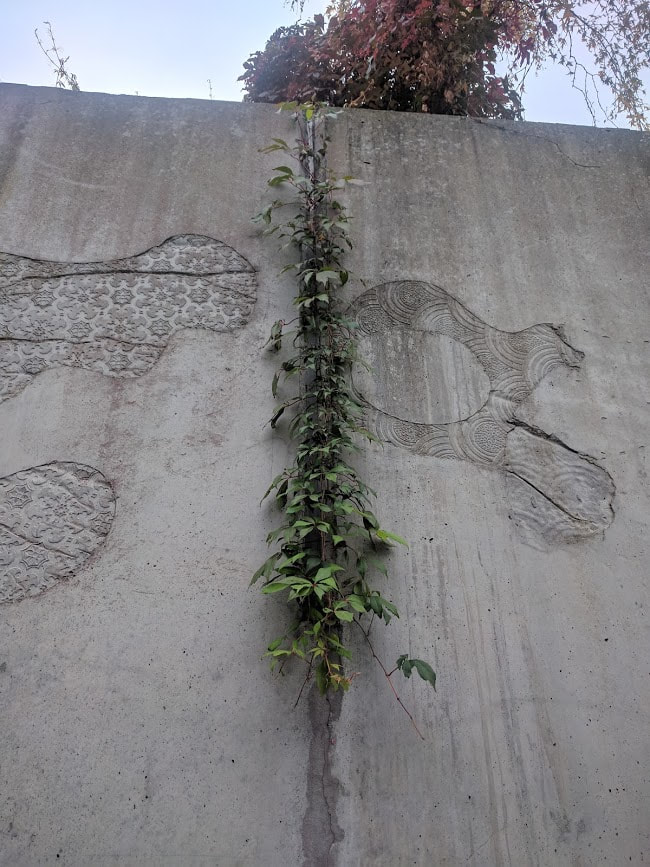
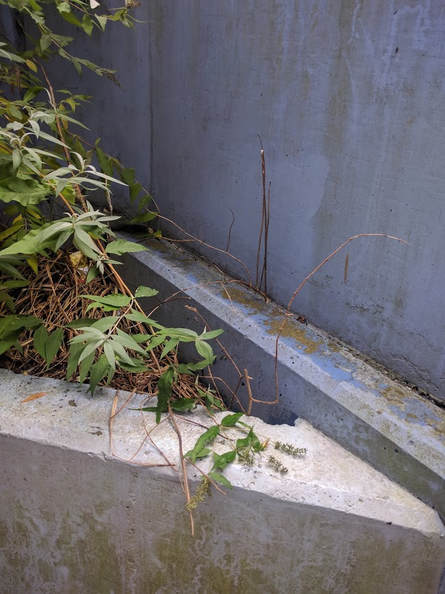
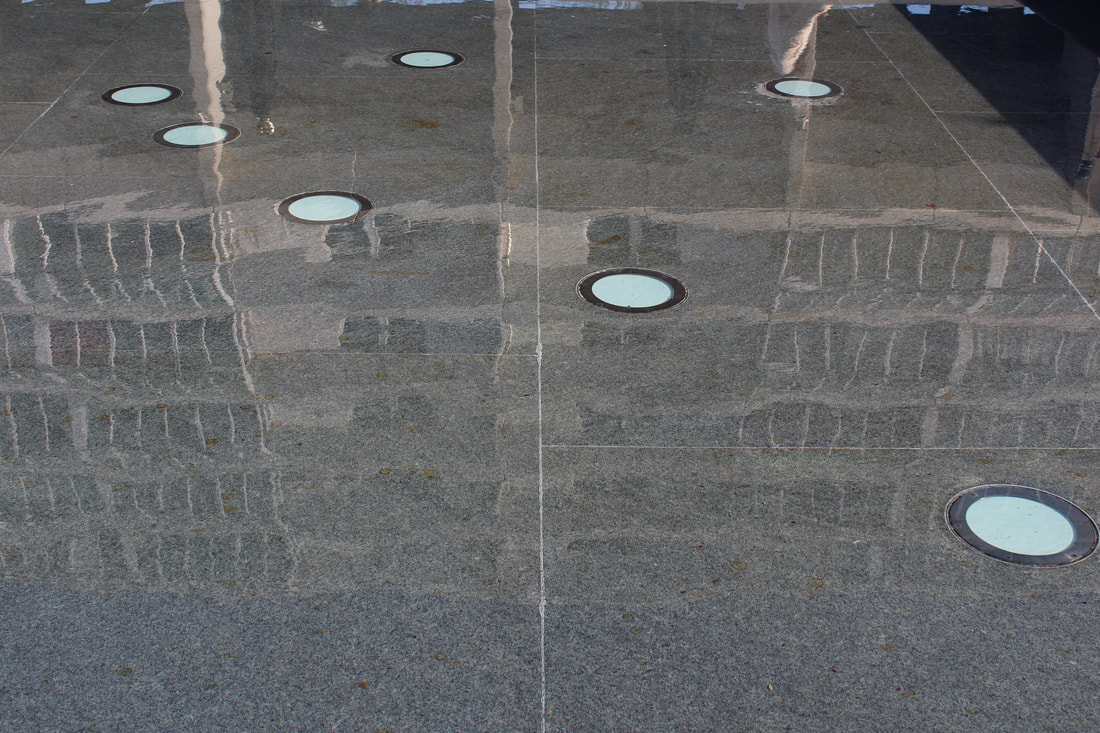
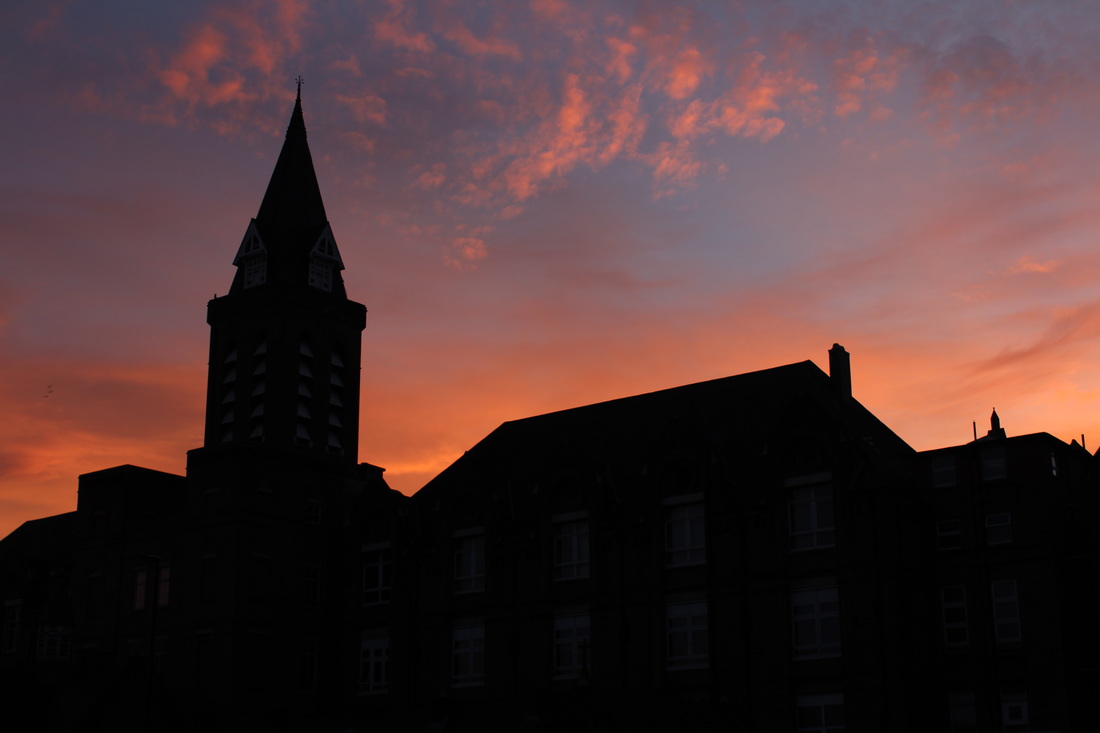
Overgrown plants
|
|
|
|
Plants overgrowing
Documenting a country post war
My Curatorship task/exhibition explored ideas towards war photography and how they have changed over the 21st century. Quite obviously, I cannot take war photographs as there is neither a conflict going on in the UK and neither would I be able to do so. However, all over London there are monuments commemorating wars that have been fought by the Great Britain over the past 100 years and longer. Most notably monuments such as Trafalgar Square and Imperial War museum. I decided
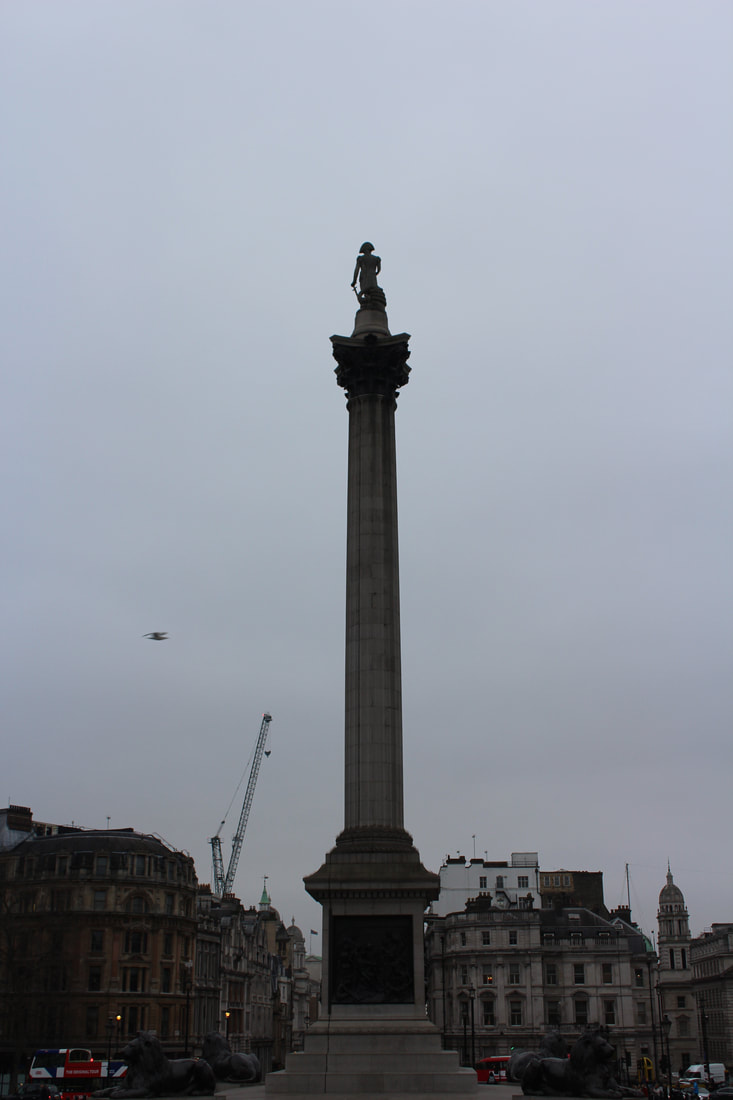
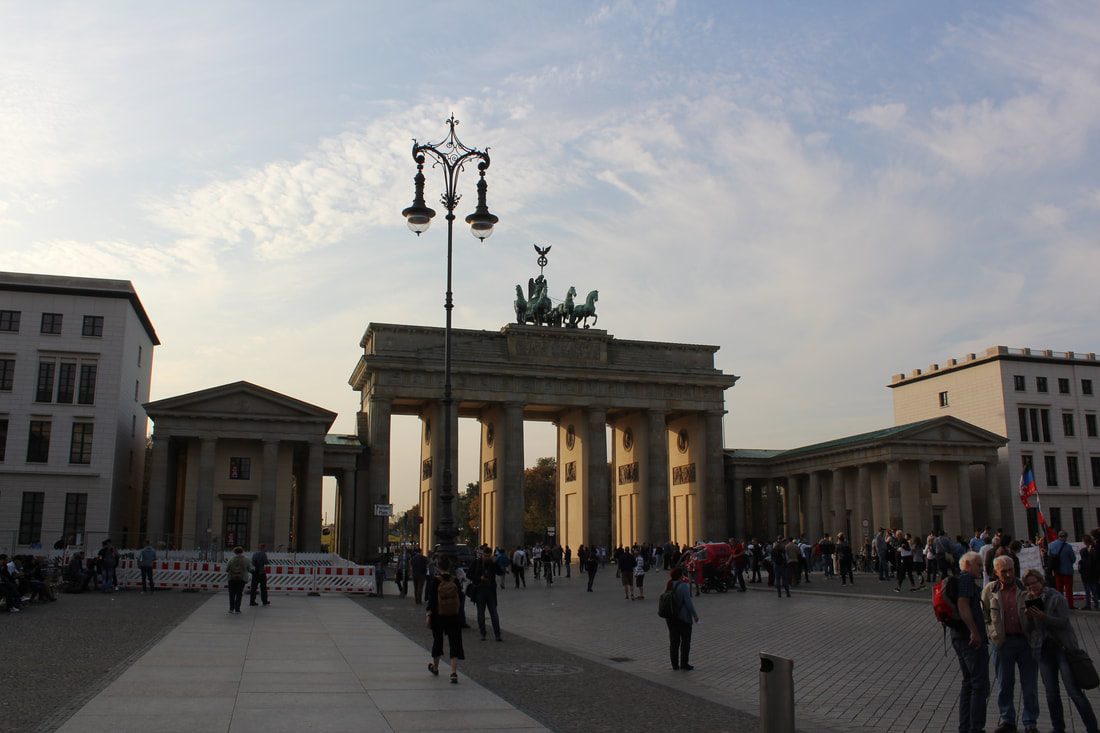
All over London there are monuments to remember wars that Britain has fought in. The most notable and famous is Trafalgar Square. Upon the tall column stands Horatio Nelson, a naval officer who died in the battle of trafalgar.
Trafalgar Square
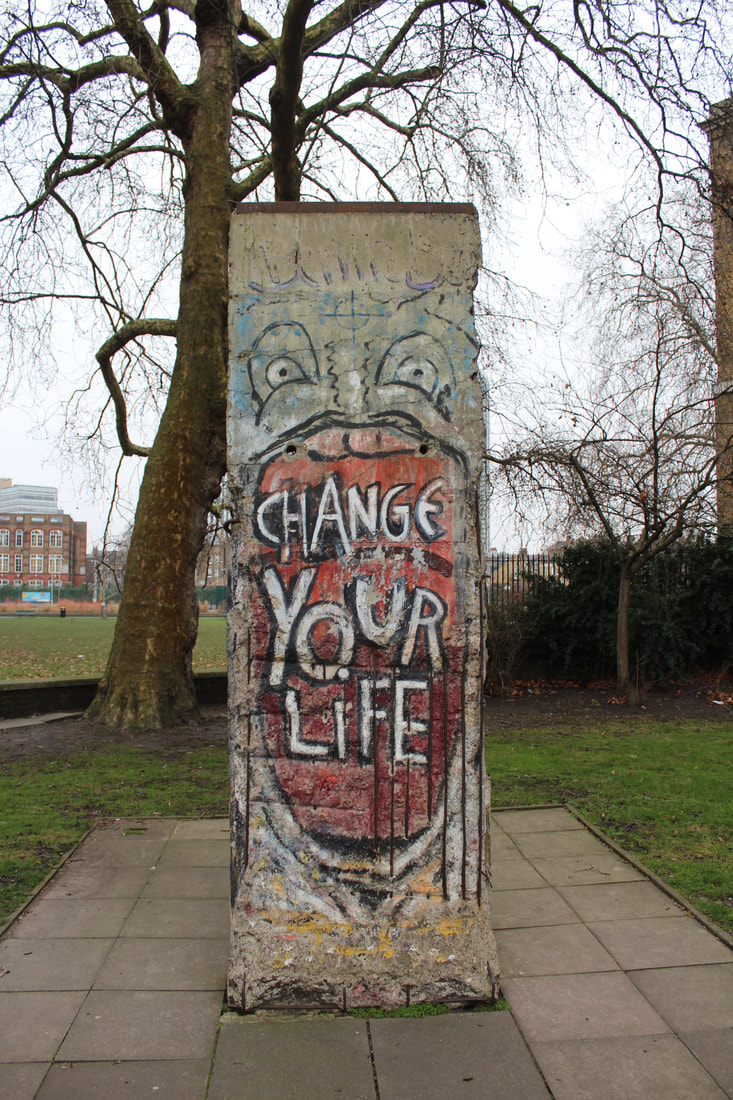
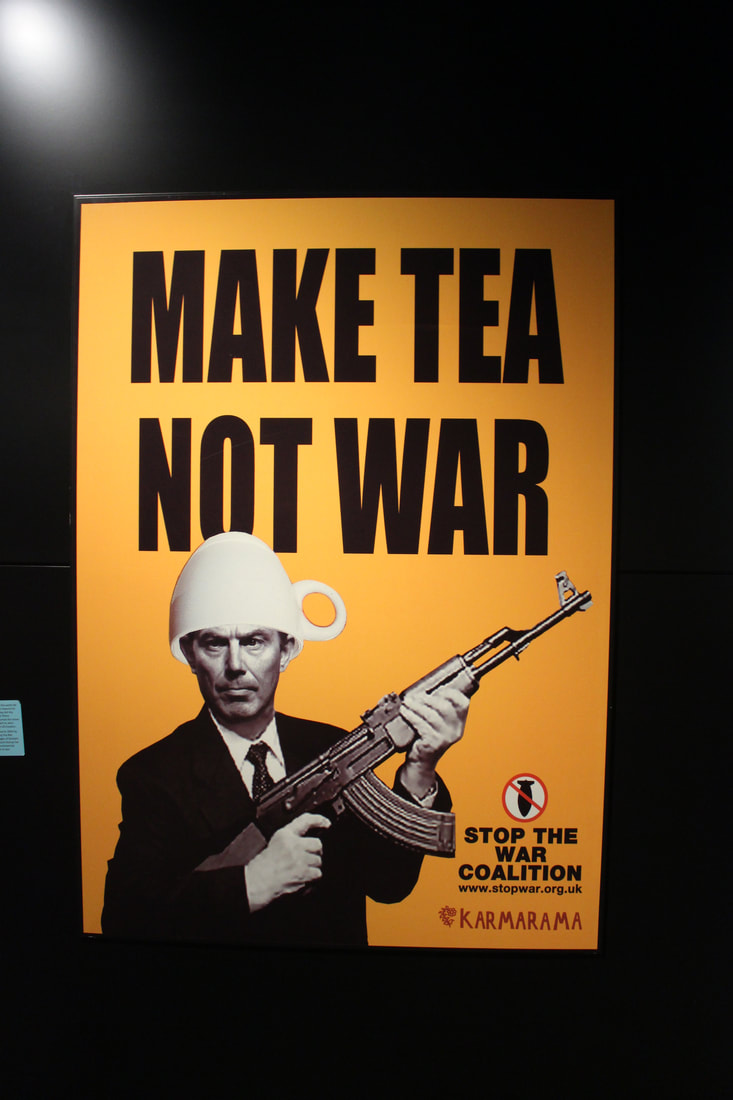
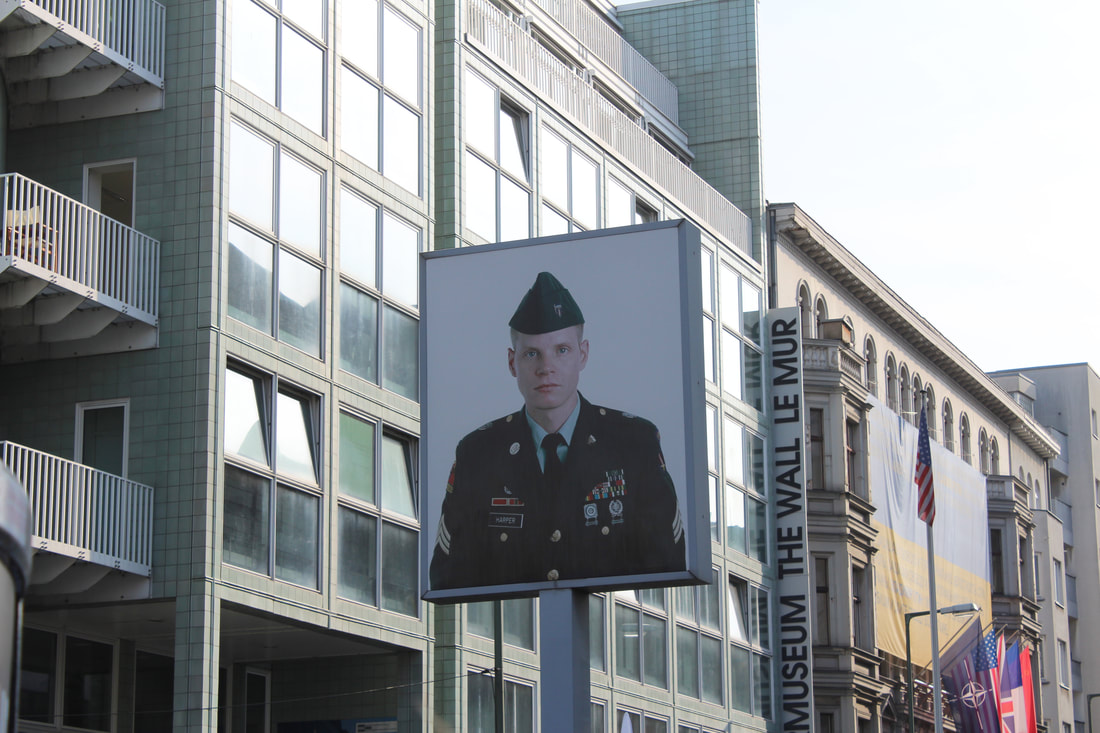
Imperial war museum
These two images are from the Imperial War museum. The first is of a piece of the Berlin wall that was taken to be kept outside as a reminder that it stood. The second reminds me of Peter Kennard's work that i explored in my curatorship task. This is due to its clear anti war messages and also targeting of Blair. The element of photomontage also contributes to this.
|
|
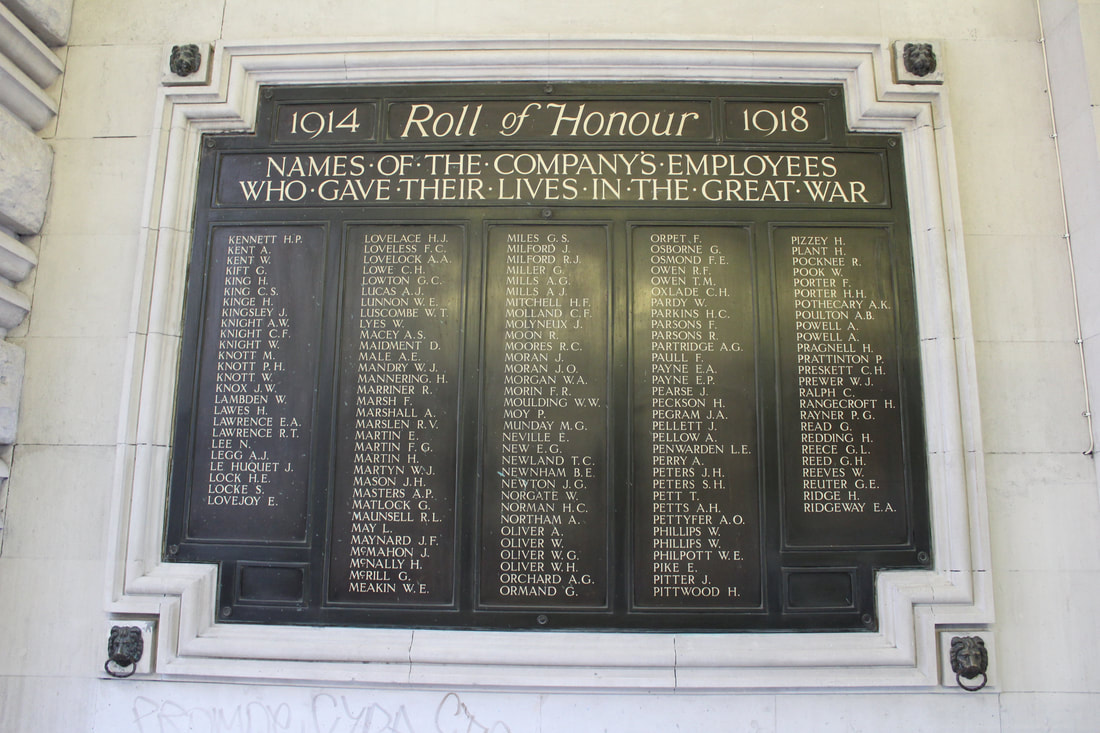
Waterloo station
Monuments such as this commemorate all those who gave their lives in WW1. This type of monument links perfectly into both my curatorship task and the overall theme of my coursework through the essays questioning of whether death should be celebrated. It is titled 'roll of honour', is giving ones life in a war deserve 'honour' or respect for their actions if the war was unjust? Or should we celebrate that these people gave their lives to possibly protect our freedom and way of life?
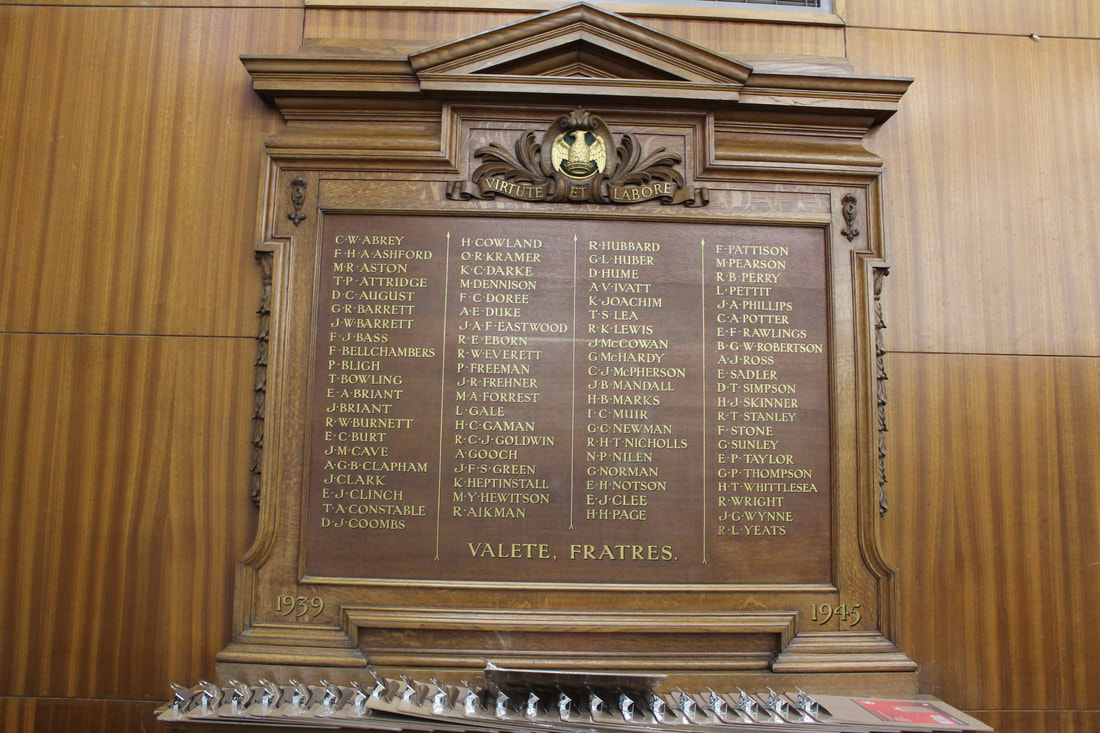
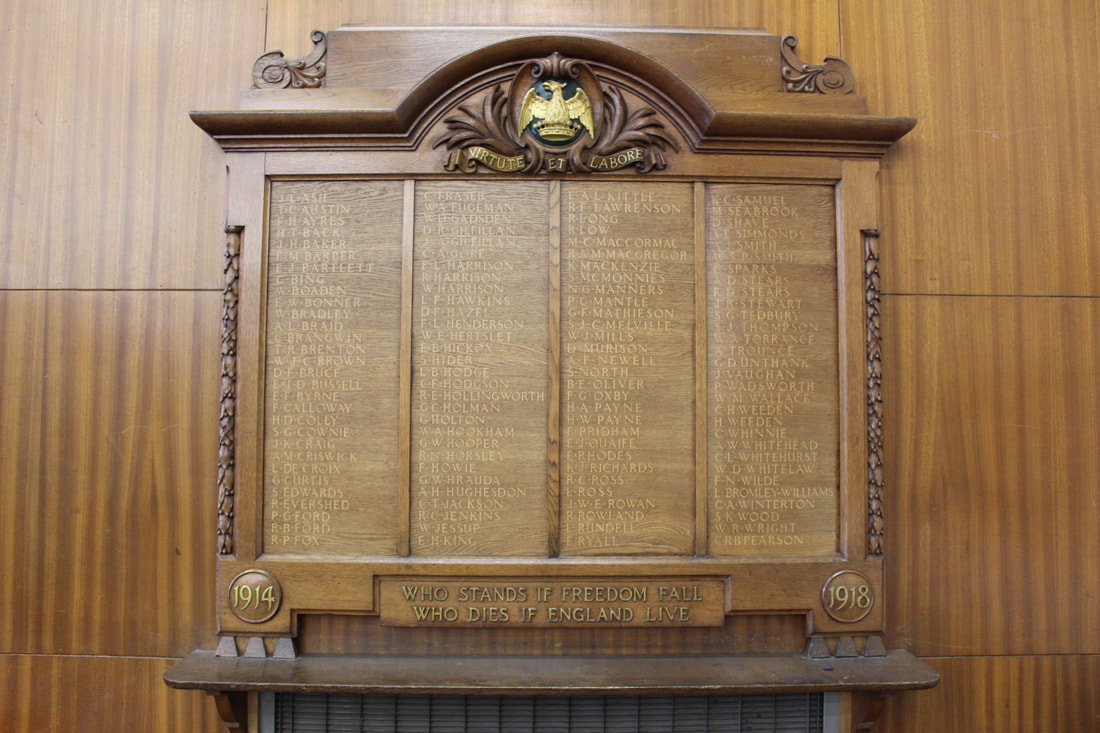
Fortismere school
These boards also those who gave their lives in both WW1&2. Whether these were the people that were attending the school or used to is unclear. They are a good reminder that such young people died in these wars.
|
|
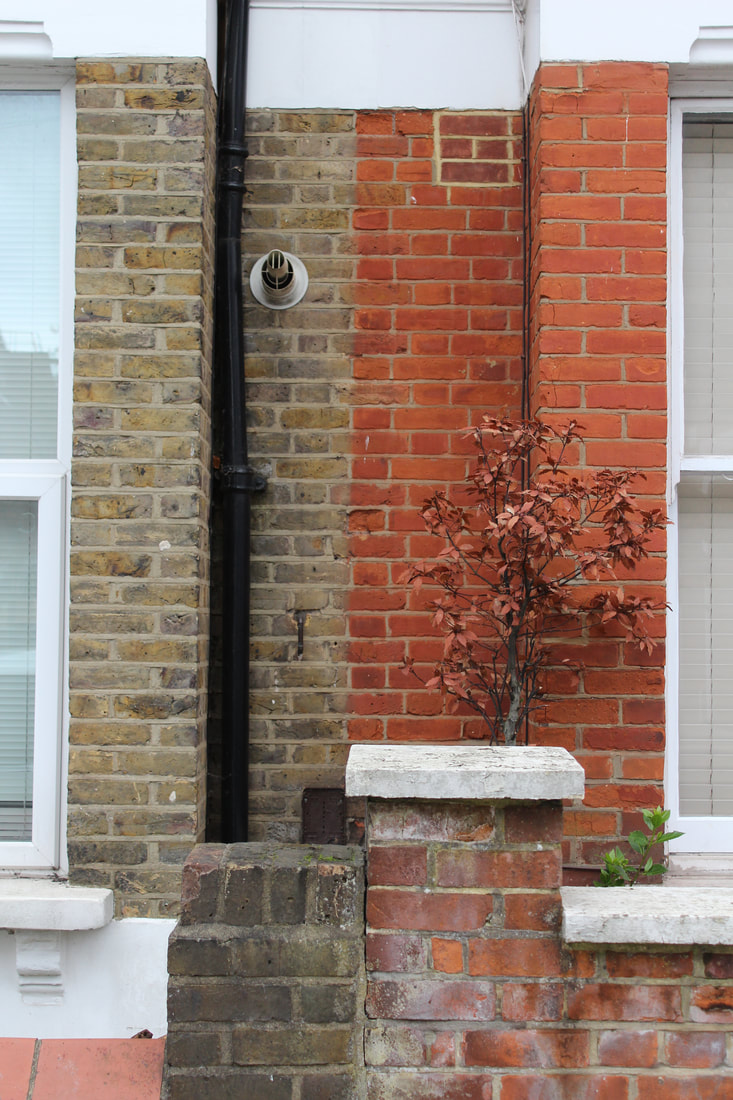
Bomb damage today
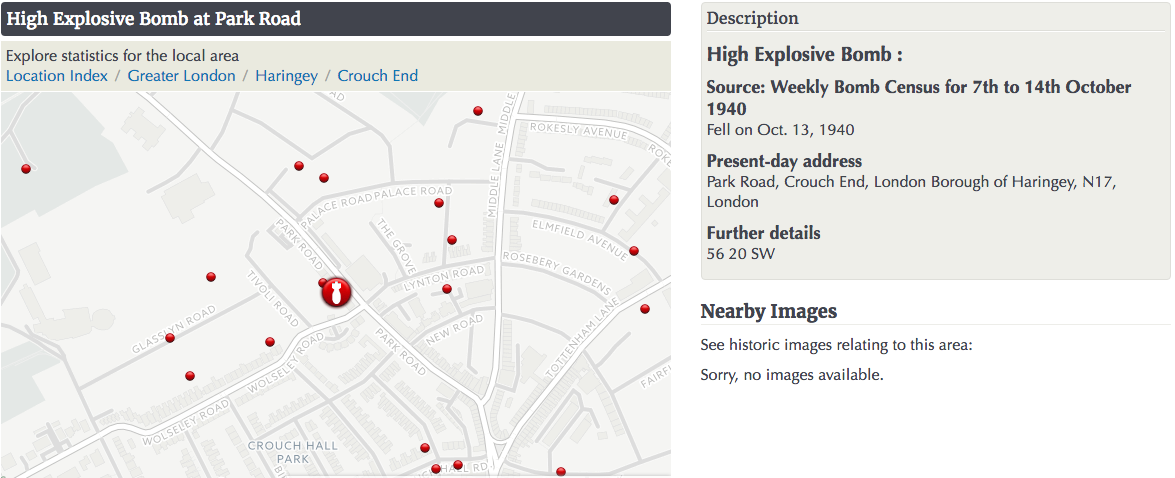
One idea I had that is photographable and has had a direct impact on our lives today is bomb damage from the second world war that has affected building structures today. I used the website: http://www.bombsight.org/ to find areas in which bombs had dropped near my house and surrounding area. Conveniently, a bomb dropped on my road, (also convenient that it dropped in the war rather than today too) just 50 metres from my house. I discovered that where the bomb had dropped, the style of housing and brick colour had changed. As shown in the photos, the bricks clearly change colour and on top of this, a whole house is missing! Im assuming this missing house allowed space behind the houses for a small green area to be created alongside other houses.


|
|
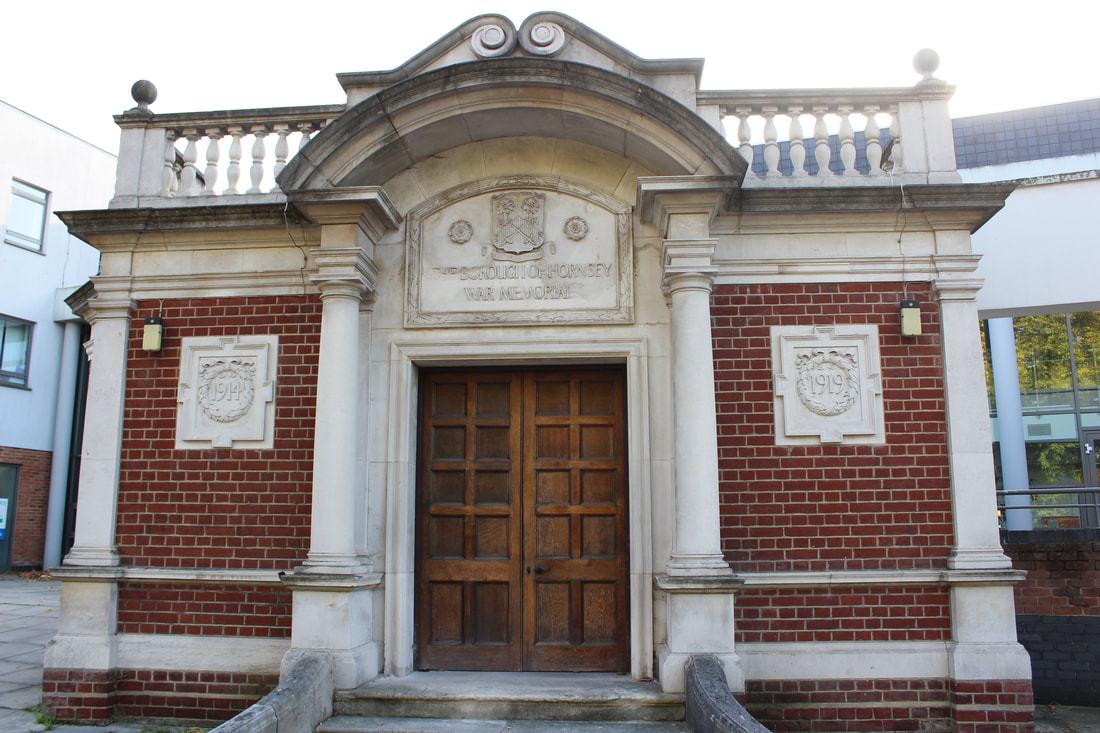
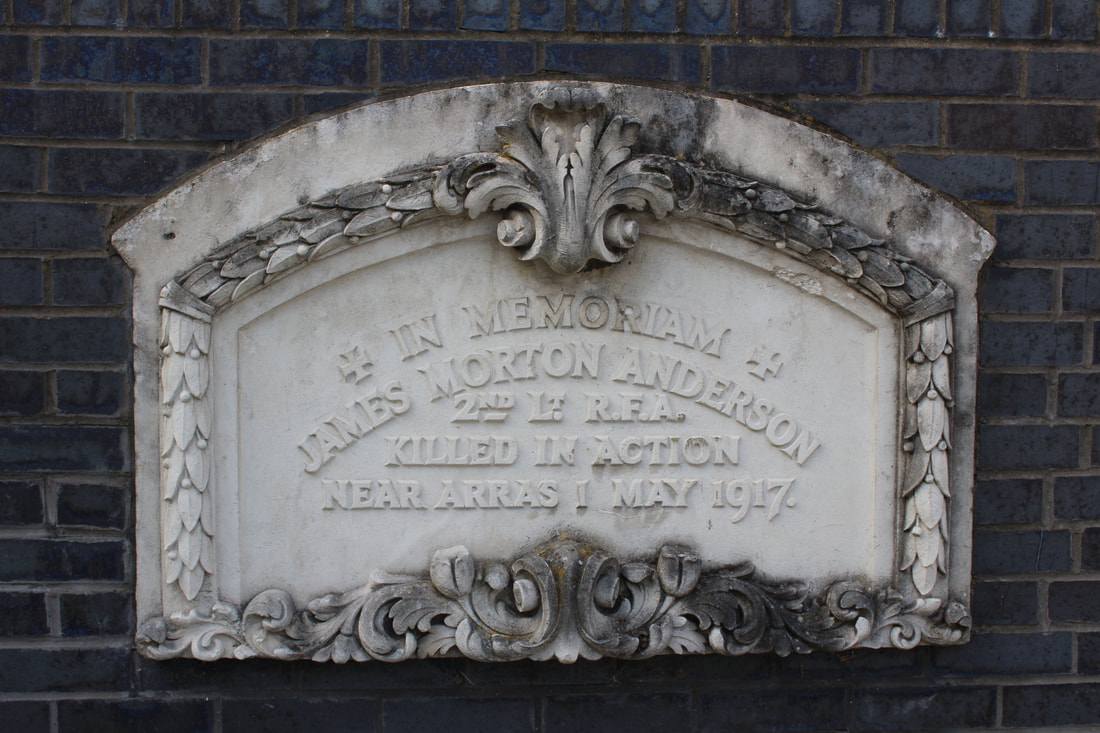
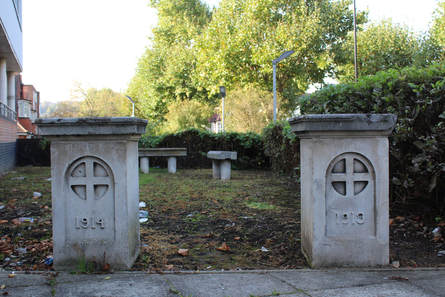
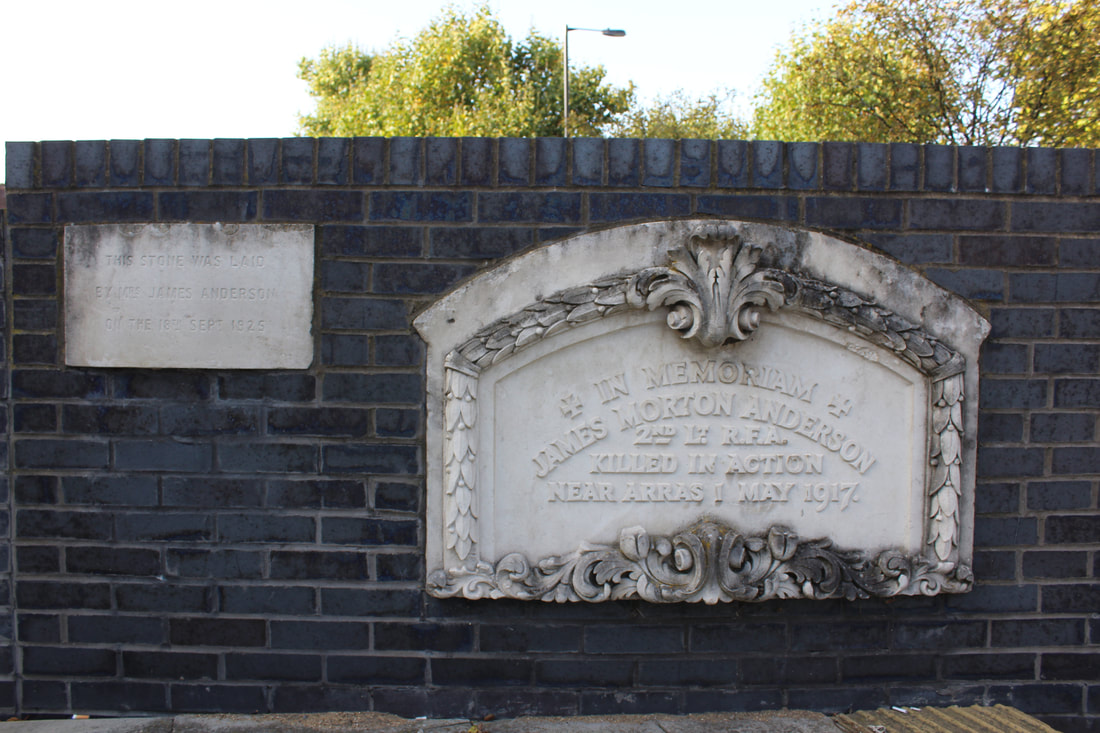
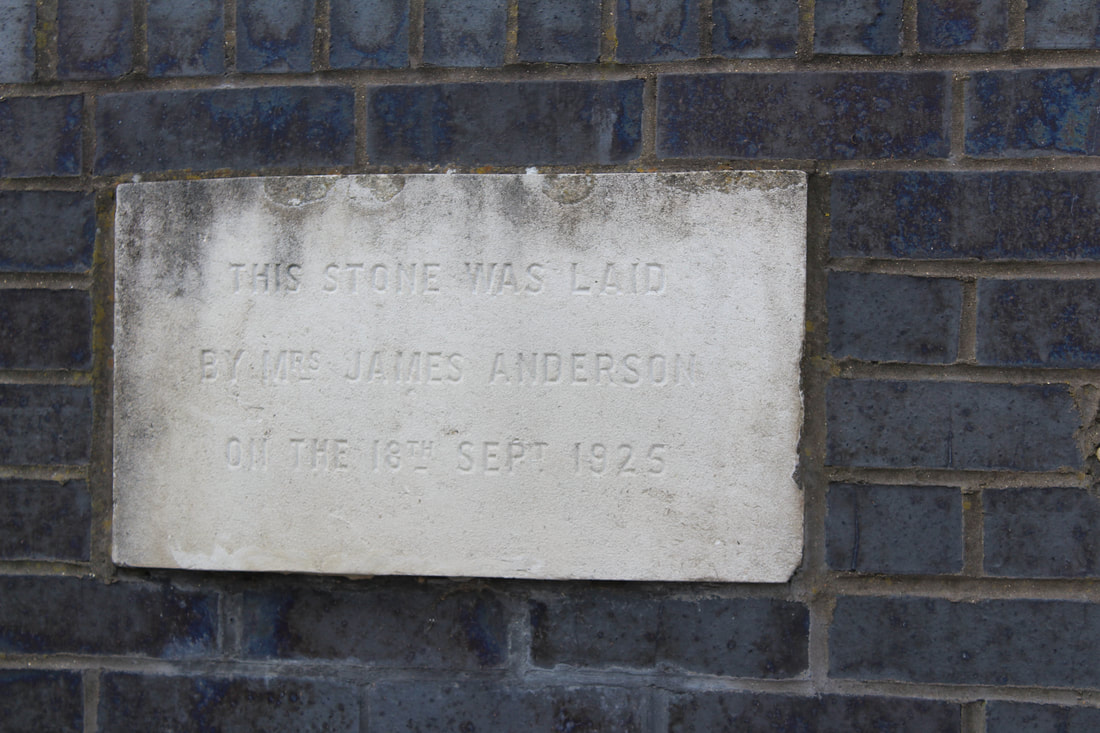
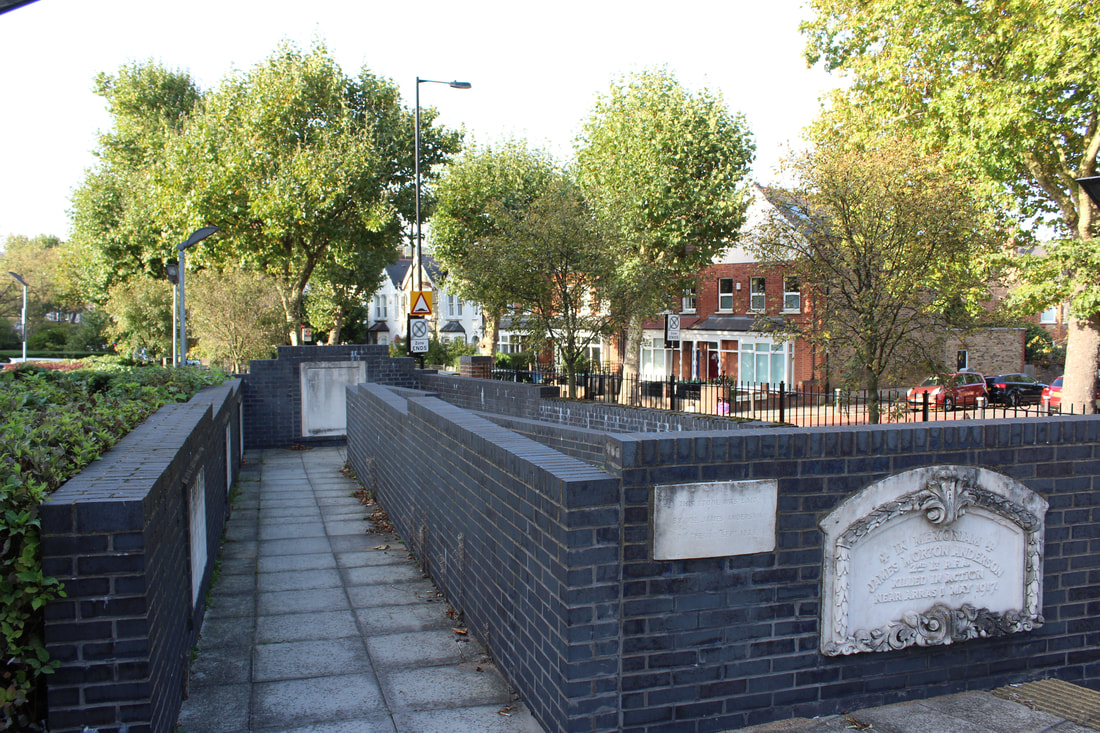
War memorial in Crouch End
I was able to capture this memorial in Crouch End, outside the health clinic however I was unable to go inside the original memorial building which also commemorates those who died in WW1.
|
|
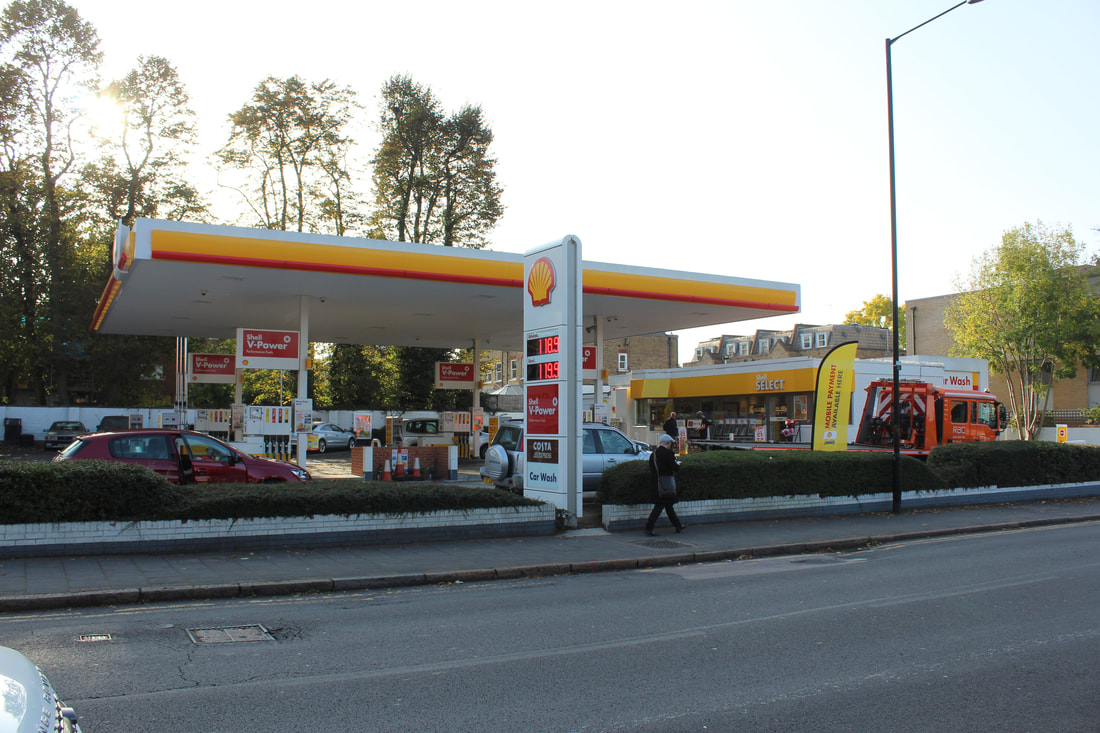
Crouch End Shell Garage
During the second world war, a bomb dropped exactly where the shell garage in Crouch End is situated. Before the bomb was dropped, cottages stood here.
http://www.bombsight.org/bombs/30102/
http://www.bombsight.org/bombs/30102/

|
|
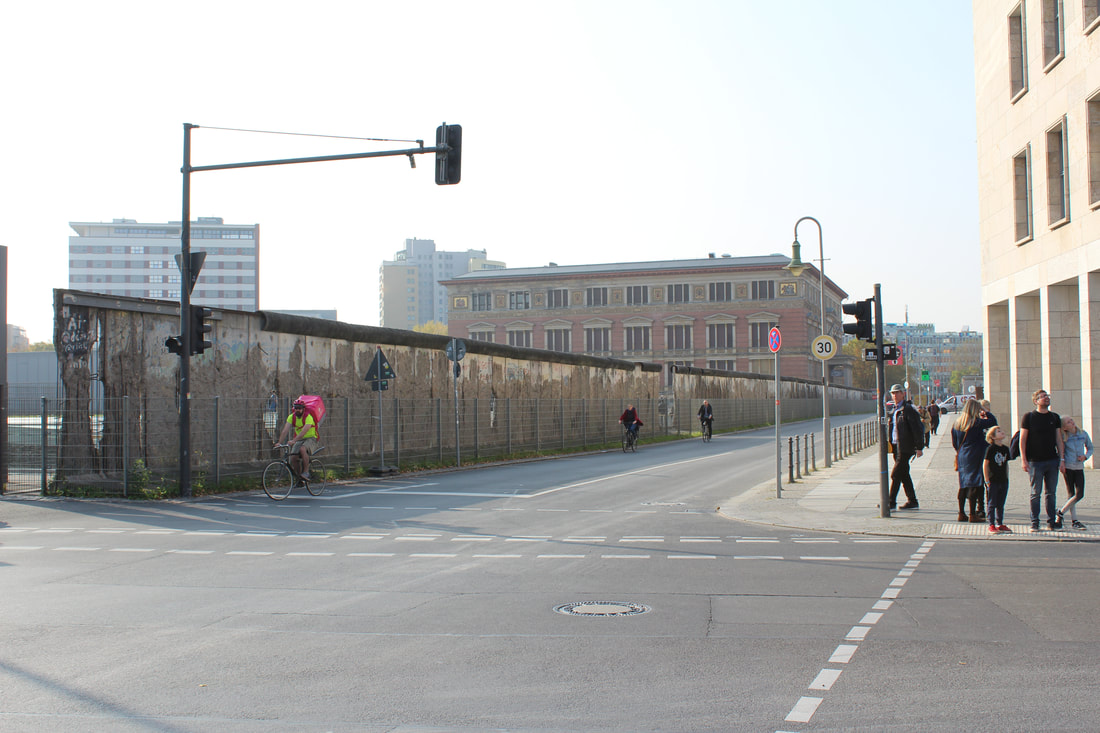
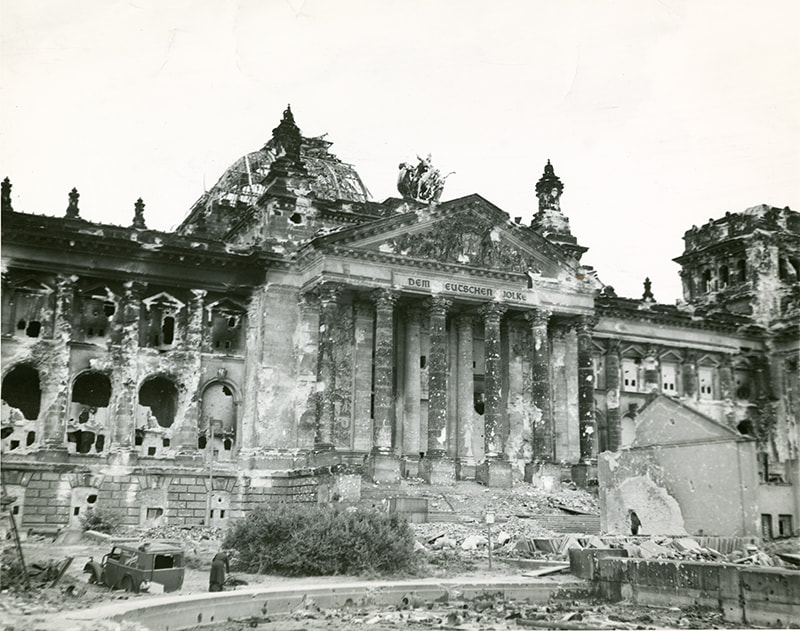
Evidence of war in Berlin
I decided to use the school Art and Photography trip to Berlin to further my practical work in response to my curatorship task exploring war and conflict. Berlin was at the heart of the German war machine from 1939-1945. The war in Europe concluded by German surrender inside the city itself. This prolonged surrender meant that the city was heavily destroyed and following the end of the war it was split into 4 zones, alongside the rest of Germany: British, American, French and Soviet.
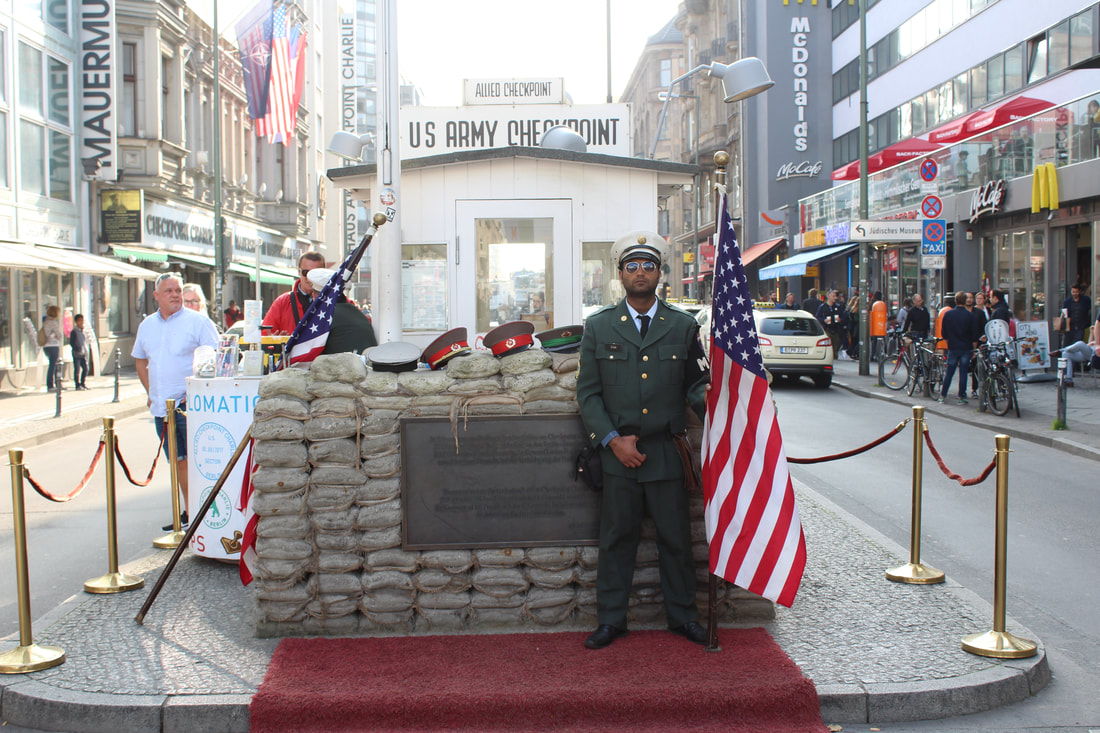
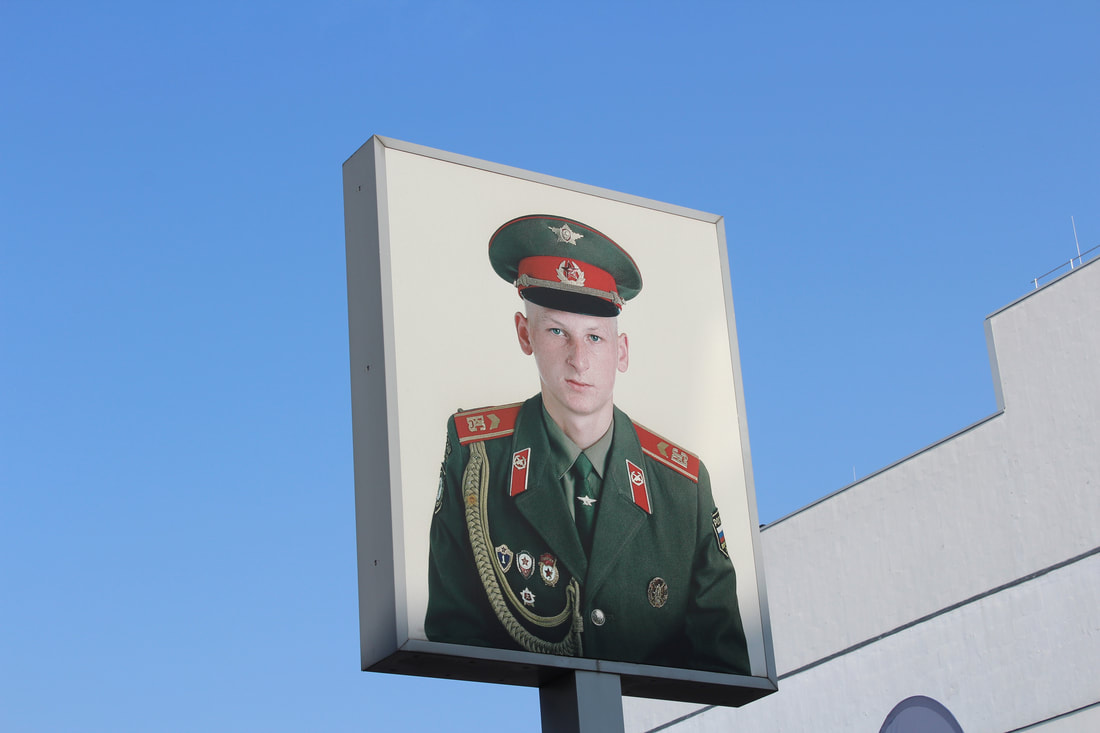
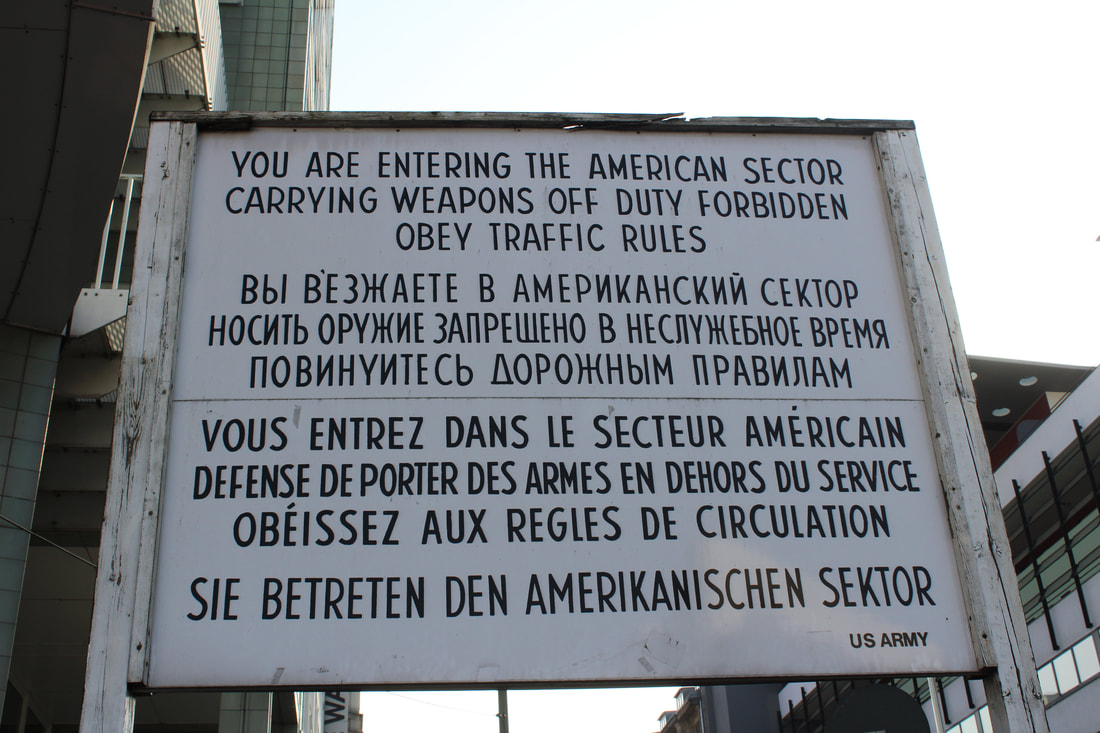
Berlin Wall
|
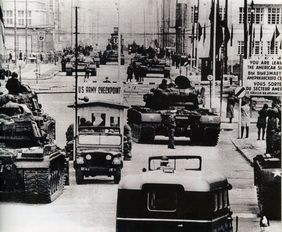
The wall was constructed to prevent East German and Berliners from crossing over into West Berlin and West Germany. The most famous of checkpoints along the wall was known as 'Checkpoint Charlie' and the first 5 colour photos all show parts of the checkpoint. Over the course of the Cold war, there were numerous altercations at this checkpoint, most famously: the Berlin Crisis of 1961 in which US and Soviet tanks had a 'stand off' on each side of the border. I have included a photo capturing this stand off to the right.
|
|
|
|
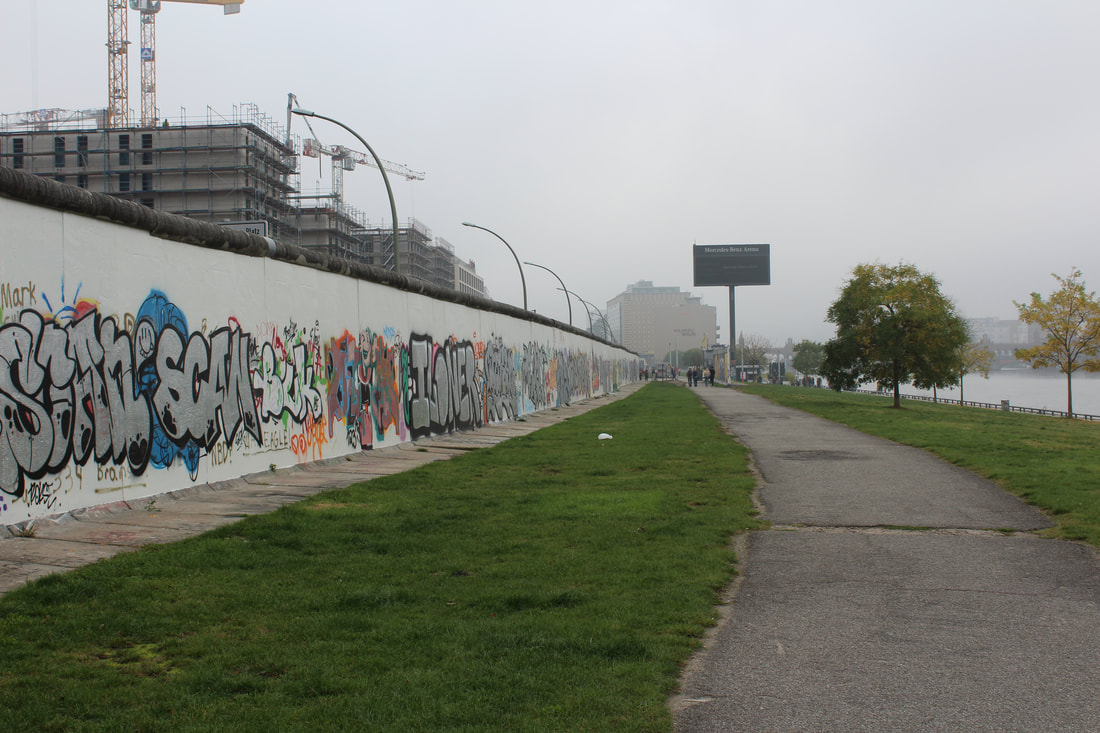
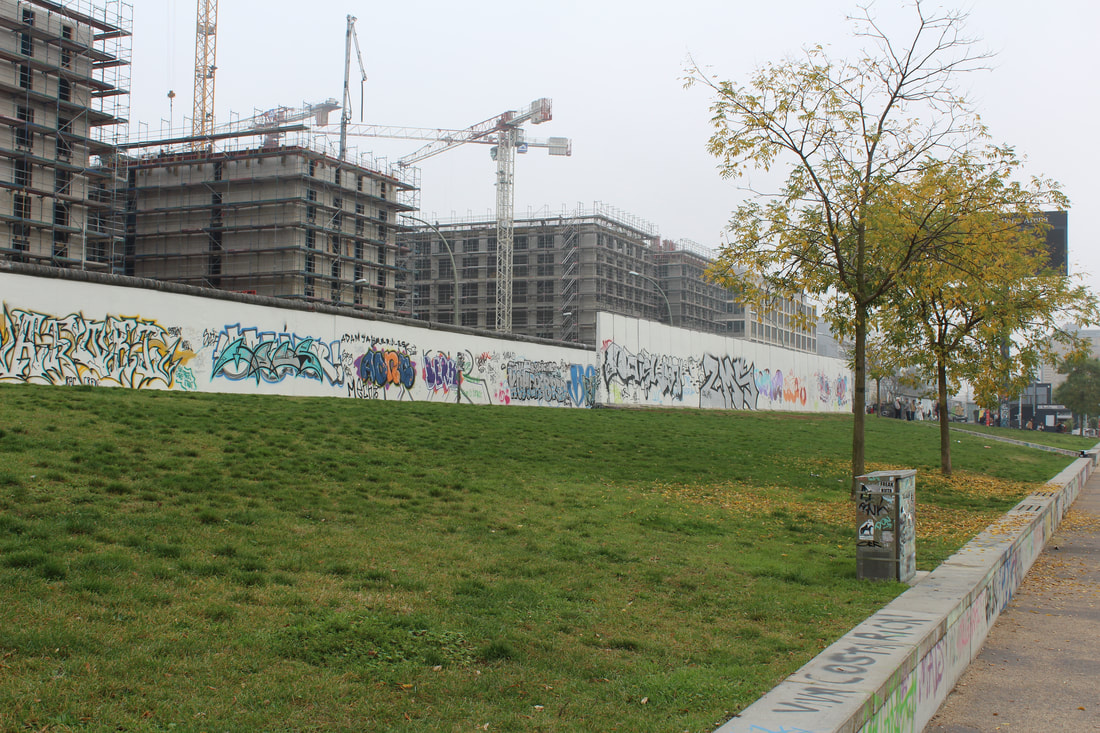
These final two photos are of the 'other side' of the East Side Gallery. The East Side Gallery is a 1.3km stretch of the Berlin Wall which contains 105 paintings by artists from all over the world. I decided it was also important to see what the other side of the wall would contain. Things like the East Side Gallery are essential to remind us of what war and conflict can do to humanity. The gallery is also dubbed a 'international medal for freedom'. The shots really capture the length and size of the wall. This is also only a small fragment of the entire wall.
|
|
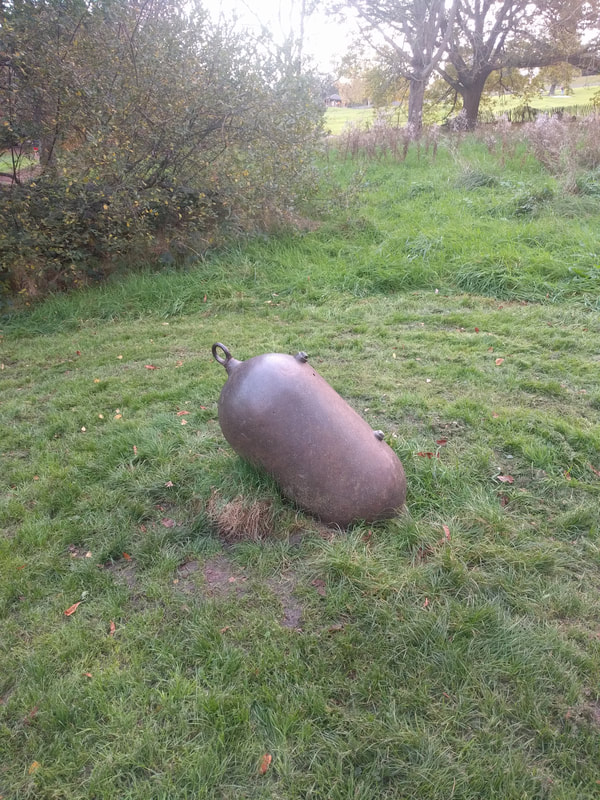
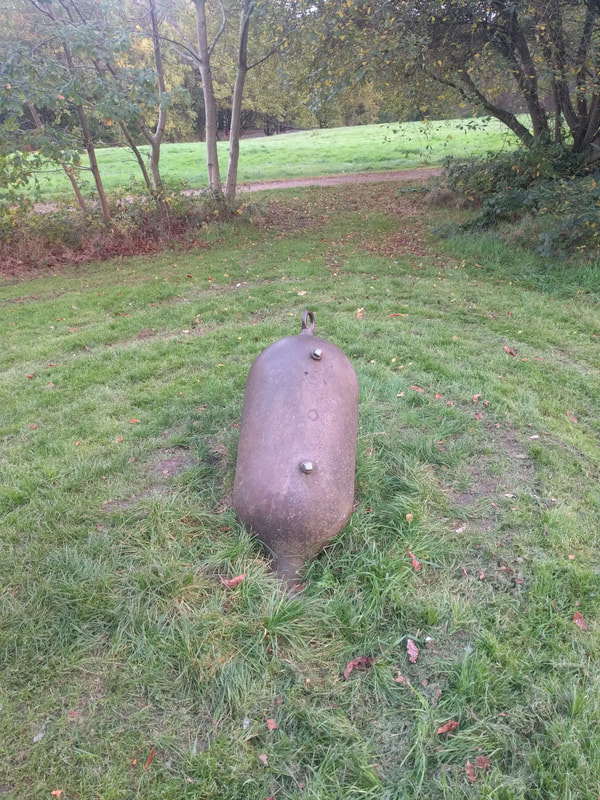
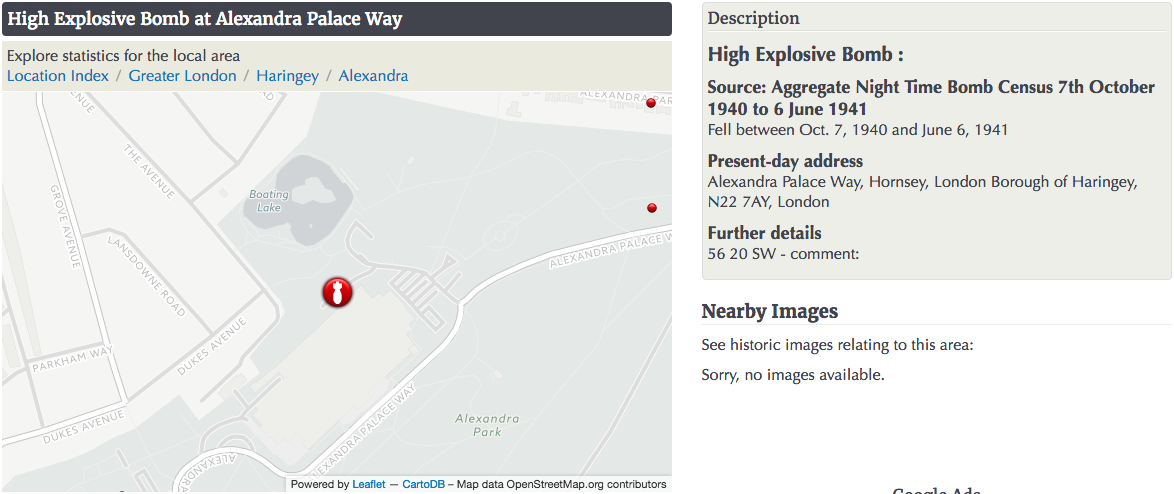
Unexploded/Disarmed Bomb in Alexandra Palace
While walking round Alexandra Palace, I noticed there was a bomb that had landed in Alexandra Palace. However, after walking to the location of the bomb, i realised that it was unexploded.
http://www.bombsight.org/bombs/30066/
http://www.bombsight.org/bombs/30066/
|
|
Fade
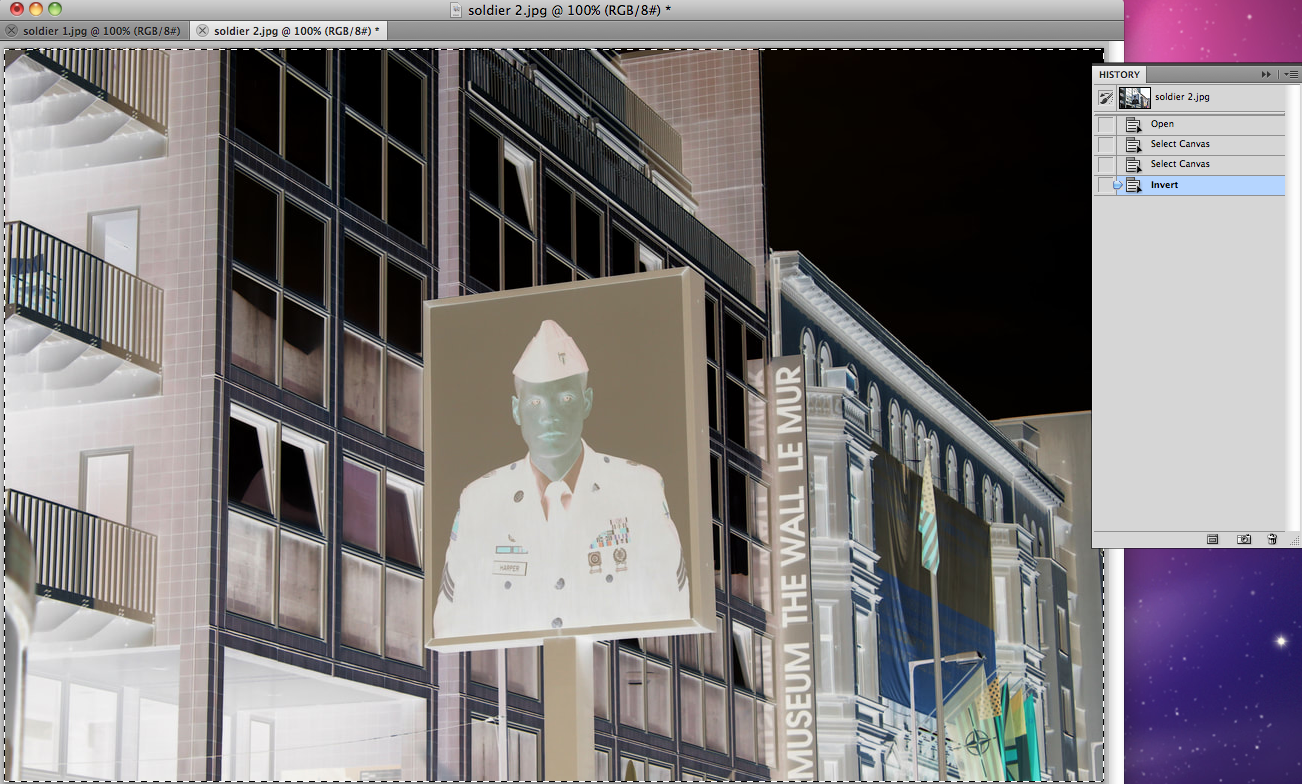
My next step in my project is to show how the idea of war passes over time. How we forget the consequences and losses. My first step was to take the photos of the soldiers by checkpoint charlie. I reversed the colour on photoshop then printed them.
|
My first step was to take the photos of the soldiers by checkpoint charlie. I inverted the colour on photoshop then printed them. To invert the image, i used cmd+I in photoshop. I then printed off the images, then photocopied onto assatape. I then placed the assatape over light reactive paper in the sun for 10 mins. After the sun went down, i used the class UV light as a replacement for the sun.
|
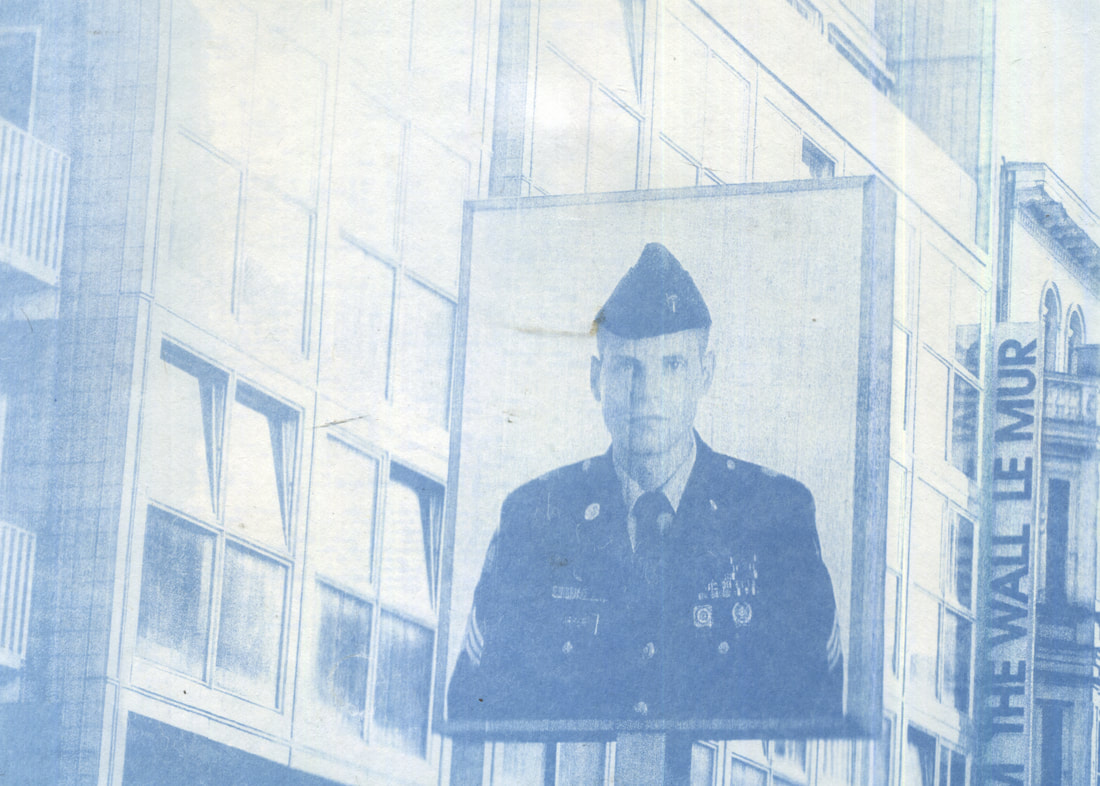
Soldier 1
Gif
Following the scanning and uploading of the raw images, i decided to show the affect of war fading over time through a gif. Thankfully my images had different levels of fade to them due to being left in the sun/UV light for different amounts of time. The gif came out nicely but it was clear that to create a more powerful image would be required. The first image in the gif is clearly different to the other two, this is due to the colour not being reversed, whereas the other two have been. It is clear from this first gif that much more work is required.

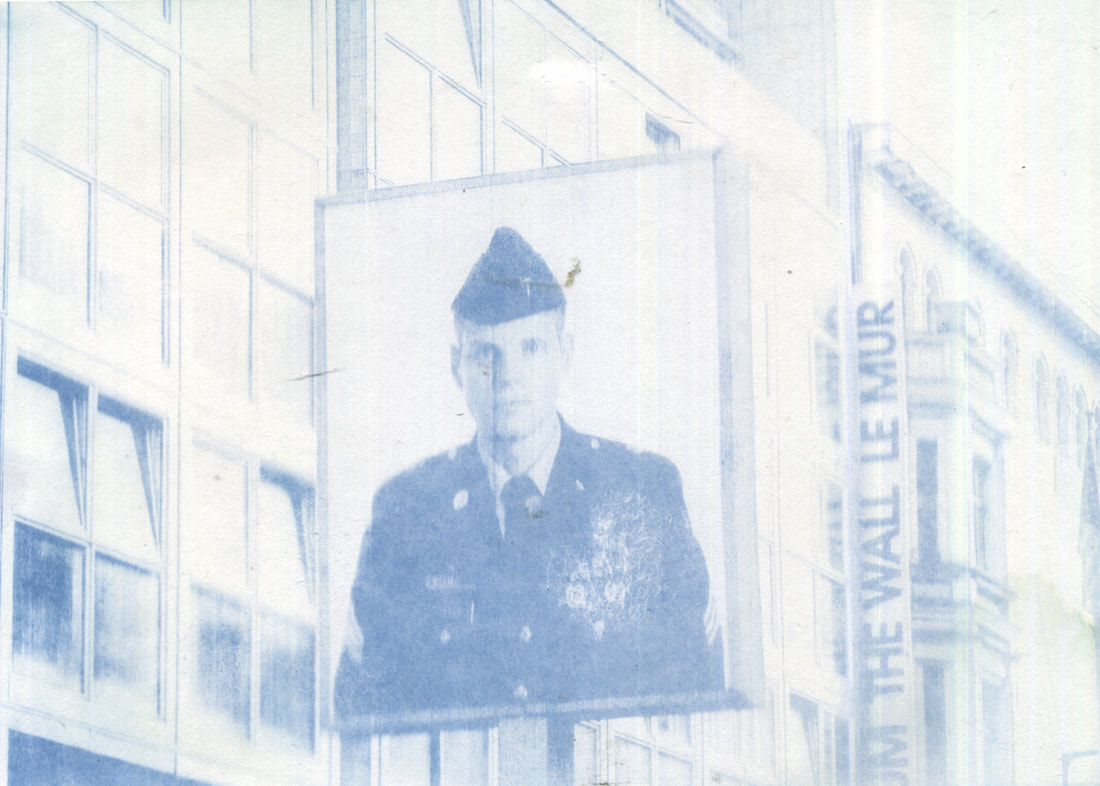
Soldier 2
I repeated the same process for the other soldier by checkpoint charlie. However I only had 2 images to create a gif with. To compensate for the lack of an image, I decided to edit them on photoshop to give off a fading effect.v
|
|
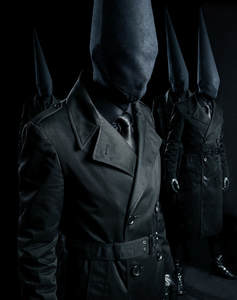
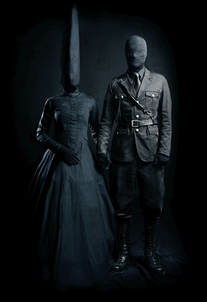
War, identity and uniform
After reading georgiemagazine.com/art/juha-arvid-helminen/ on the work of Juha Arvid Helminen, I decided to look into the concept of a soldiers uniform. In the midst of a war and in humanities past, it is easy to forget that those behind the guns, swords, and fists are humans. Seeing a uniform with a Nazi 'swastika' immediately provokes negative feelings towards the person. 'A uniform can glorify an individual or strip an individual of his or her humanity.'
|
|
|
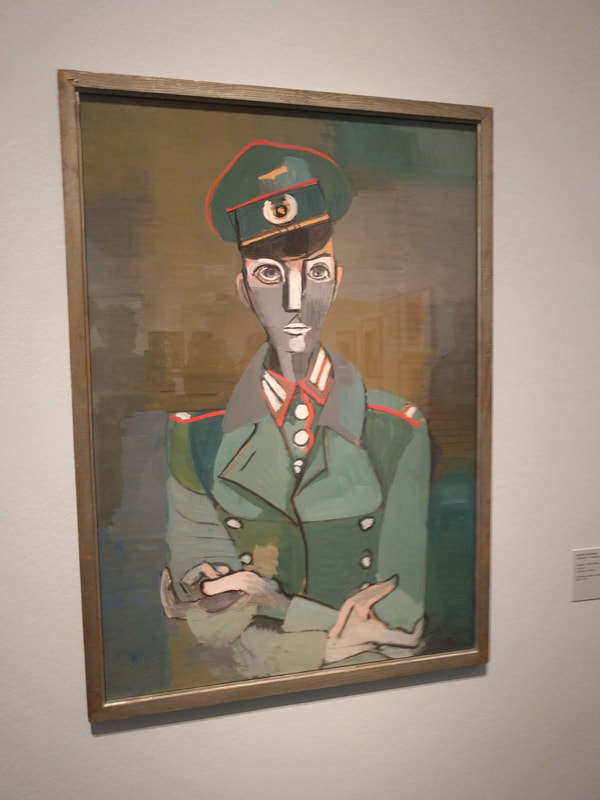
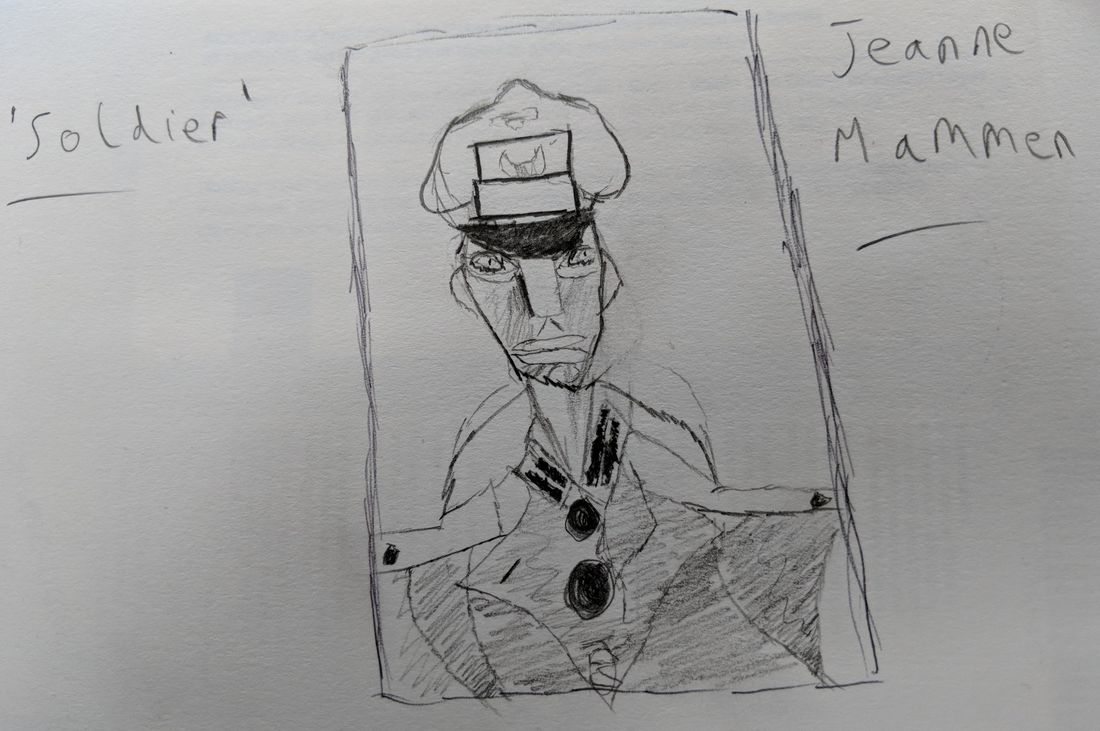
Berlin Art Gallery
During my time in Berlin, I visited many galleries. One piece of art that caught my eye was 'Soldier' by Jeanne Mammen. I liked this so much that i decided to sketch a copy of it as a record. After doing so I thought it essential to take a photo and document it. The article from before reminded me of this drawing and piece, so i decided it was best to group them together as a brief look into soldiers and their uniforms.
|
|
One form
http://content.time.com/time/nation/article/0,8599,1906083,00.html
http://content.time.com/time/nation/article/0,8599,1906083,00.html
Then and today
- https://www.pinterest.co.uk/c54camm/london-bomb-damage-ww2/?lp=true
- http://ww2today.com/14th-october-1940-disaster-at-balham-tube-station
- http://mashable.com/2015/11/24/london-blitz-underground/#cUTt4oWy8ZqX
|
|
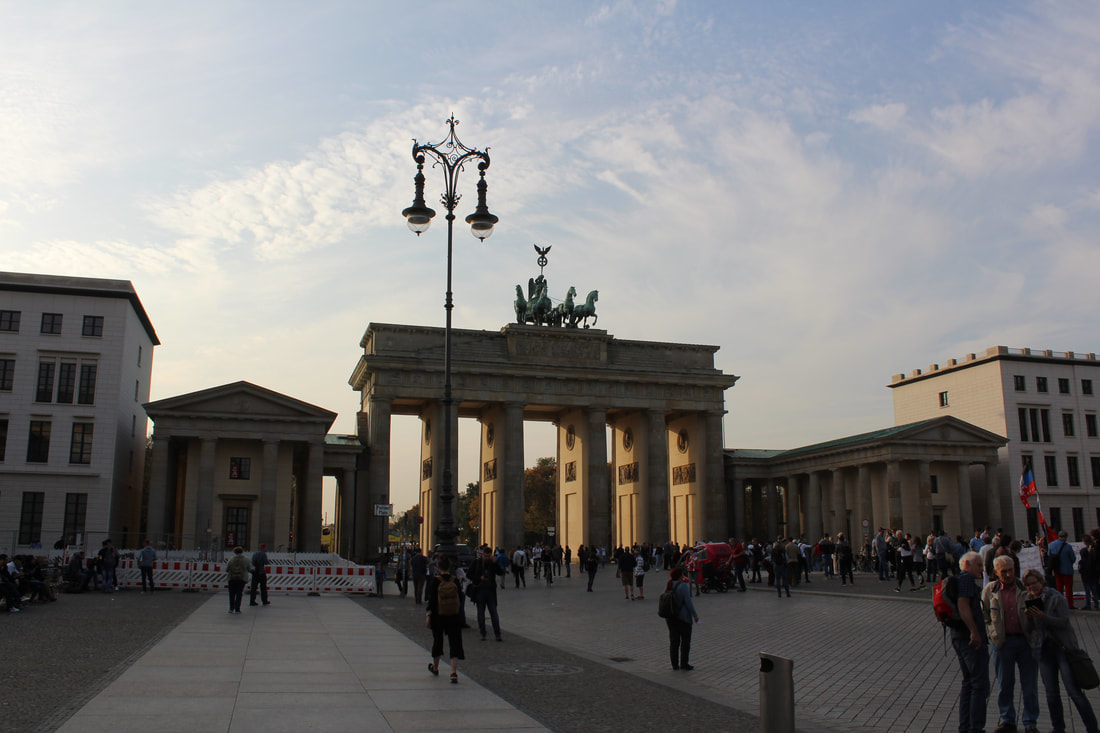
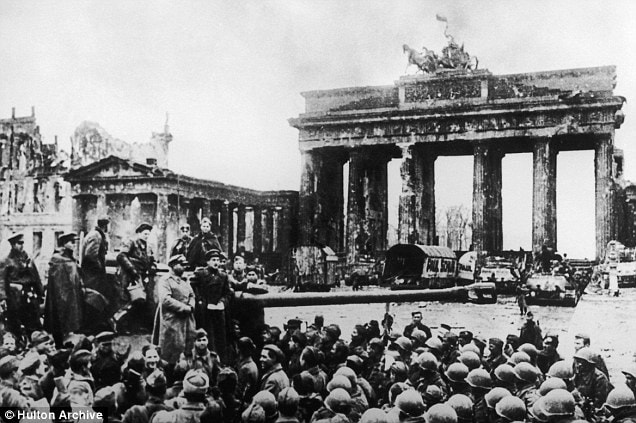
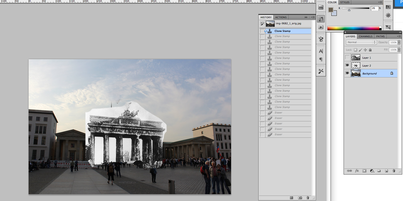
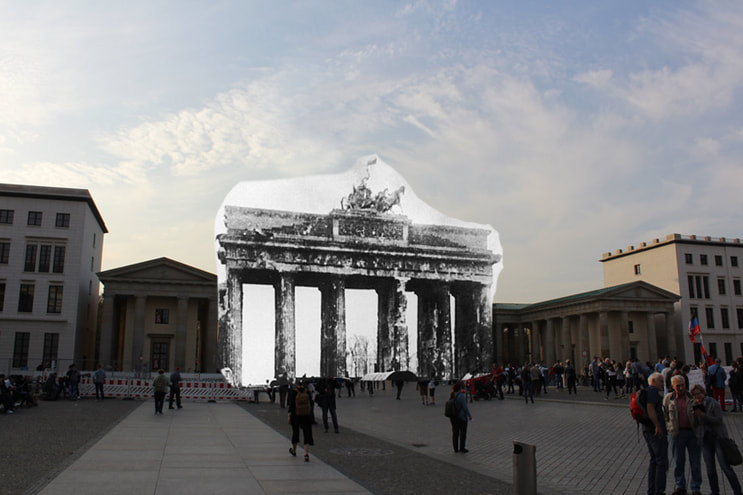
Due to weather issues, i decided to attempt superimposing an old image with war damage from the past onto a newer photo of the same place. The first image i used was that of the brandenburg gate. My image of the gate from the trip to Berlin made this possible. I searched the internet for an image and found one from the correct side of the gate but from the wrong angle. I had to flip the entire image in order for that image to semi match mine. I resized the imahes and
|
|
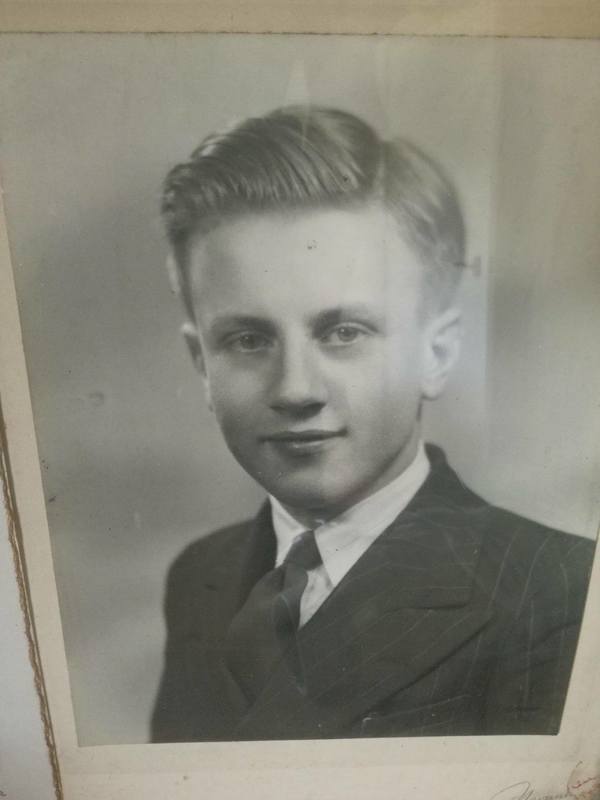
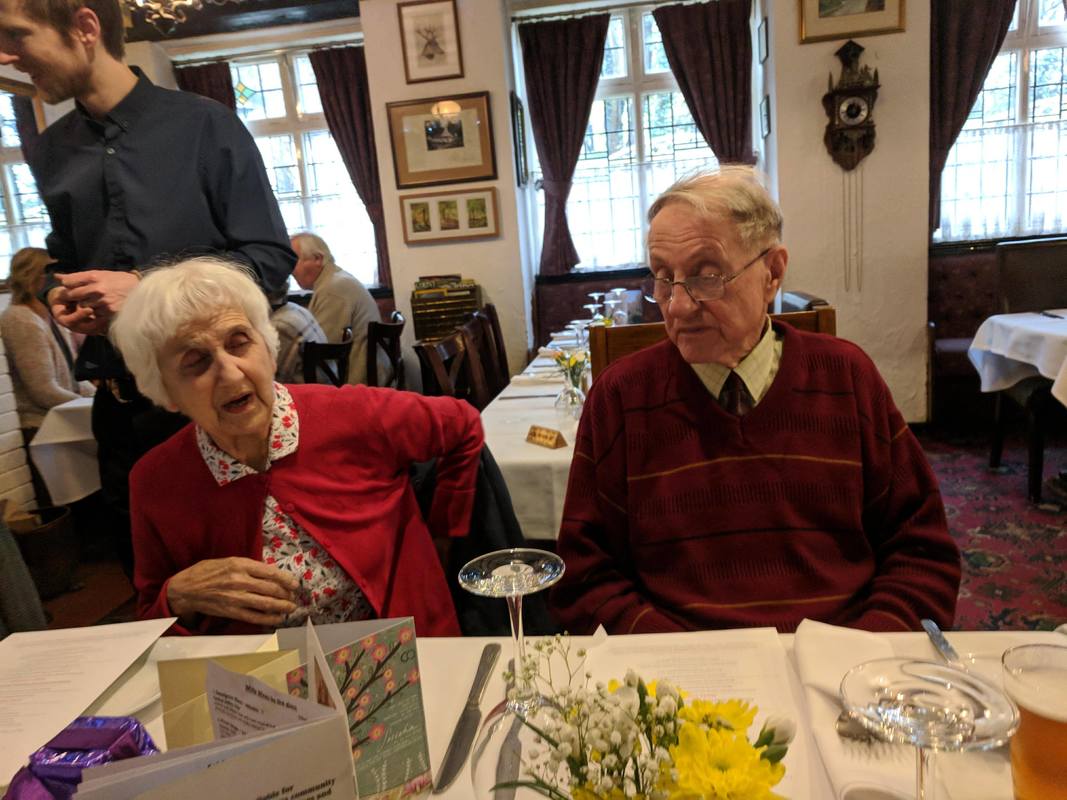
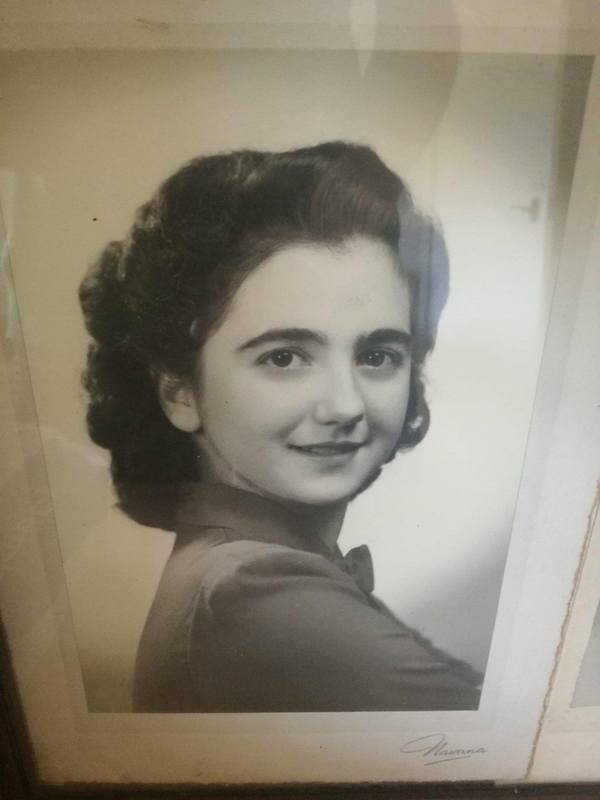
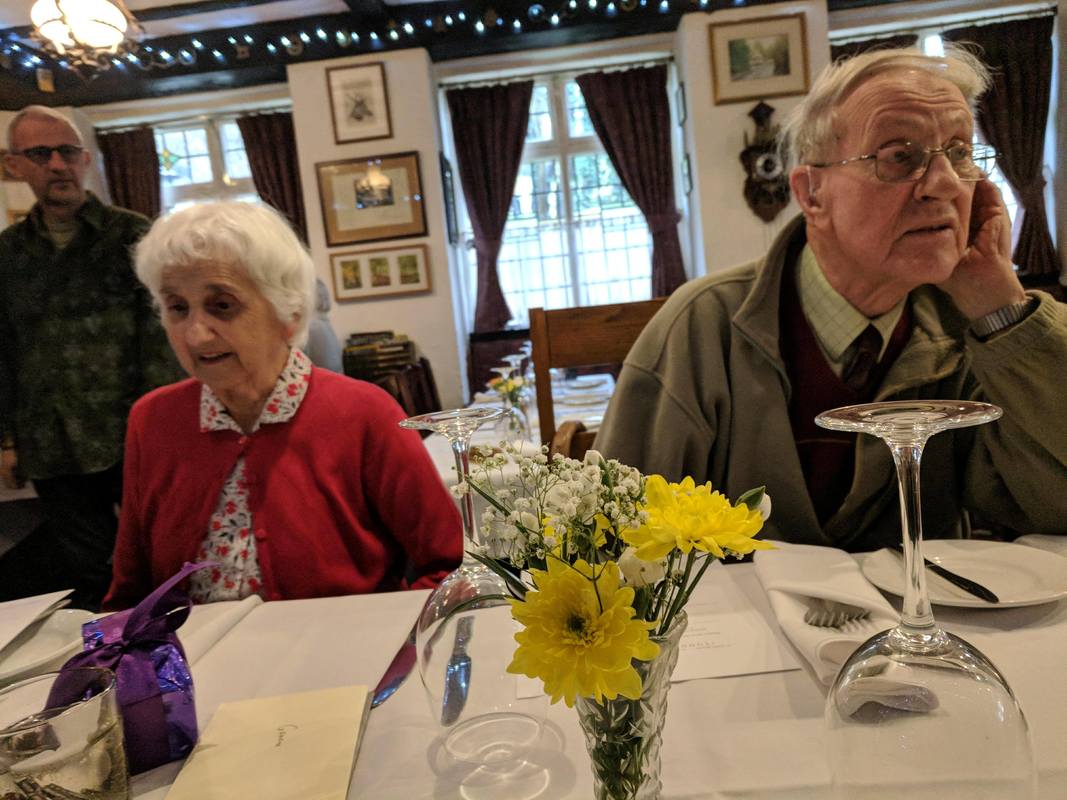
My connections to the War
My grandfather is the only member of my family to not only be alive during the war, but also remember it. He is 90 years old and his father worked for supermarine. The purpose of this strand is to highlight how, over time, the memory of war can fade. Despite todays photos, videos and written documentation of war, nothing is more powerful than being in a conflict itself. We can never truly understand what it was like to live in a period of struggle and hopefully will never. Below are pictured him and his wife. They both are 90 but my grandma grew up far away from the war in India and Armenia. They highlight how people can live through such horrors and live on today. I decided not to expand upon this project as it proved difficult due to them living in Birmingham.
|
|
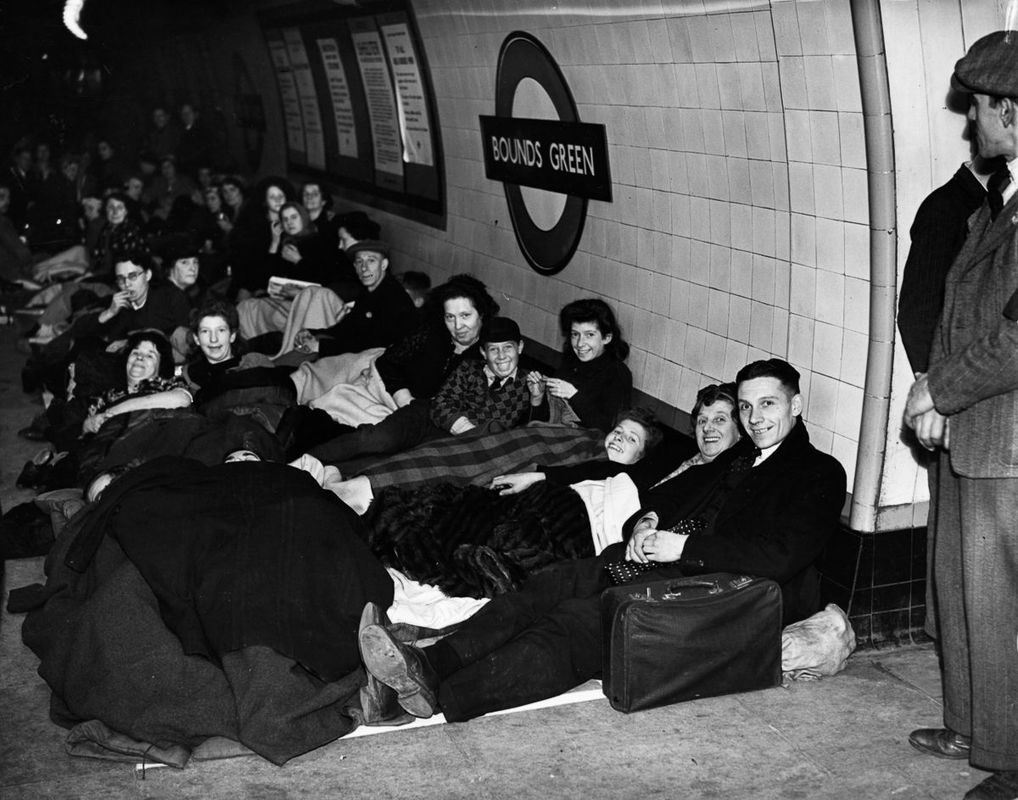
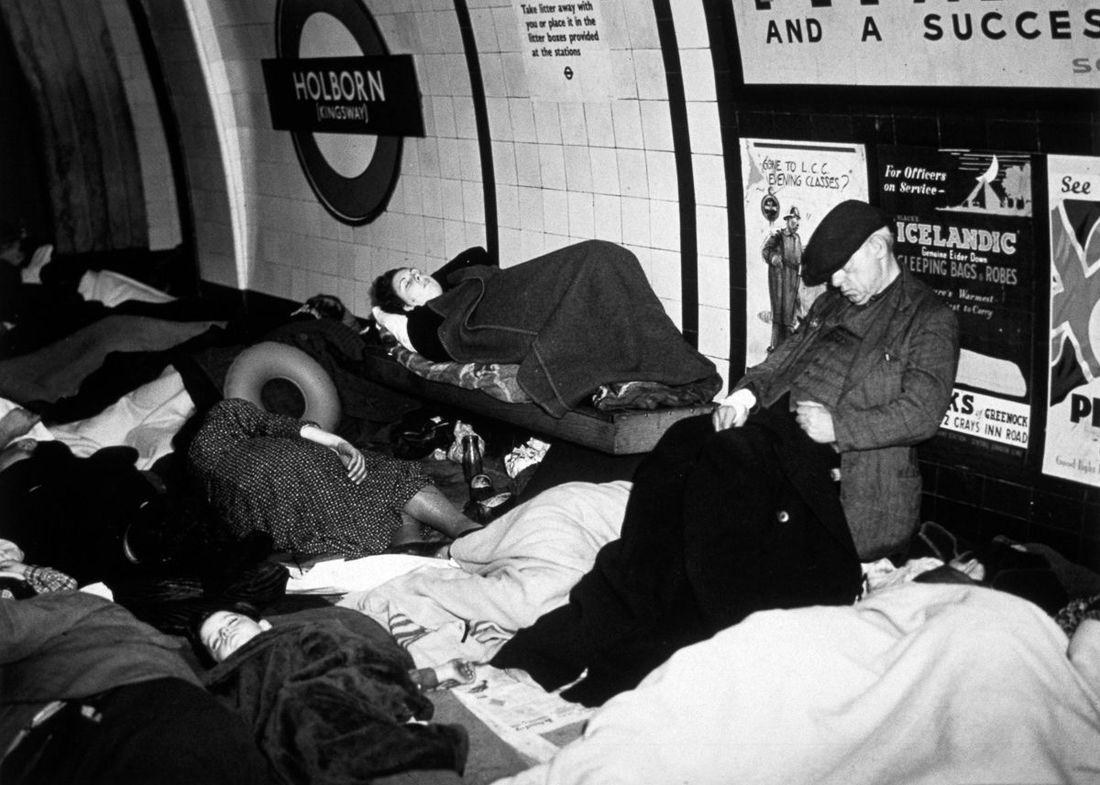
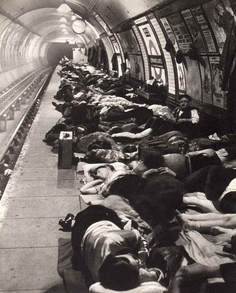
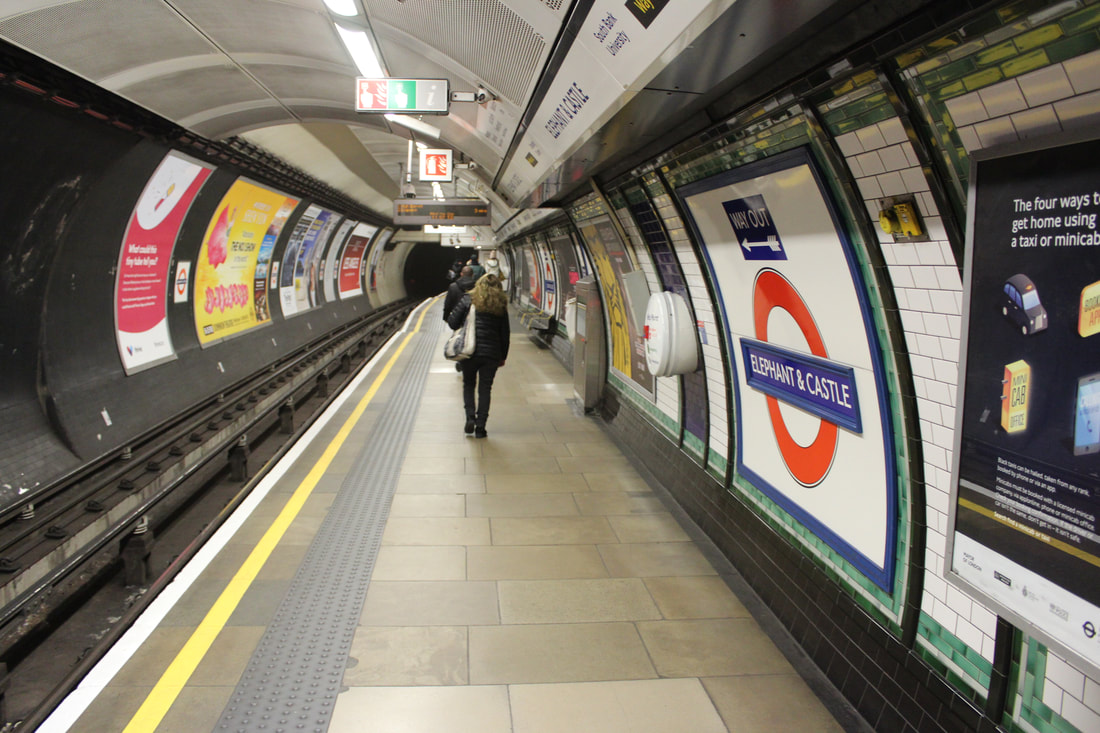
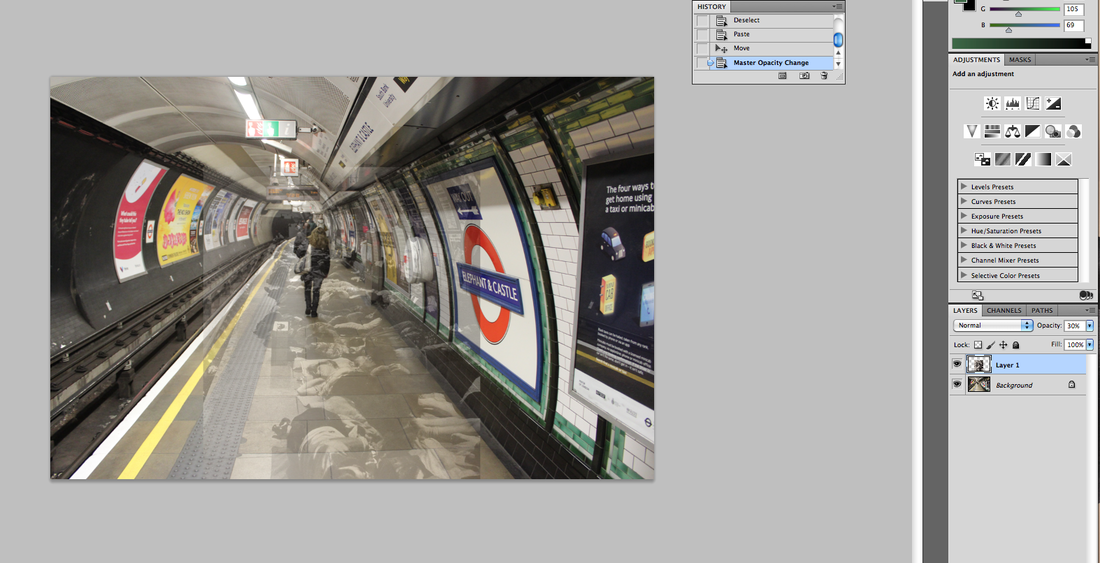
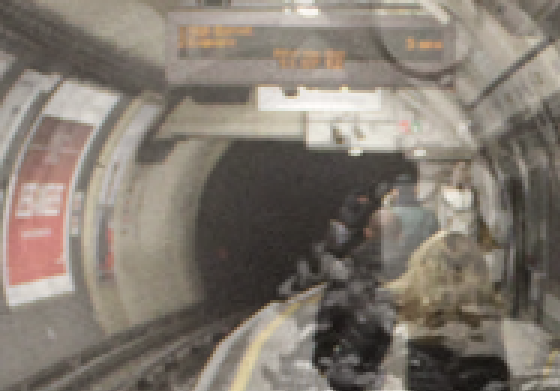
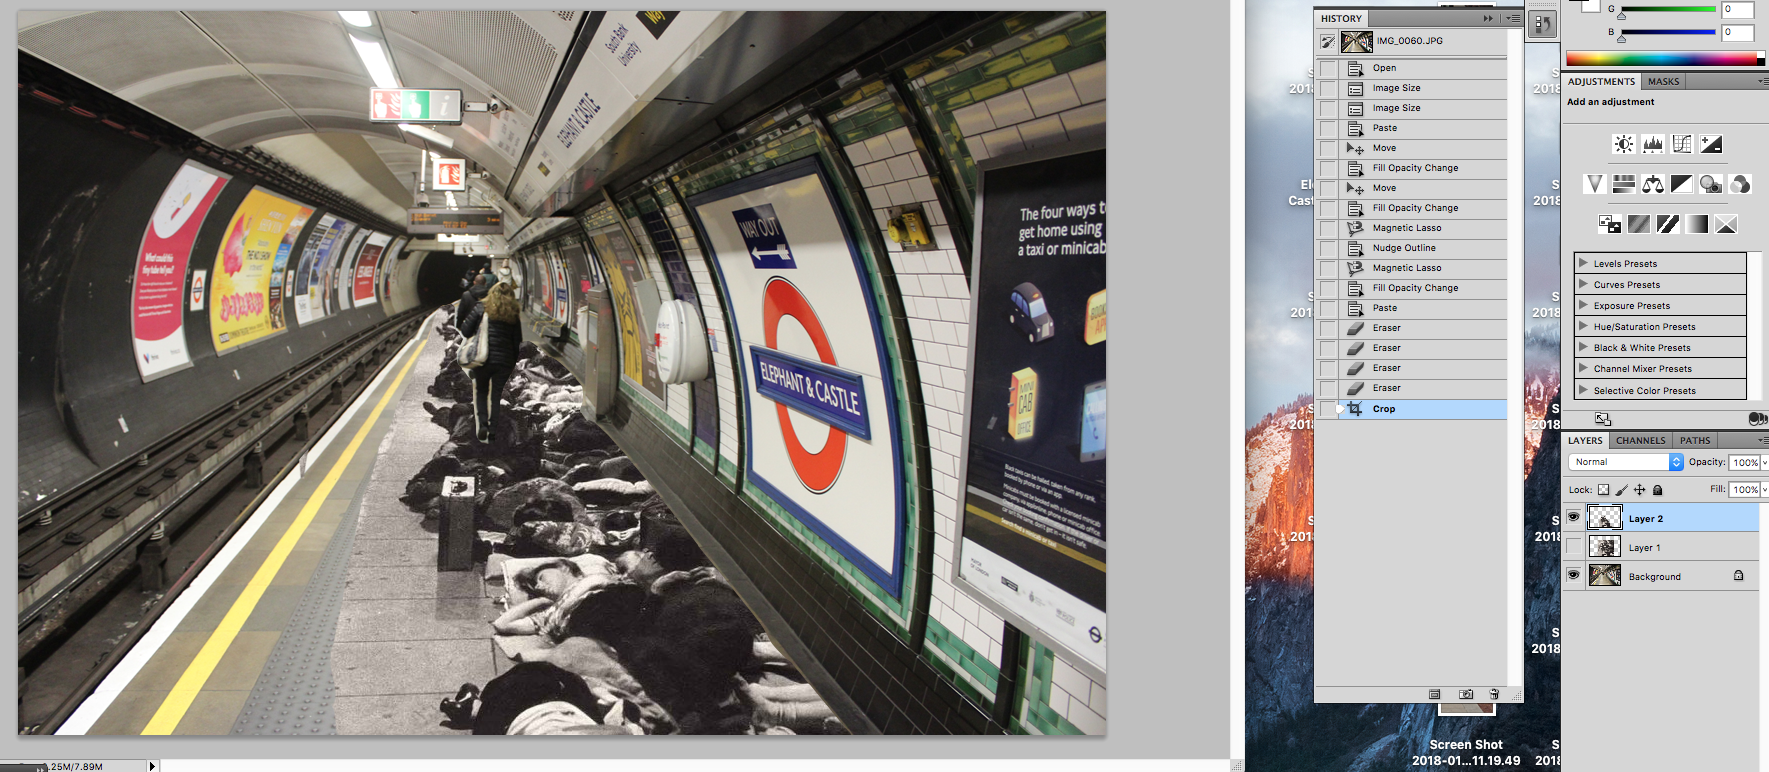
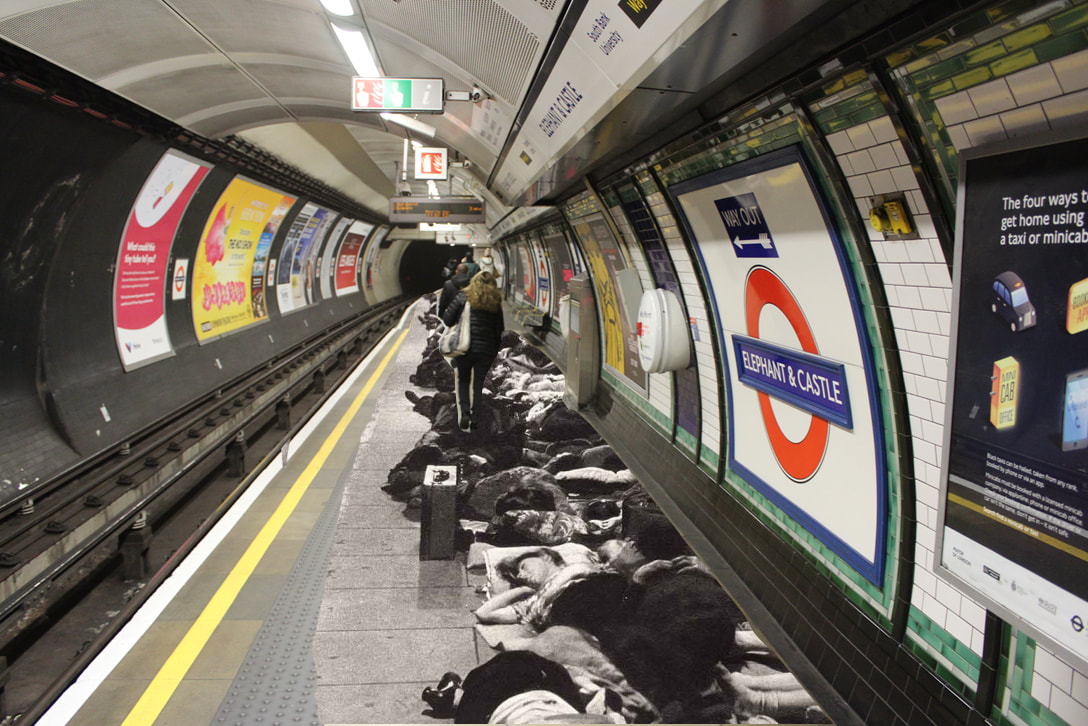
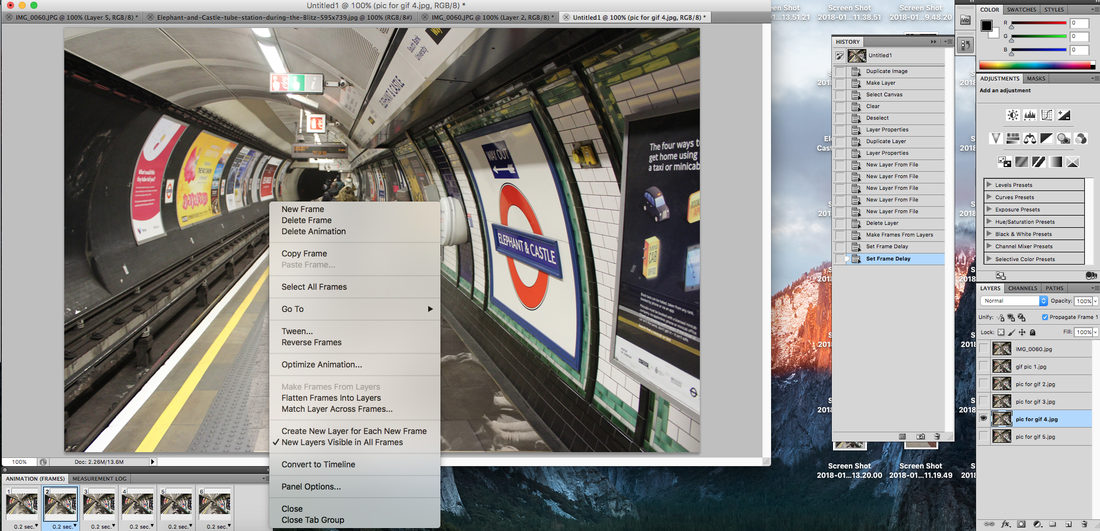
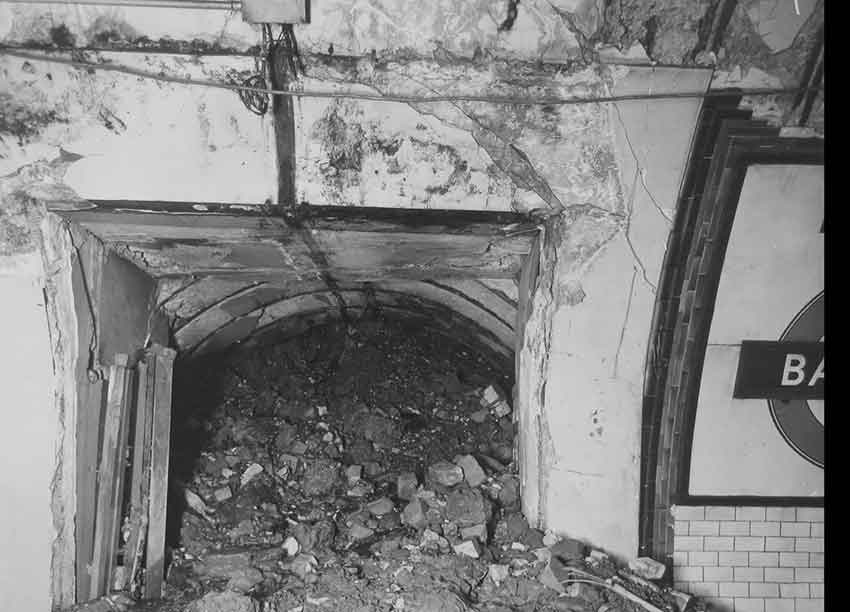
Elephant and Castle tube station
During the second world war, many people took shelter from the German bombers in the underground. Tube stations and tunnels offered a natural shelter away from the bombs. People slept for nights in these shelters. Some were even trapped underground due to the bombs destroying tube stations and exits out.
|
The image on the right was taken during the Blitz and the one below in January 2018. They are both taken on the Northbound Northern line platform at Elephant and Castle. My next step will be to combine the two images giving an idea of the past compared to present. Up until this point, I felt my work was at a standard but was not rewarding or as good as it could be. I decided from here on it needed to be different.
|
|
|
My first step was to paste the picture from ww2 over the modern photo. The first issue i faced was that the old image was very different to mine and the people walking in. Instead of trying to just combine the two, i decided to create a fading gif, similar to the ones from the soldier at checkpoint charlie.
|
|
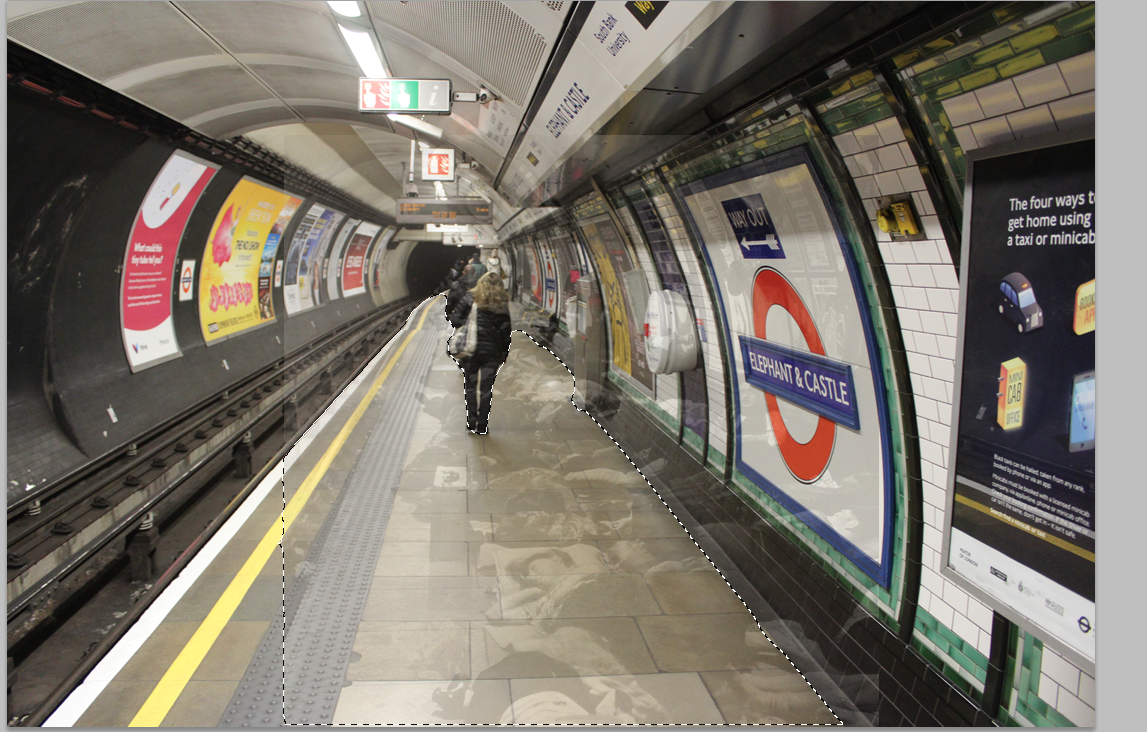
I opted to use the lasso tool to cut out the people sleeping that fit in the platform. I was unable to take my photo at the same angle and position as the one taken during the war so my results were far from perfect. I very much plan to create a better image in my next level of development.
|
These three images show the editing required to create the image:
|
|
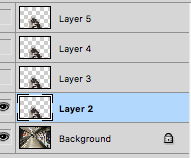
Creating a gif
I now decided to turn my image into a fade in and fade out gif! This is how I did it!!
First, I had to duplicate the layer lying down on to a fresh image of the tube station today. Then, I changed the could level of opacity of the people lying down by -10% and saved the image to a folder. I repeated this step 6 times. This gives the gif a nice 'fading' feature. I then clicked 'scripts, load files into stack'. I selected the 6 images (including the original which was not see-through at all. This loads the different images as layers. I then clicked 'make frames from layers'. As you can see I also set the delay from each frame to the next to 0.2 seconds. To save the Gif i had to use the save for web & and devices feature. Done.
First, I had to duplicate the layer lying down on to a fresh image of the tube station today. Then, I changed the could level of opacity of the people lying down by -10% and saved the image to a folder. I repeated this step 6 times. This gives the gif a nice 'fading' feature. I then clicked 'scripts, load files into stack'. I selected the 6 images (including the original which was not see-through at all. This loads the different images as layers. I then clicked 'make frames from layers'. As you can see I also set the delay from each frame to the next to 0.2 seconds. To save the Gif i had to use the save for web & and devices feature. Done.
|
|
Moving on from war
Just as it is important to document war and what happens during it, it is also very important to document how a country and people can move on after it. War photography has its limits for me so adapting to further my portfolio was critical in order to produce high quality work. I plan on featuring many buildings that were built following world war 2 and to show how prosperous a country can be after such a horrible period.
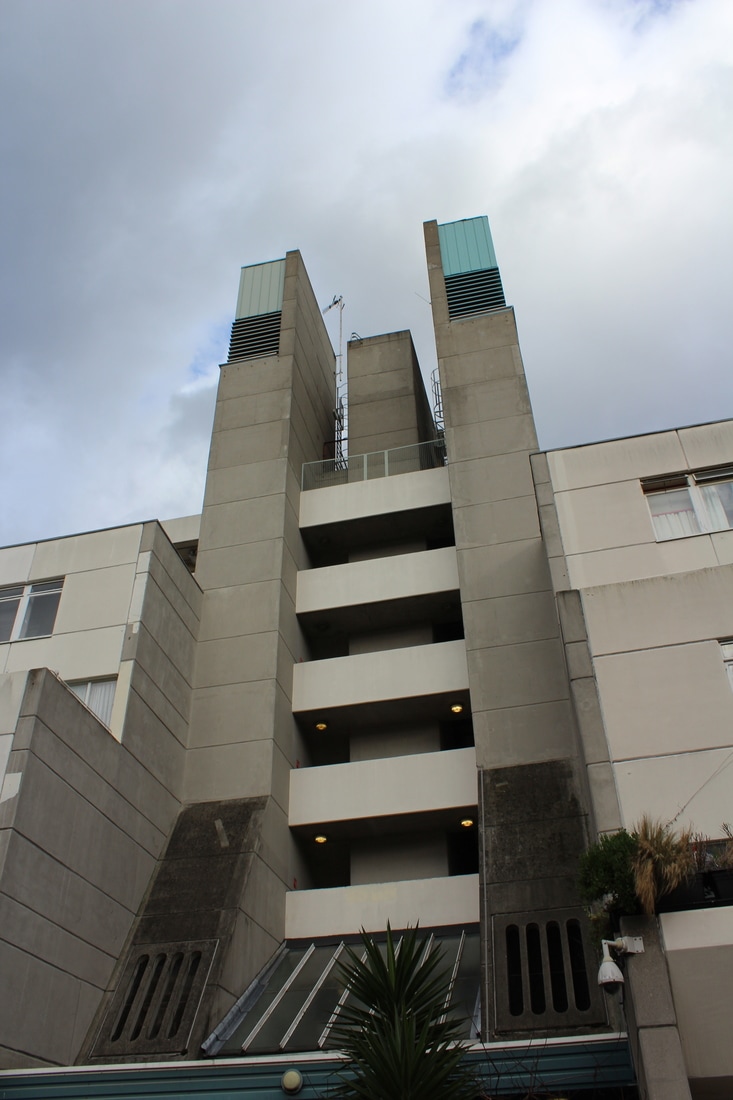
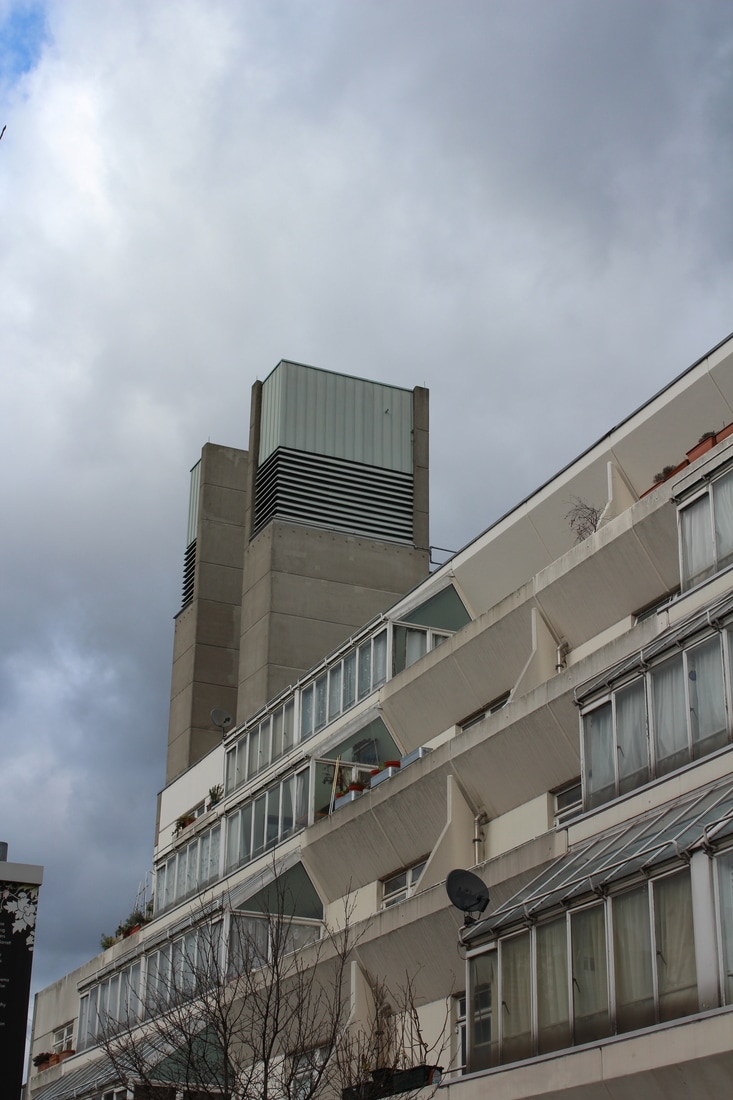
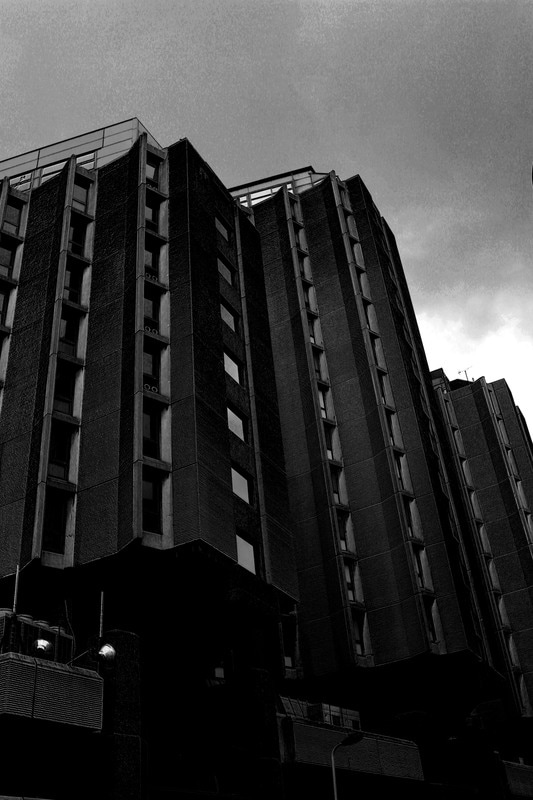
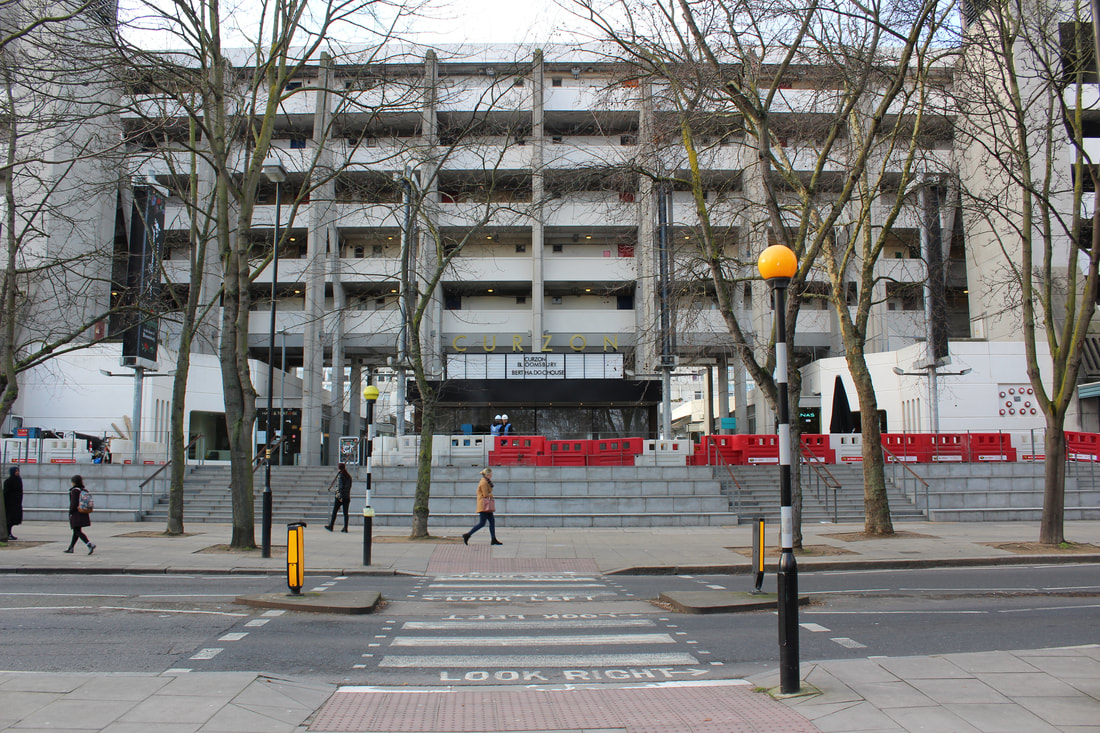
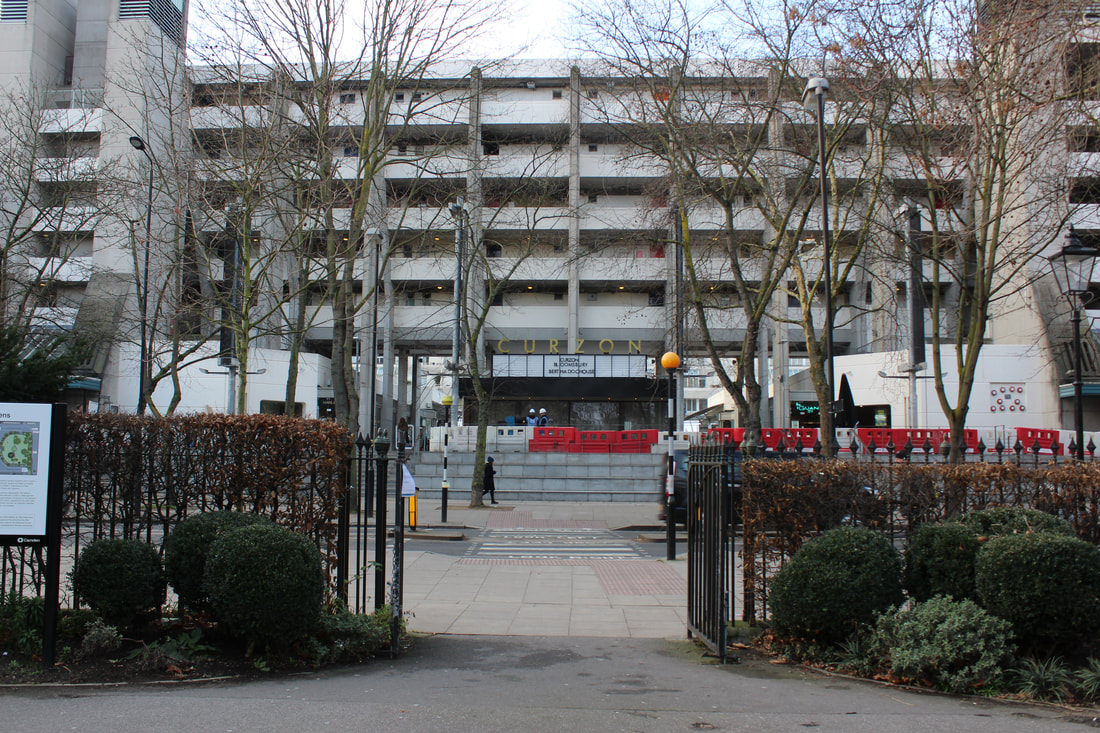
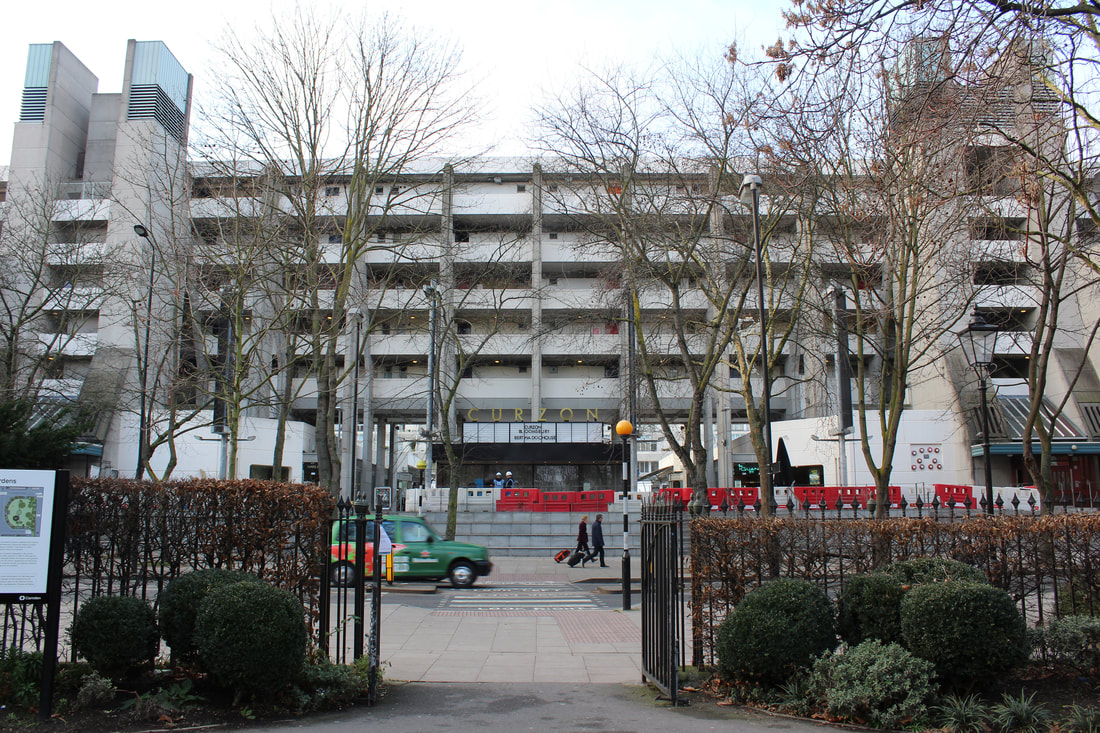
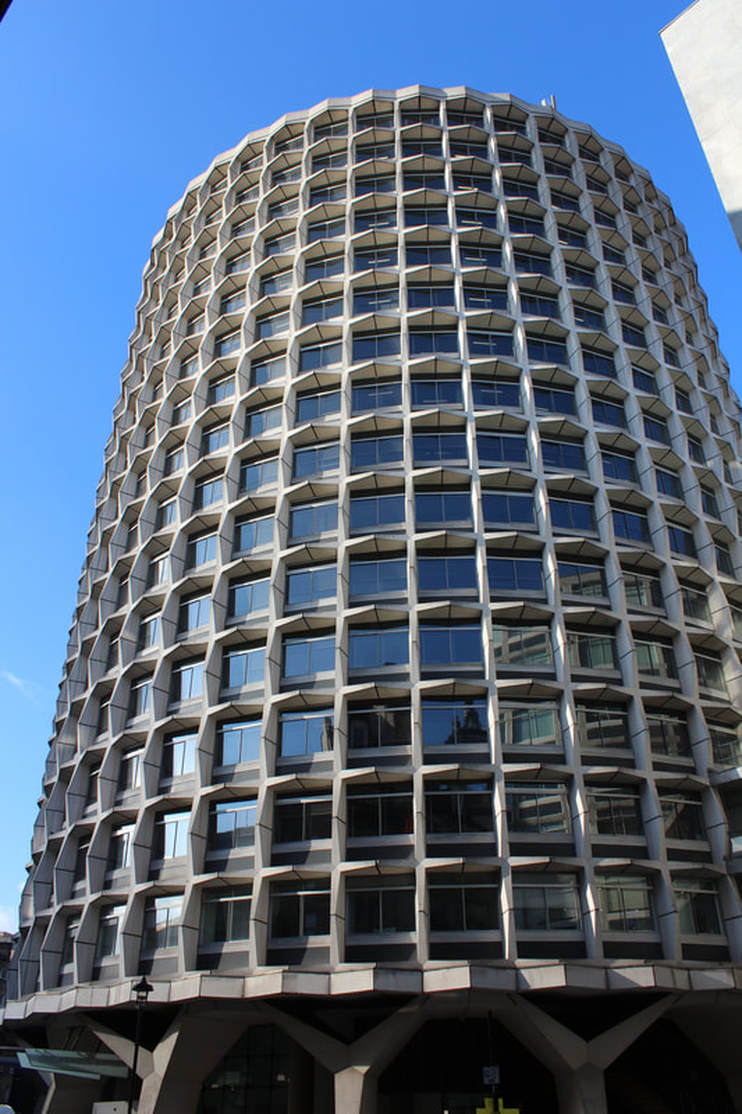
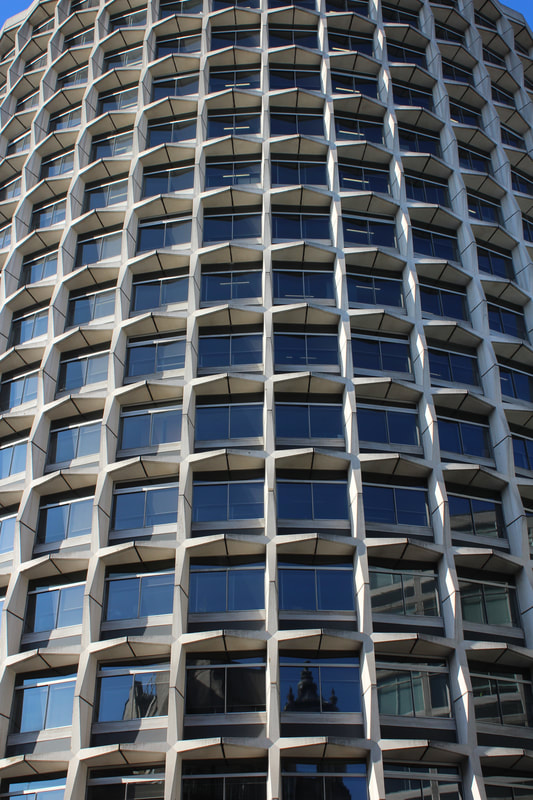
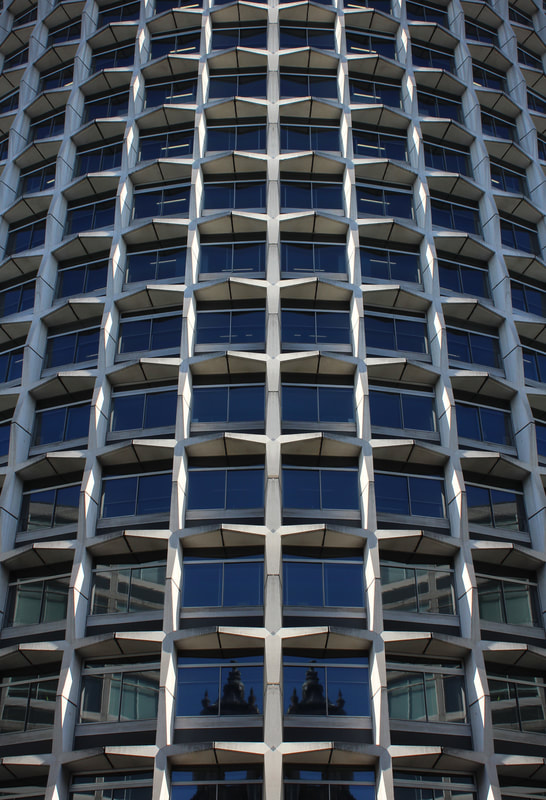
Brutalism
The Brunswick Centre is made almost entirely of concrete but all the slabs and sides have been smoothed out. Due to this the building looks very sleek and appealing compared to other Brutalist architecture.
|
|

|
|
|
I wasn't completely pleased with the photos i took of the Brunswick centre and St Giles hotel. Due to this, i opted to return to central London and re capture some of these buildings. The day was far more pleasant the light made for far better photos.

|
|
Construction at the Brunswick Centre
Luckily, it just happened to be the case that there was some construction work going on at the Brunswick centre when i went. This fit perfectly into the theme of war and reconstruction following a war, as the Brunswick centre was constructed in the post war period.
|
|
The Civil Aviation Authority building
|
|
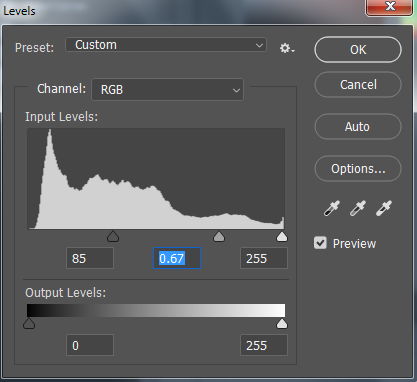
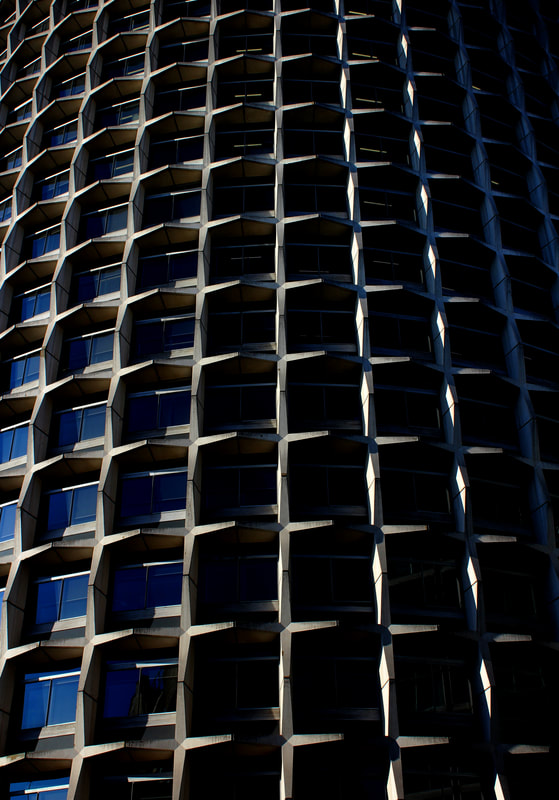
Edits
|
The first edit shown below was very simple. I merely used the 'levels' tool on Photoshop to edit the image.
|
|
|
I really liked the symmetry of this building. Sadly the difference in lighting was clearly shown in the image above. To change this, I copied the half of the building on the right hand side and flipped it horizontally. This created 2 layers with the two different halves of the building.
|
|
The result of this was interesting. The mirrored reflection at the bottom of the image obviously points out the lack of realism to the photo, but this result was expected and I am pleased with it. The basic architecture of the post war period is easy to manipulate on photoshop, pointing to how there was a lack of innovation and resource at the time.
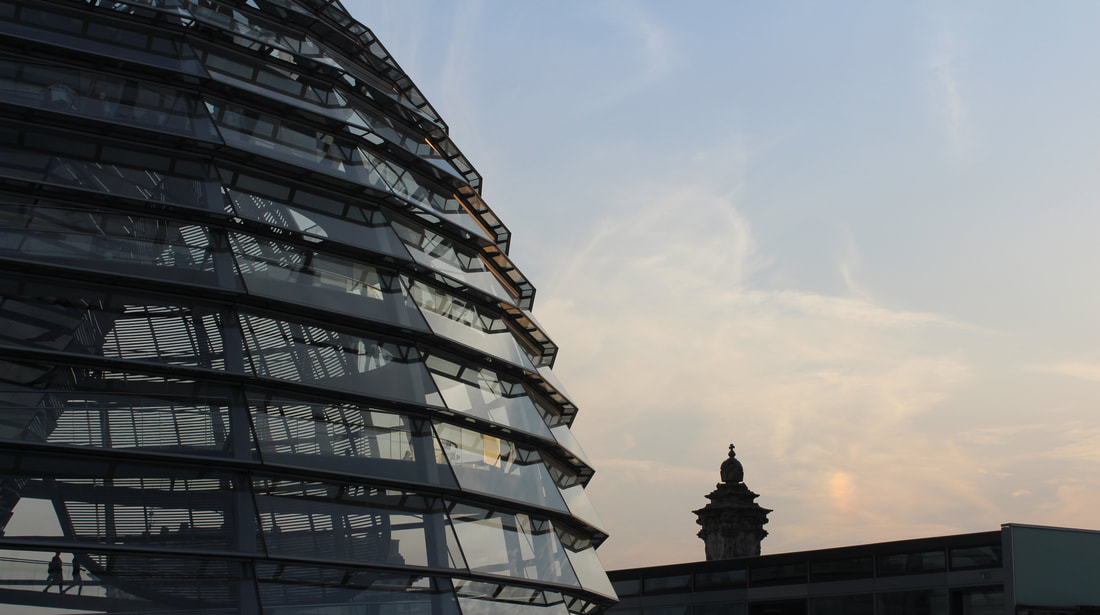
The Reichstag Dome
|
The original Reichstag dome was destroyed in the Reichstag fire of 1933 and during the Soviet bombing of Berlin and attack in 1945. The Dome was finished and opened in April 1999 and from the dome and roof there is a 360 degree view of all Berlin. The Reichstag is also the German legislative building. The damage to the Reichstag dome is shown to the right. The rebuilt dome shown below is clearly far different to how it appeared in late 1945. This shows very clearly how even a building can be restored.
|
|
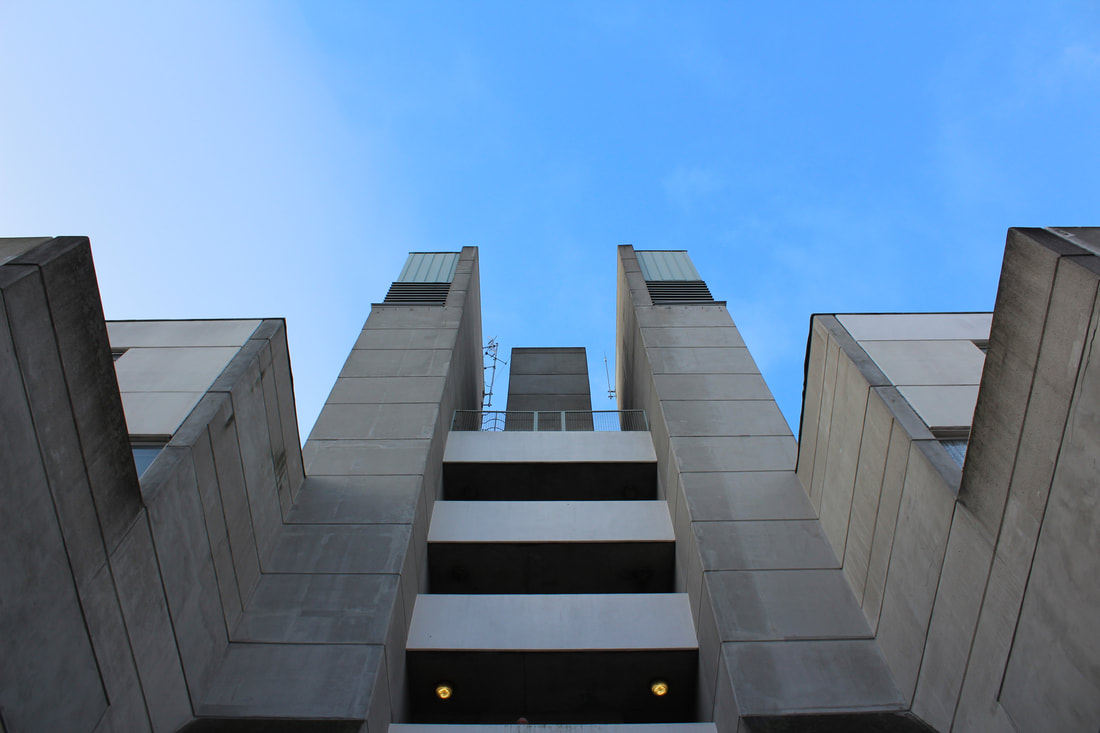
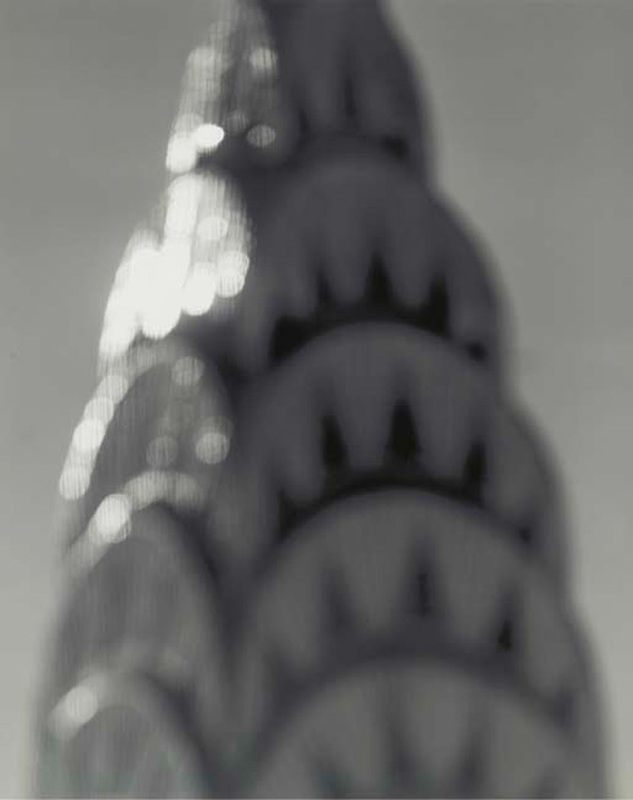
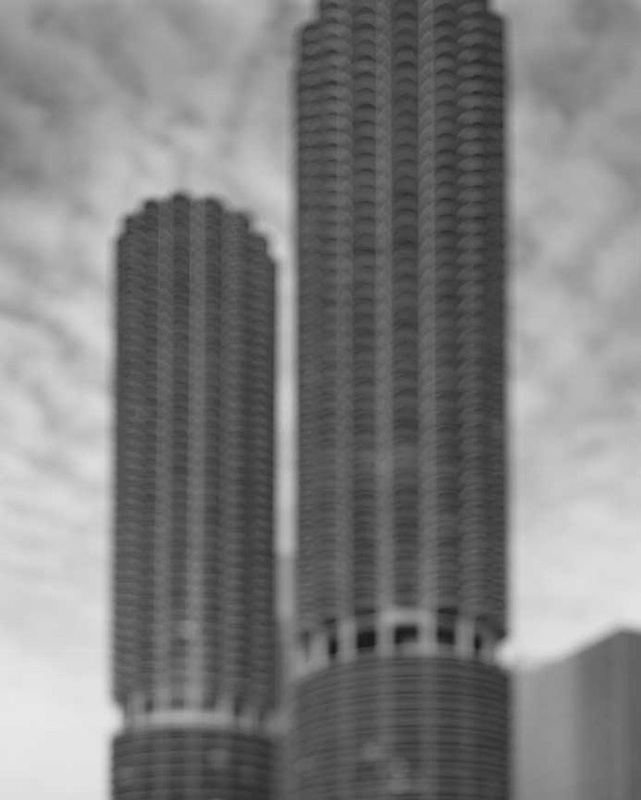
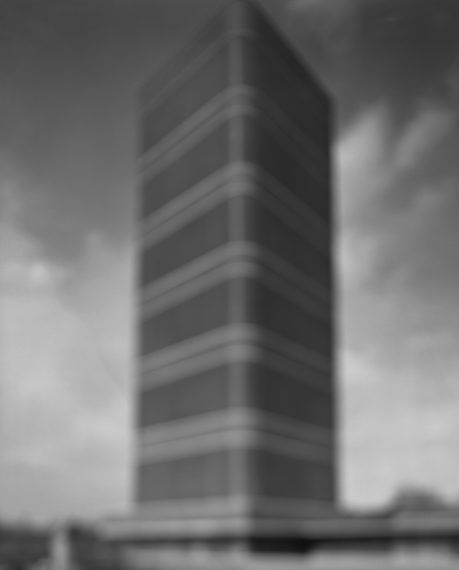
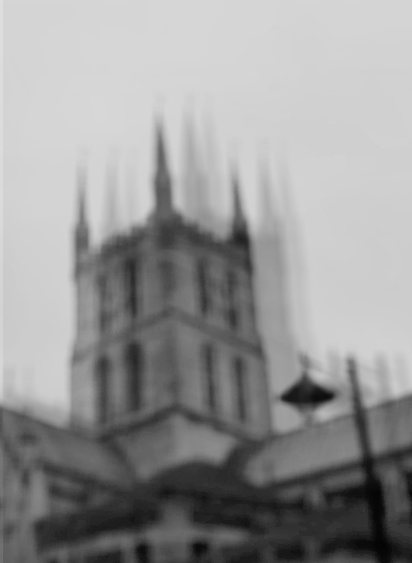
Hiroshi Sugimoto
Bold and out of focus architecture
Hiroshi Sugimoto, born in 1948, is a Japanese photographer and my images take inspiration from his Architecture series from 2000-2003.
In these 3 images Sugimoto has deliberately chosen not to feature all of the buildings selected. Out of the 4 buildings shown only one of the buildings roof/top is shown. By framing the image in this way it means ambiguity is added to the photos, alongside the blur.
|
|
|
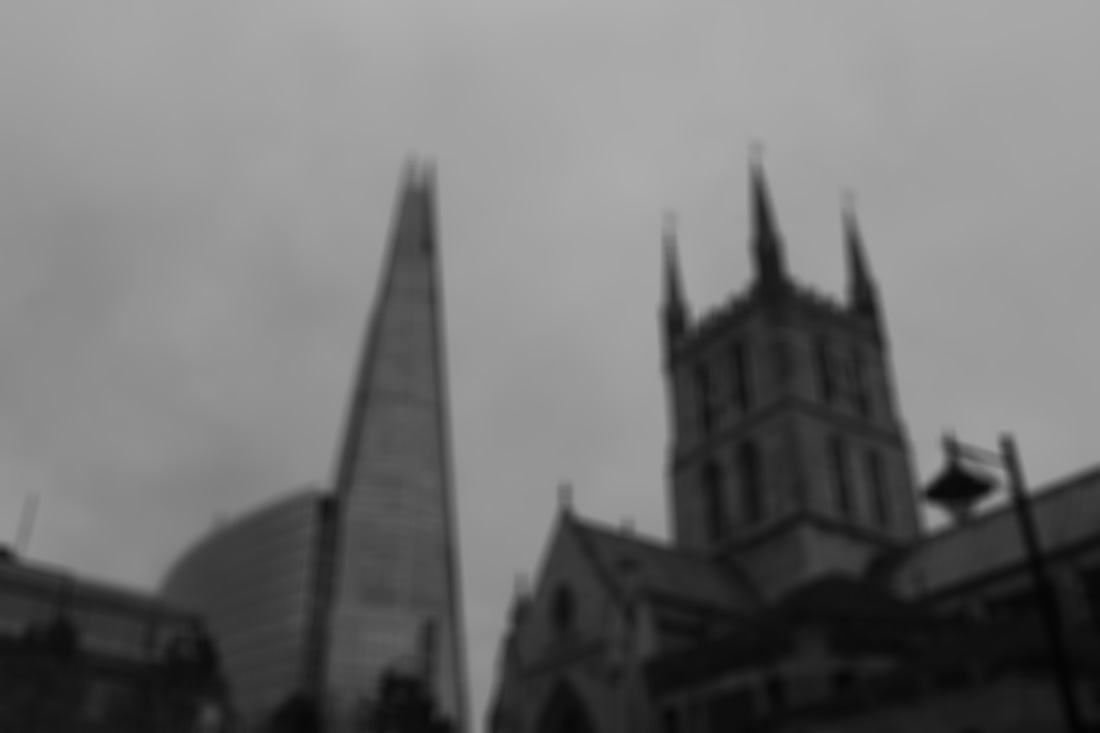
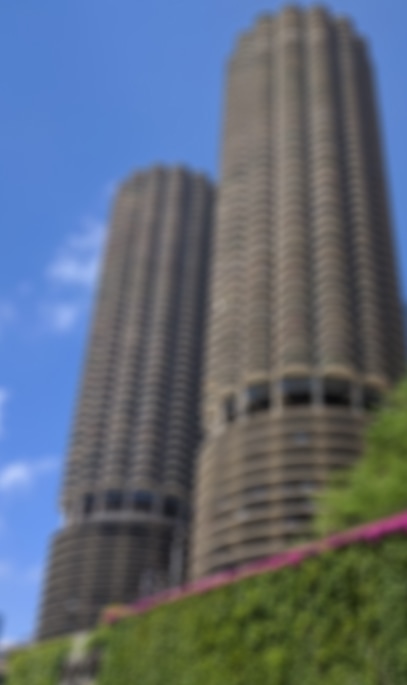
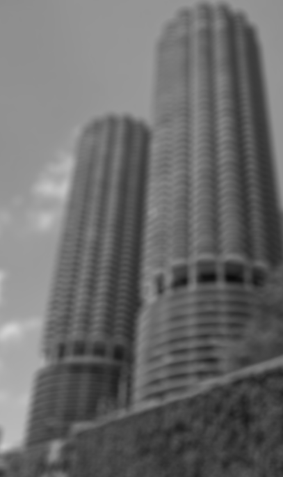
Central London
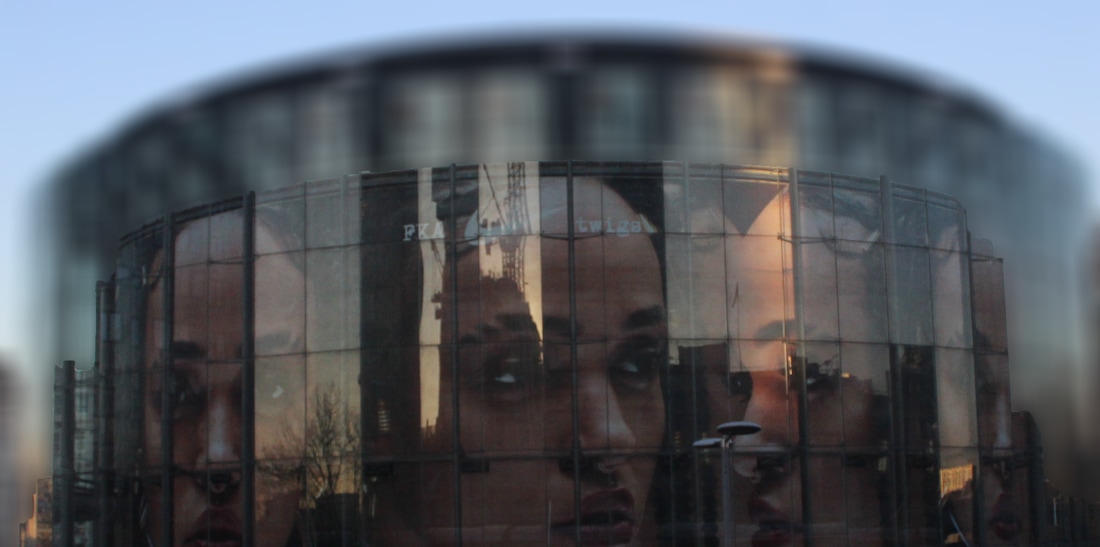
To begin my strand of blurring images to show hints of the past, I went into central London. I took many photos of large buildings including the shard, the IMAX cinema. Following the taking of my photographs, I used photoshop to blur a picture i took of the IMAX building. Inside of the building a woman's face had been printed many times gave added content to the image.
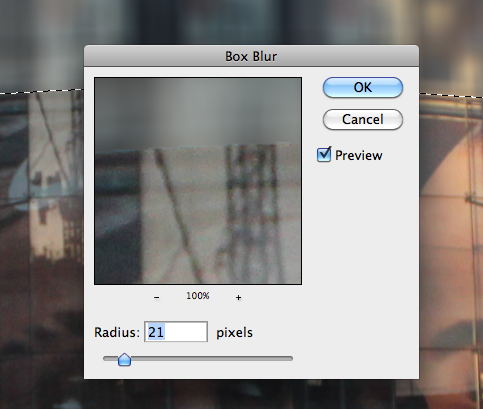
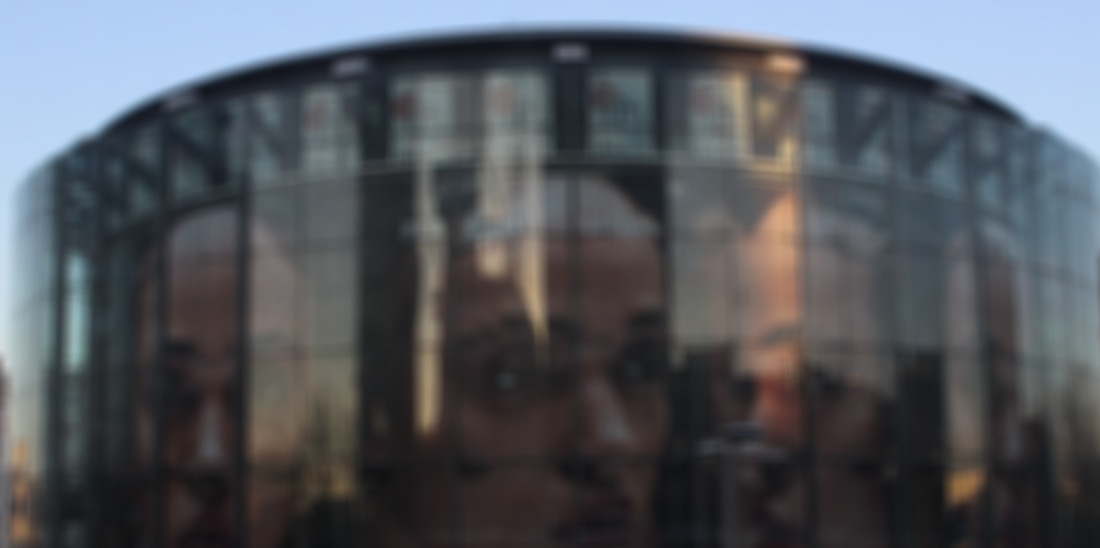
My next development of this image was to change the area in which i blurred the image to only the areas in which the woman's face is showing. I decided this was effective at creating an abstract image within the photograph as a whole. So much of what people see is overlooked and this image is supposed to outline this.
Archway tower
On my way home from school one afternoon in January i took many photos of archway tower and the skyline behind. I edited these photos in the same manner as i did before. As the afternoon progressed, the sun began to fade and the lighting changed significantly. The crane in the right of the final image again incorporates the theme of rebuilding in the image.
|
|
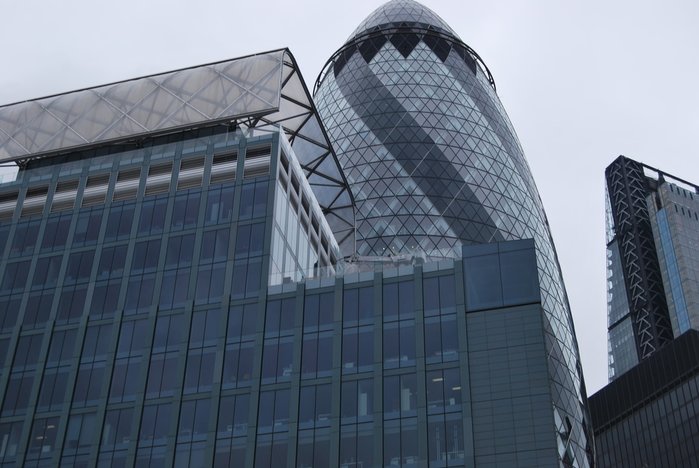
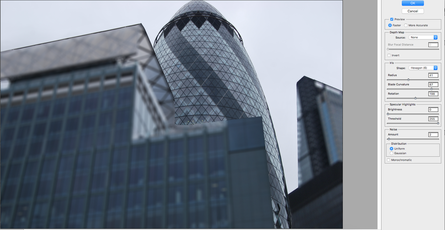
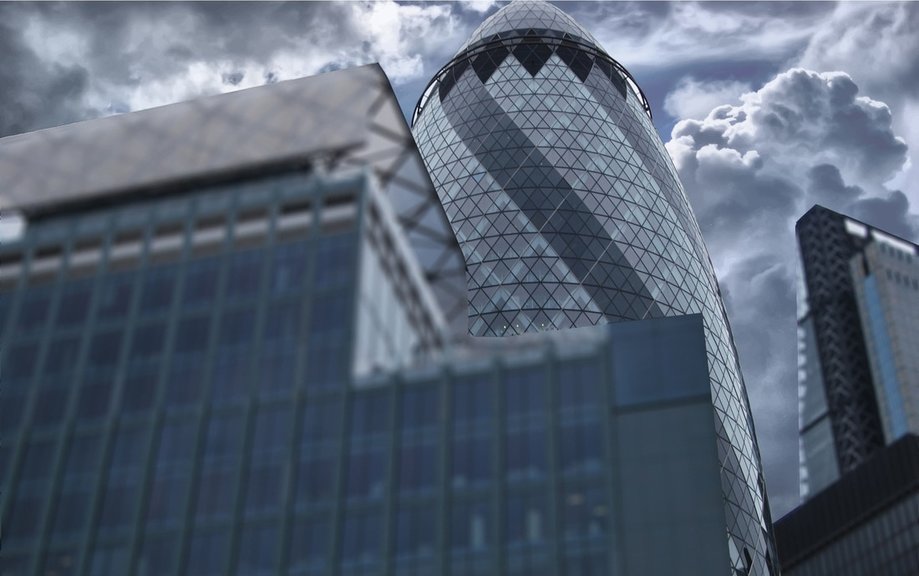
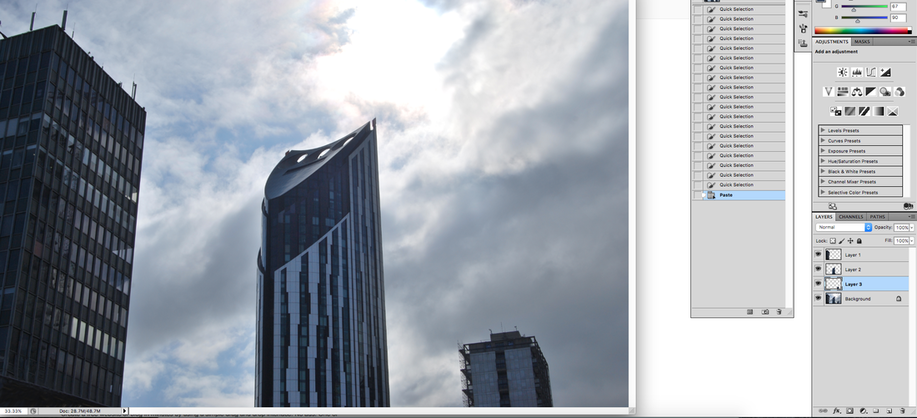
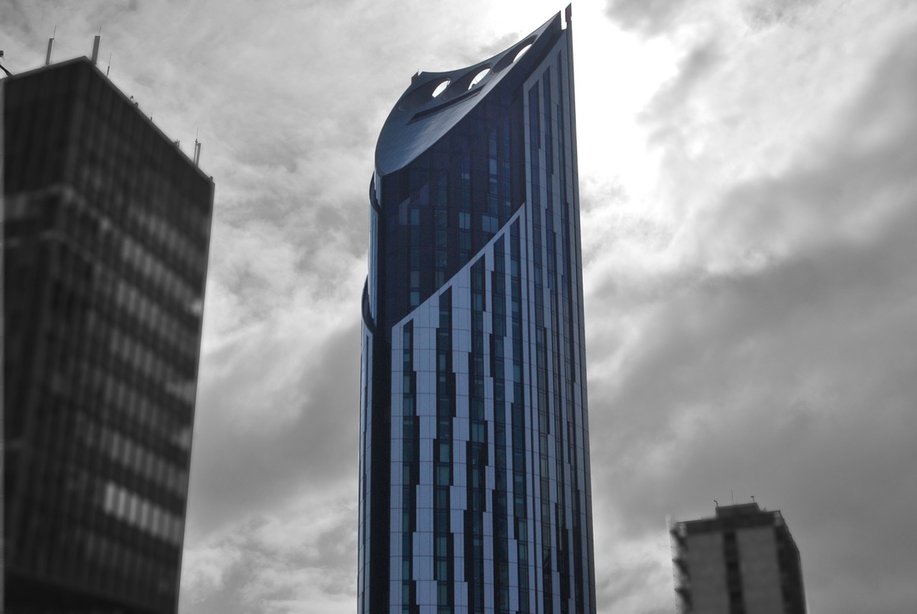
The Gherkin
I chose this photo of the gherkin due to the extent to which it stands out and the clear sky allowed me to easily edit in my own clouds and sky. The main theme of my my final piece was to emphasise dark blue, grey and white colours and to show how a simple lack of colour can change an entire image.
|
|
|
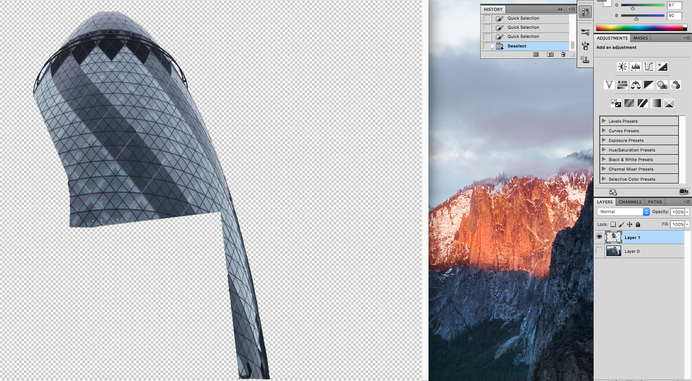
To start off, I cut out and coped the Gherkin, by doing this i was able to edit and change the colours of the rest of the image without affecting the main focus area. My first edit was to use the lens blur tool on the two other buildings.
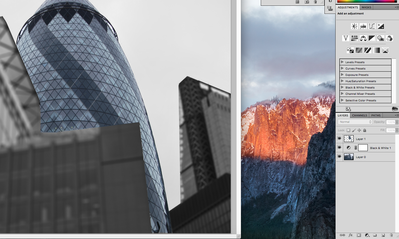
Following this, I decided to remove colour from the two buildings, doing this made the Gherkin even bolder.
|
|
The final image, shown below, contains a brand new background that I took, with much more added colour. The relatively blank background i started with allowed me to photoshop the new one on much more easily. The dark blues and greys of the sky give much more detail and depth to the image. The buildings deliberately stand out from the background to emphasise the contrast and change in the image.
The Strata and further development
|
|

Before editing any colours of the image or blurring, I carefully edited out the railing obstructing the view at the bottom left of the original image and after that I selected all three buildings and made them their own layer. By doing as, as with the Gherkin, I can freely edit the buildings to match my overall theme. I put the Strata on free transform and decided to enlarge it in order to increase its boldness. The enlarged Strata takes up a much greater proportion of the image and even partially blocks out the sun.
|
For this image I used the motion blur instead of lens blur on both the smaller buildings, to change the focus of the photo to the Strata. As with the first edit, I blurred the smaller buildings less than the larger one.
|
|
My first finished edit below, shows a greatly enhanced Strata (in terms of size), which stands out with colour from a dark, colourless world around it. The growth of the Strata is to indicate the growth of a city and its buildings over time.
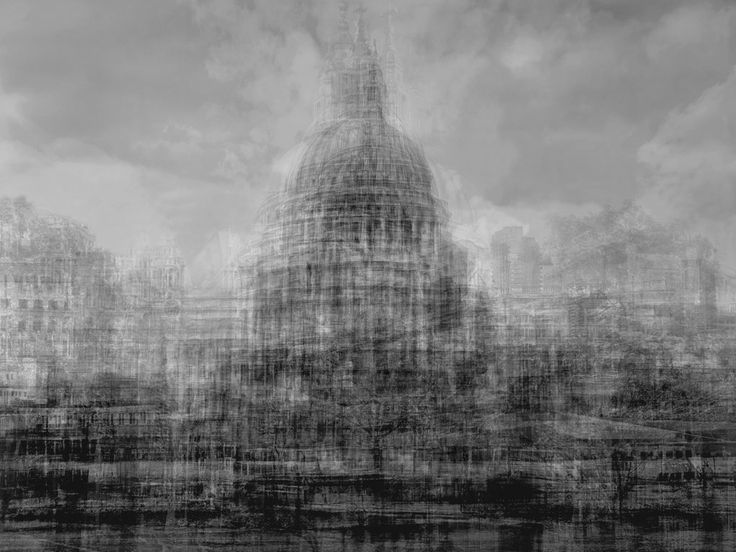
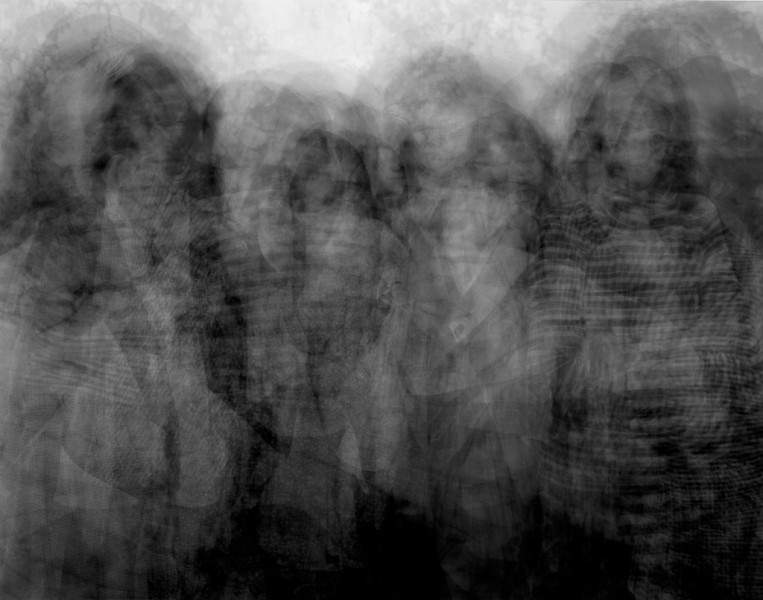
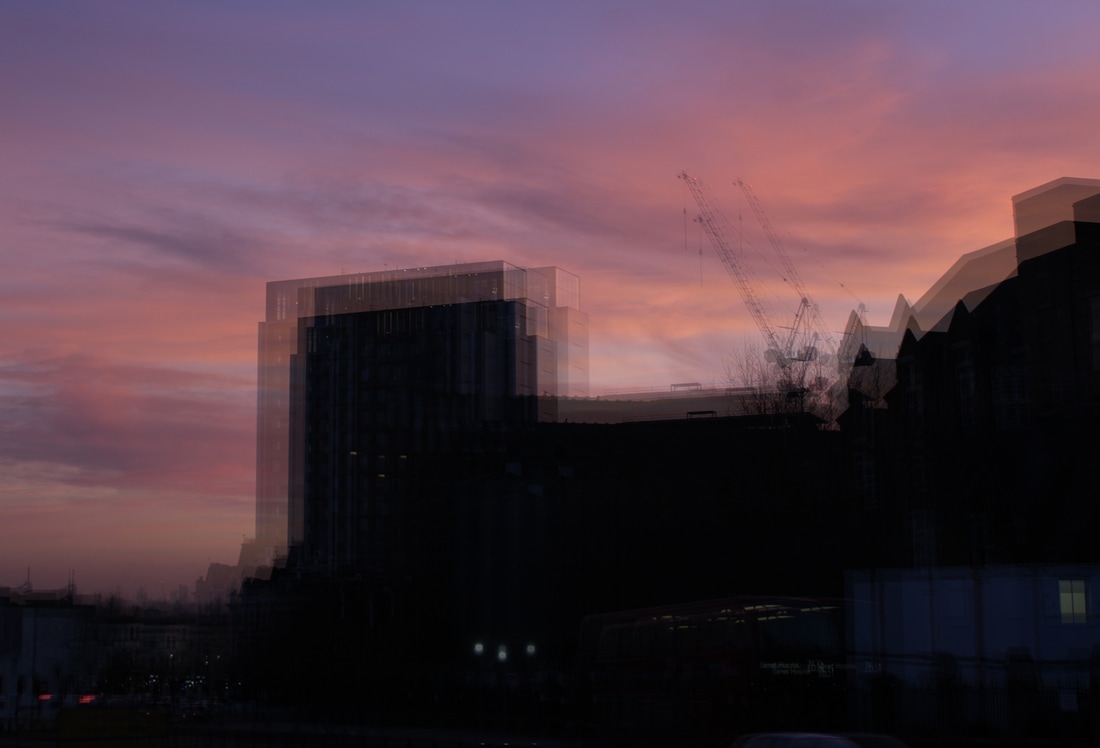
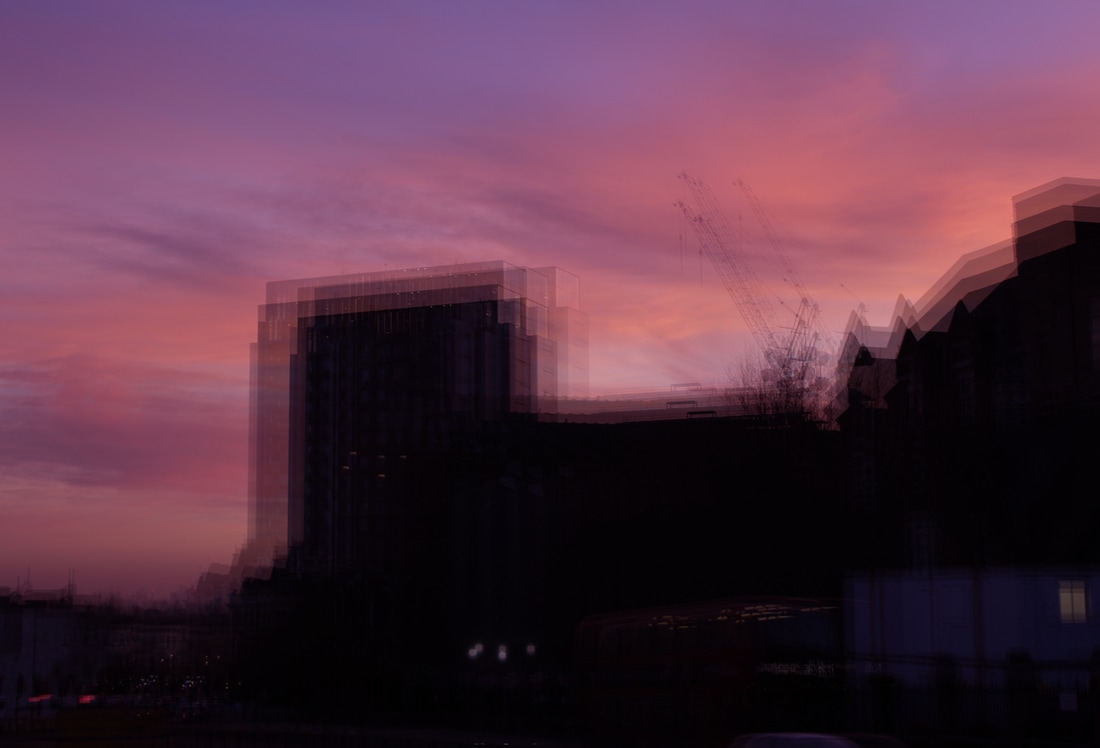
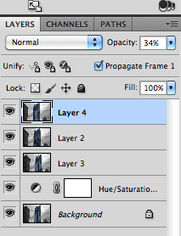
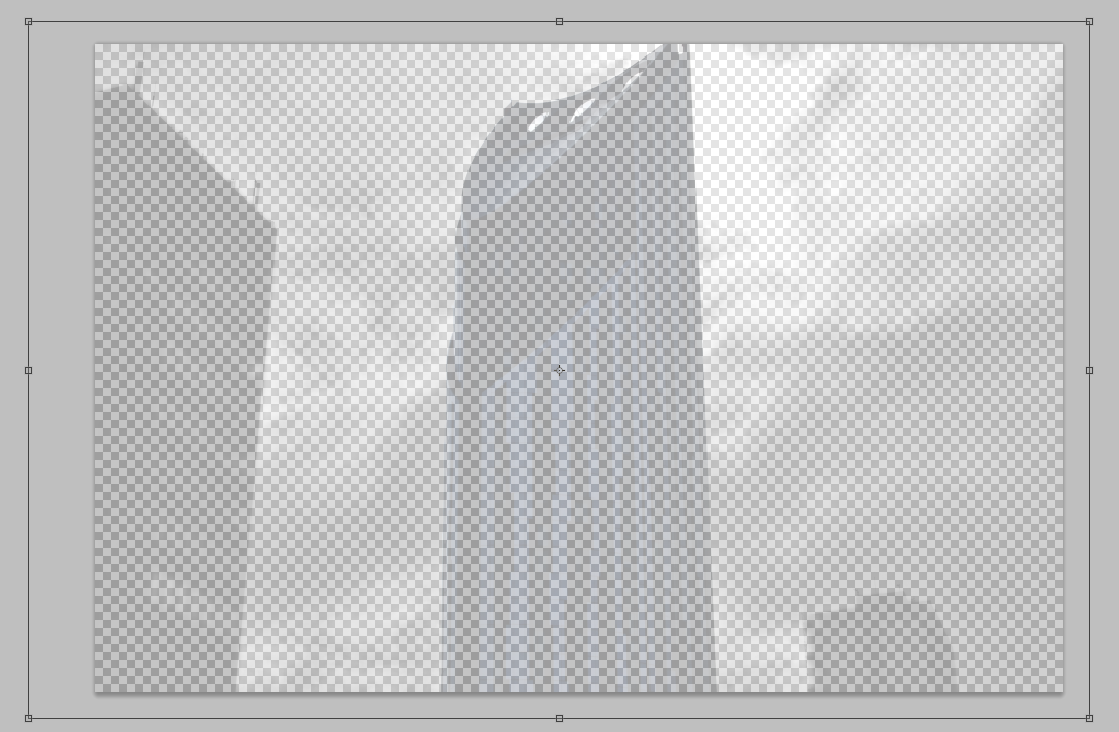
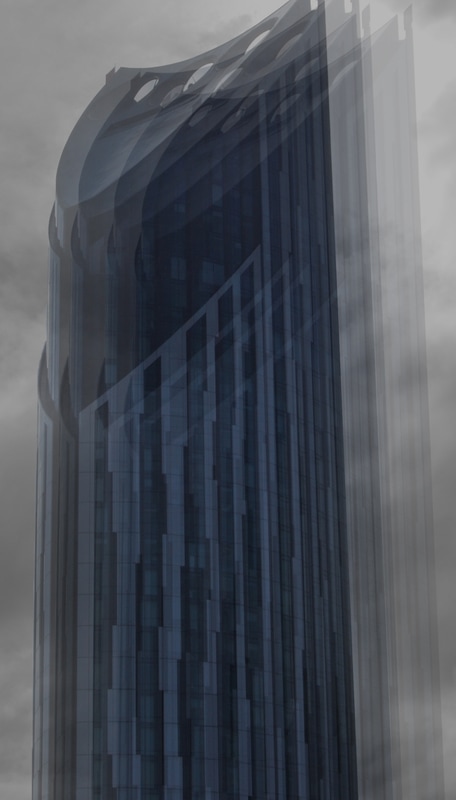
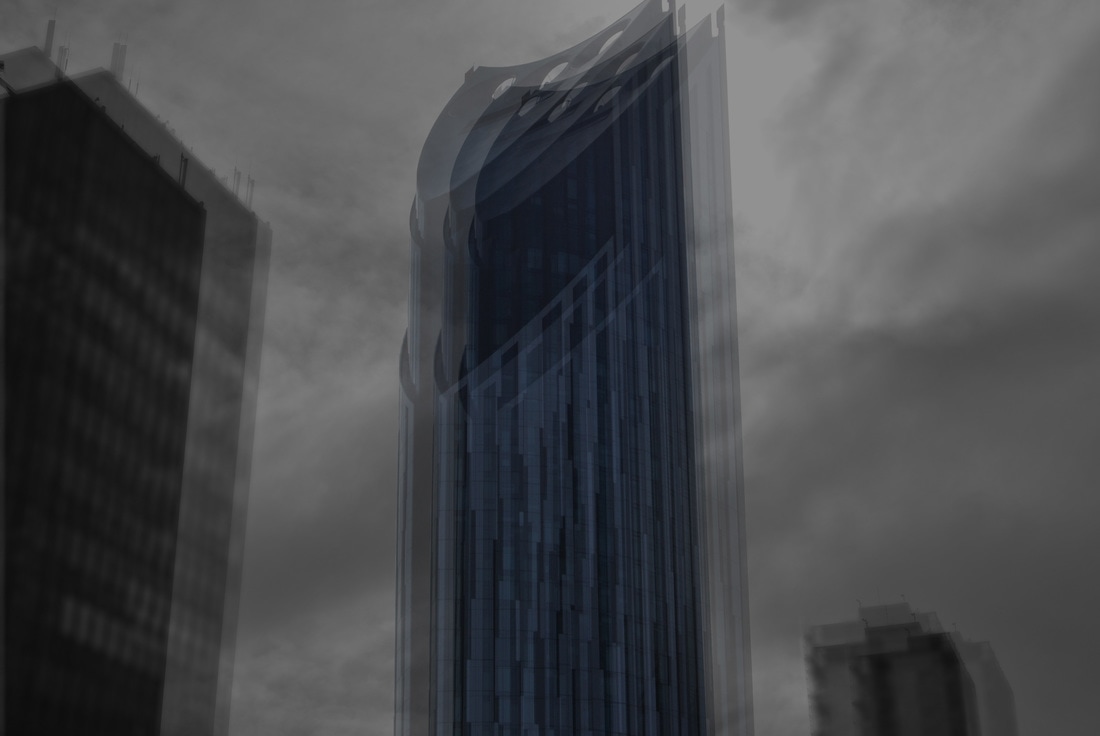
Layering of Architecture
After experimenting with blurring architecture on Photoshop and editing images, i looked to photographer Idris Khan for inspiration layering of images.
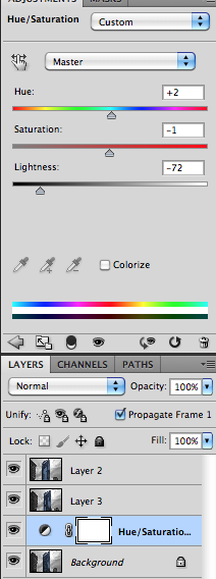
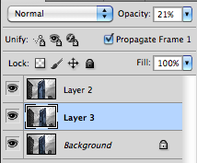
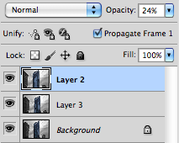
Rather than layering an image and leaving it, I decided to create gifs to show my process of doing so. The original image featured vivid colours, but my inspiration pushed me to remove colour, following this up I created 2 additional layers and moving them around. To create the effect of a distorted or multiple layered images on top of eachother, I had to reduce the opacity of the additional layers in order to show each layer.
|
|
|

|
|
|
|
|
Following the creation of the gif above, i decided to go back and use the same process for some of my old photos as shown below. The two photos on the top are obviously still images whereas the two below are gifs. The church is taken from the photo of the shard which i used for my first development of the blurred buildings strand.
|
|

|
|
Re development of the Strata
My next step was to layer another of my edited images from before. I chose the strata as the structure of the building and the two surrounding it really stand out from the background and the layering process would be very noticeable. As before I duplicated the background, not needing to remove colour, i decided to edit the hue and saturation as shown below. This darkened the entire image and especially the background. The change in light made the Strata stand out even more than before. I set all the additional layers to free transform and increased the size of the entire image 3 times, this gives the layering affect around each building. I finally decided to crop the image, only to show the main Strata structure, however after cropping the image i decided that showing the full photograph was more effective.
|
|
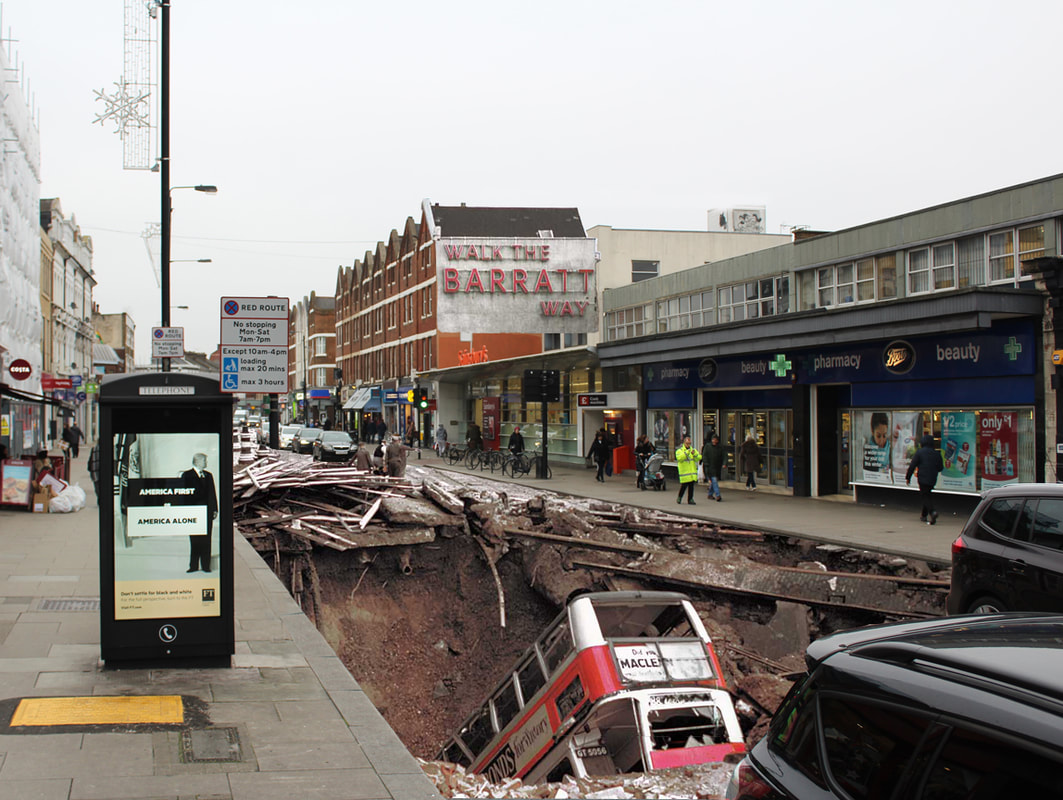
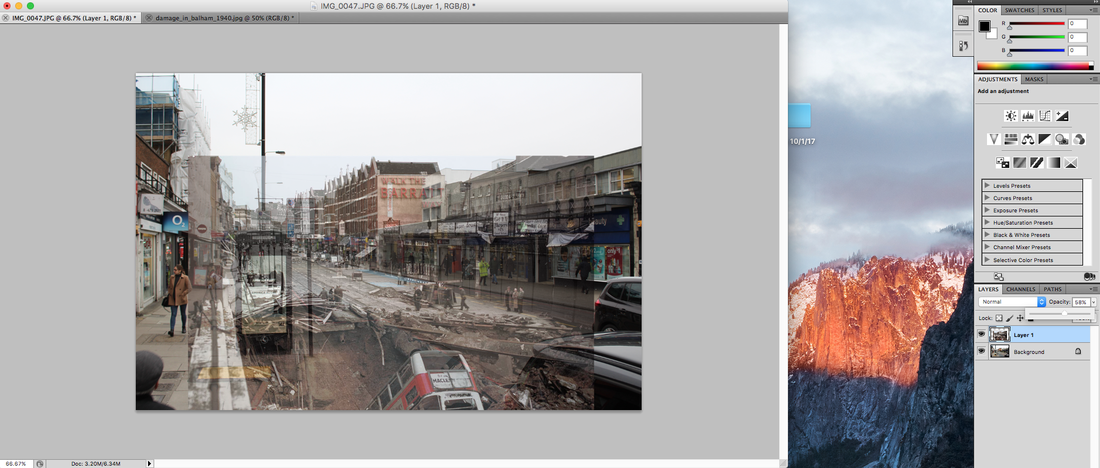
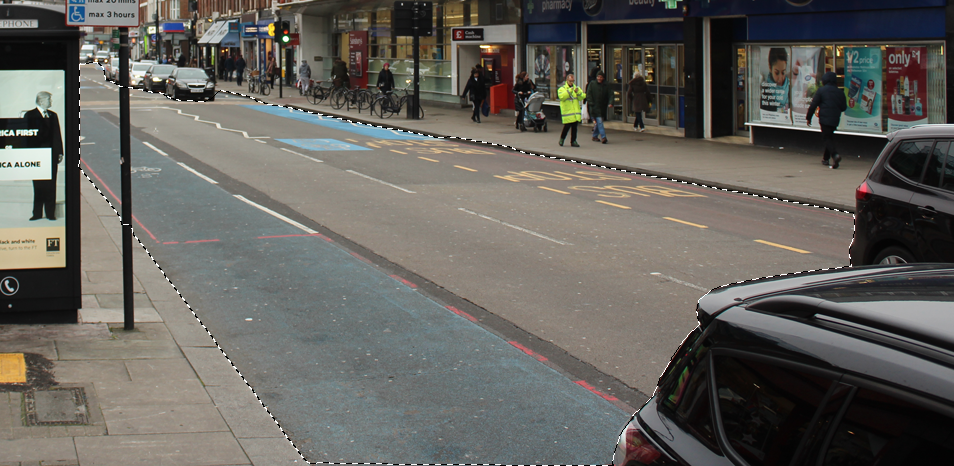
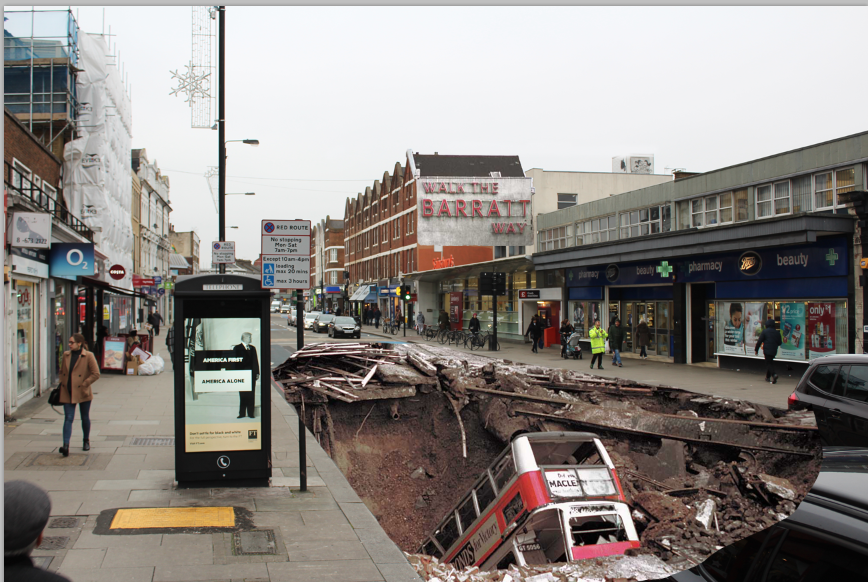
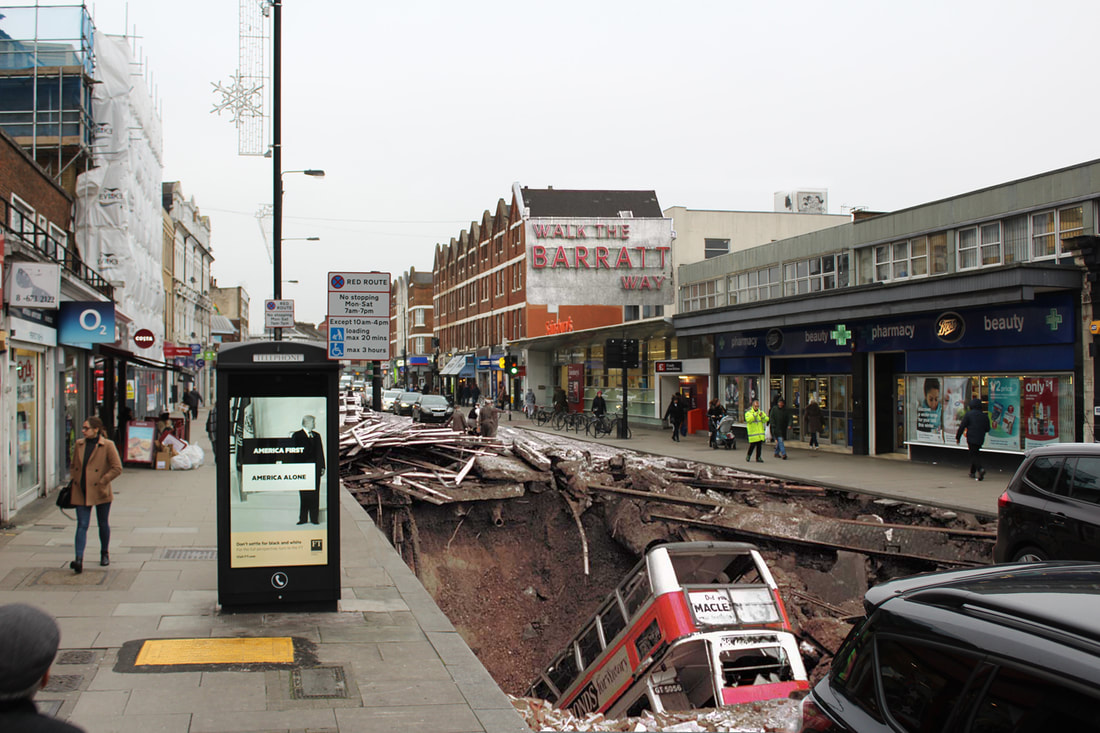
Disaster at Balham Tube Station
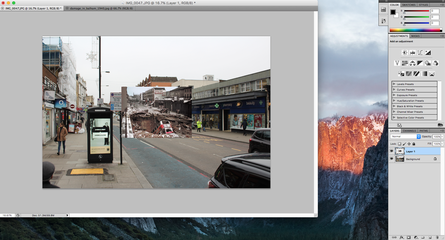
Just 7 stops southbound on the Northern Line from Elephant and Castle, lies Balham. During the War, a bomb dropped just outside the station and penetrated 30 metres down into the earth. The bomb landed directly in front of a bus, shown below, and exploded in between the Northbound and Southbound platforms. As with my previous work, I am going to attempt to merge an image from the past and one from today. The extent of the damage is clearly shown below.
Just 7 stops southbound on the Northern Line from Elephant and Castle, lies Balham. During the War, a bomb dropped just outside the station and penetrated 30 metres down into the earth. The bomb landed directly in front of a bus, shown below, and exploded in between the Northbound and Southbound platforms. As with my previous work, I am going to attempt to merge an image from the past and one from today. The extent of the damage is clearly shown below.
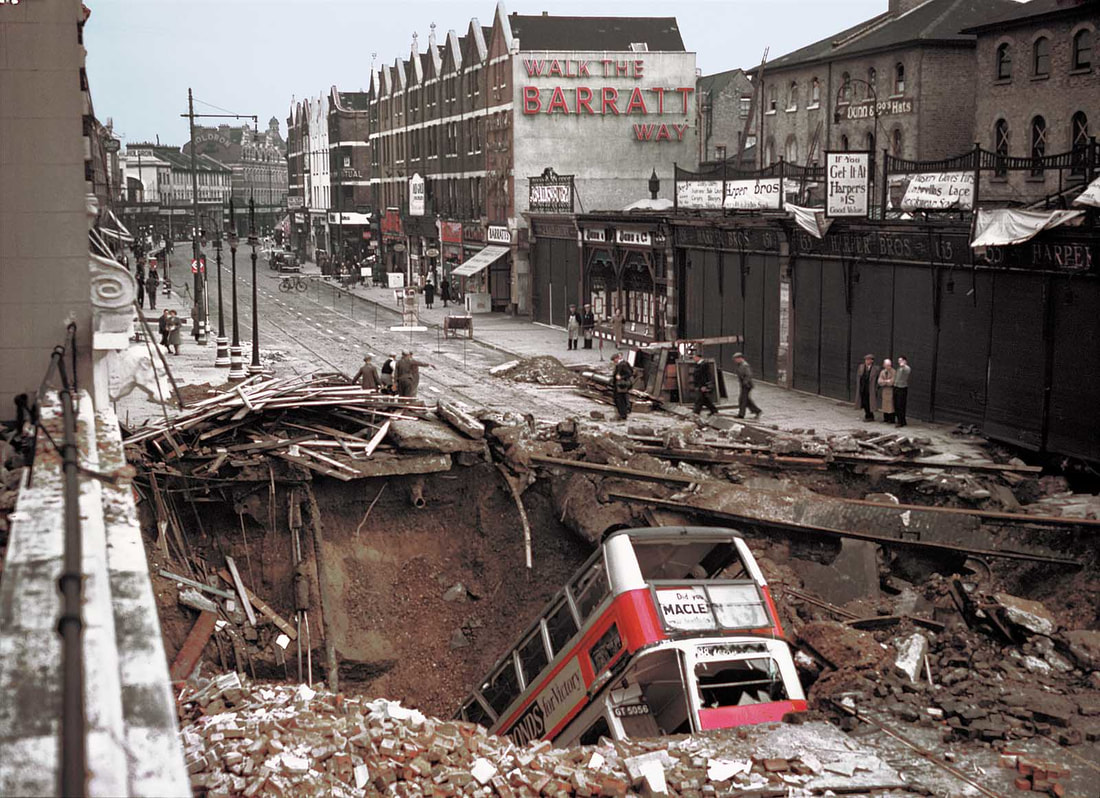
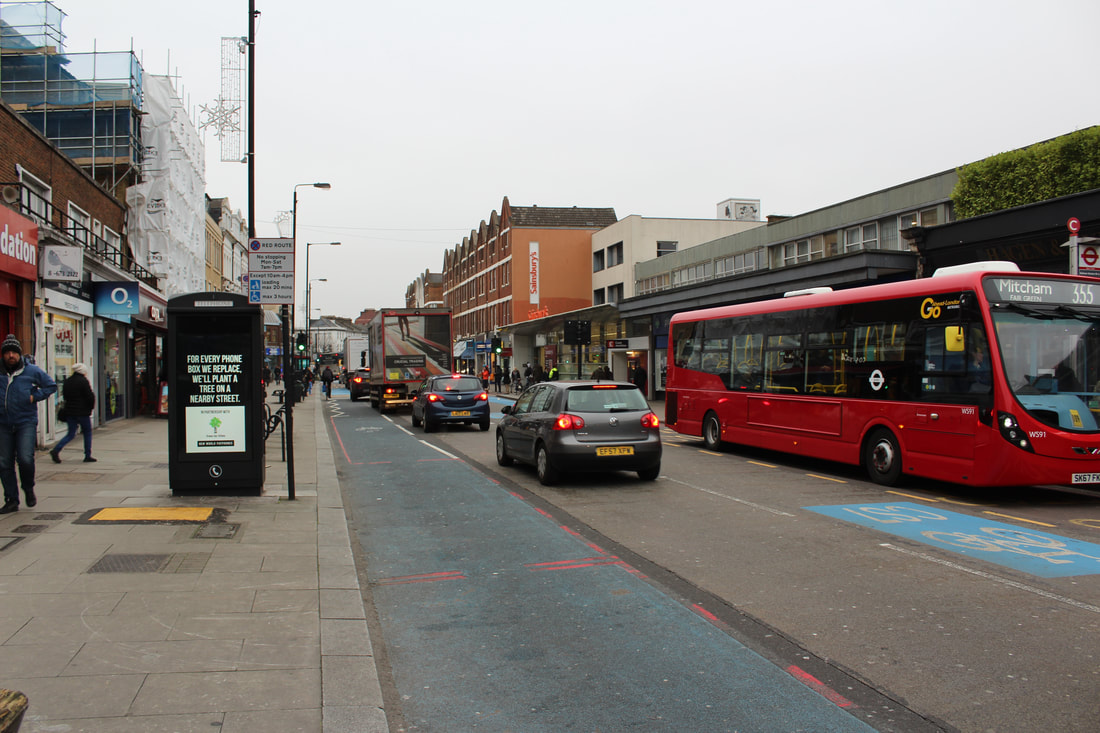
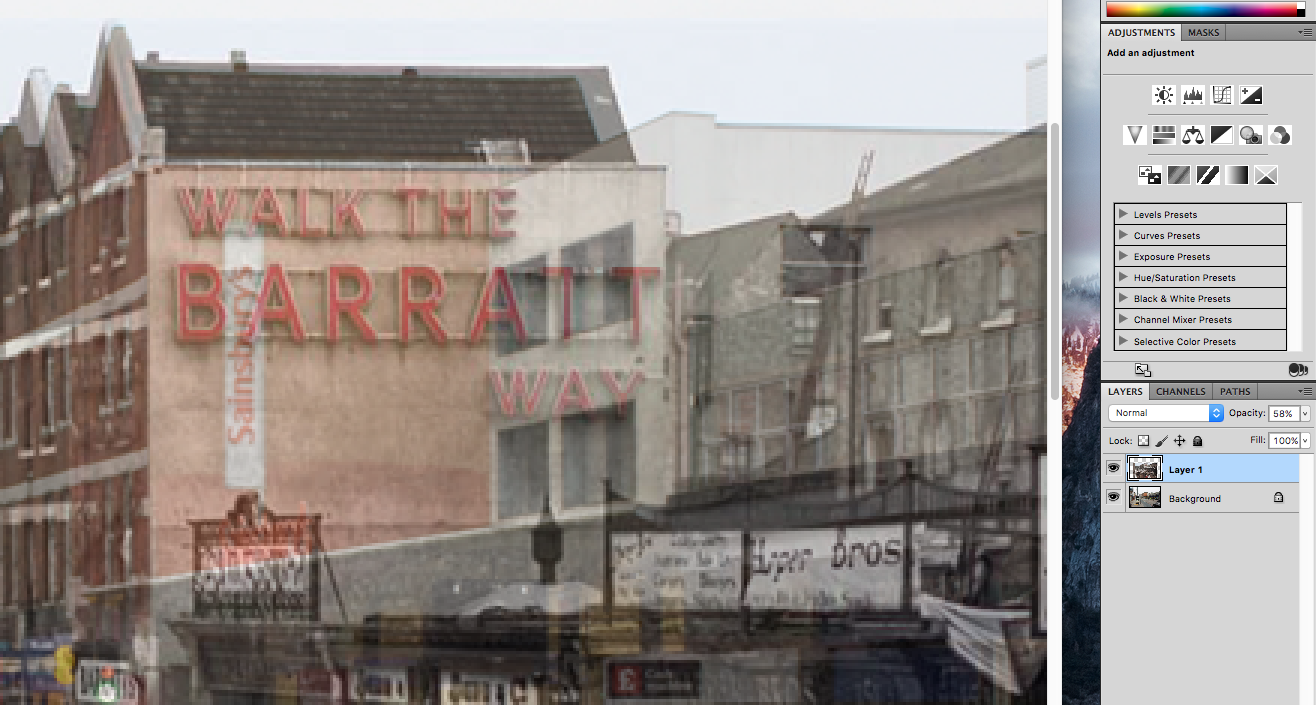
In response, I travelled to Balham to photograph the same location. One issue i encountered when attempting to recreate the Bus photo was that it was taken from one story up. Therefore preventing me from matching up the photos in the same manner. However, it was easy to identify where the 'Walk The Barratt Way' building stood and it provided a clear indication of what to photograph. Recreating the photo of the underground explosion was also difficult as my camera lacked the wide lens to capture as wide of an image as the old one.
|

|
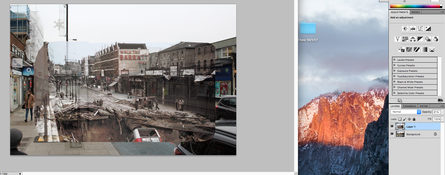
The Bus at Balham Station
|
My first step to creating the image was to make sure that the old and new image were the same size. My image, as shown to the right, was far larger than the original from the war.
I scaled my image down to 25% of its original size to counteract this. The results were near perfect as the Baratt Way Building now almost perfectly lined up with my image from today. I then changed my opacity level to 56% to line up the buildings and to allow me to identify what parts of the original image should be kept. After this, I rounded off the corners to give more of a natural feel to the image, rather than just an image that had been copied and pasted straight on to another. |
|
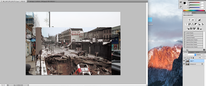
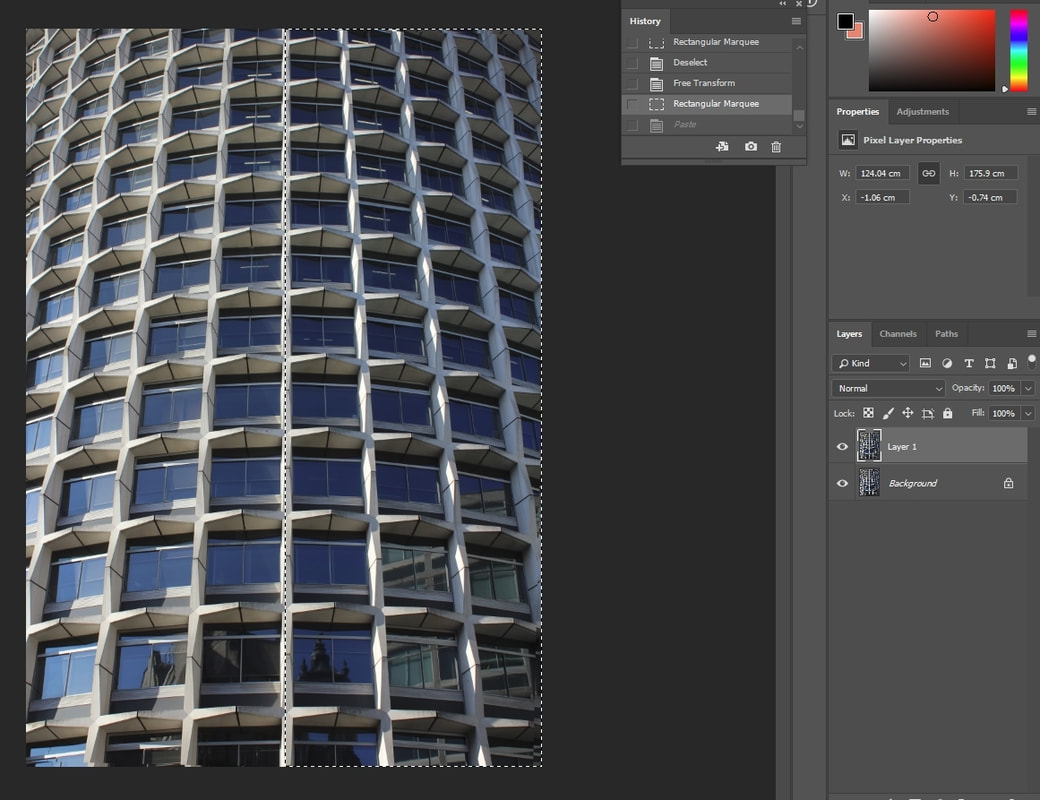
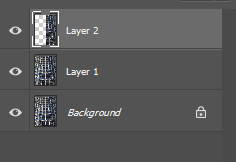
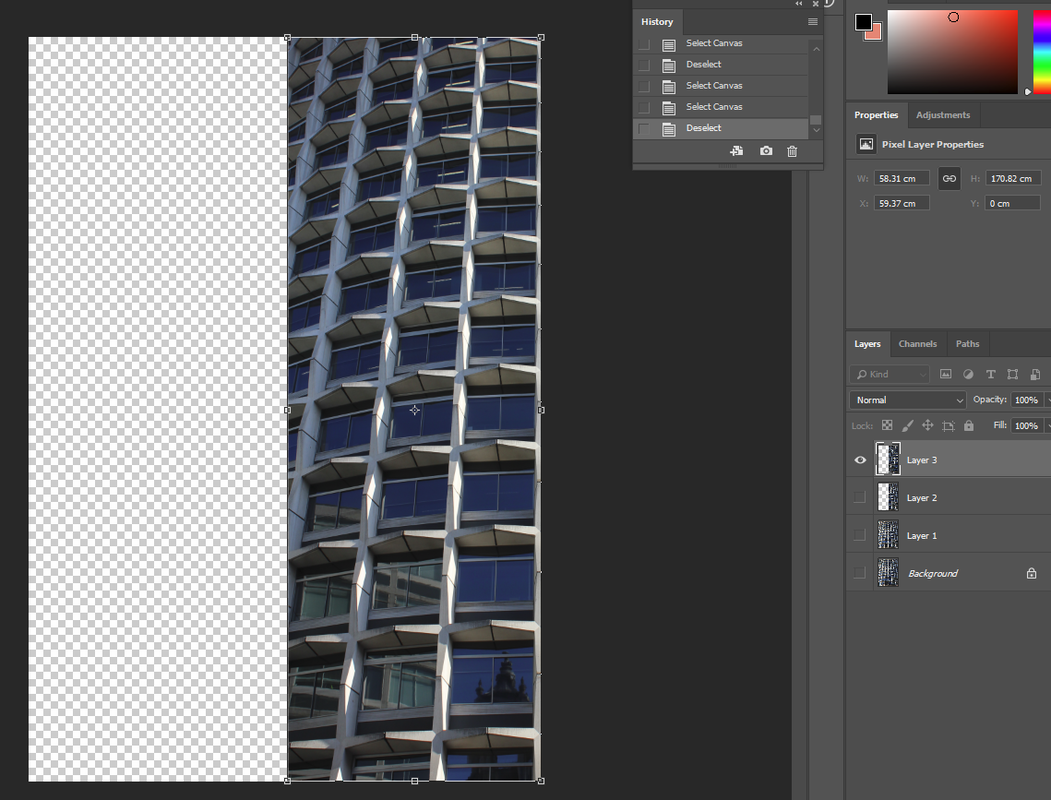
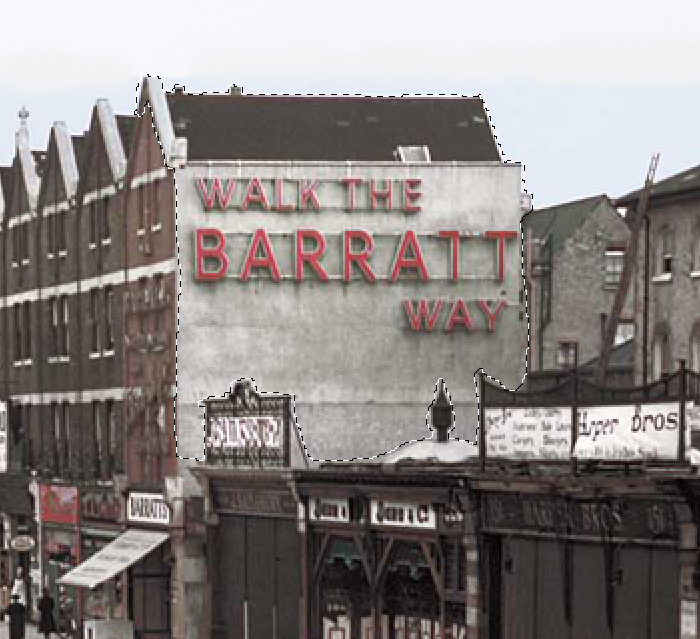
Separating the images by layers
After continuing and evaluating my work for some time, I decided that it was a better idea to match up what fitted to the image separately and discard the rest. My first step toward doing this as shown below, was to use the lasso tool to select the Walk The Barratt Way building. After doing this I copied it and pasted it onto a new Layer on photoshop, AKA Layer 3. The initial problem was obvious, I had used too much of the old image compared to the modern one. Instead of using a rough rubber to erase away at the Barratt building, I opted to use the rectangular selected to do so. I may return to the Barratt building at a later date to add finishing touches to the bottom part of the building as it may look significantly nicer.
|
|
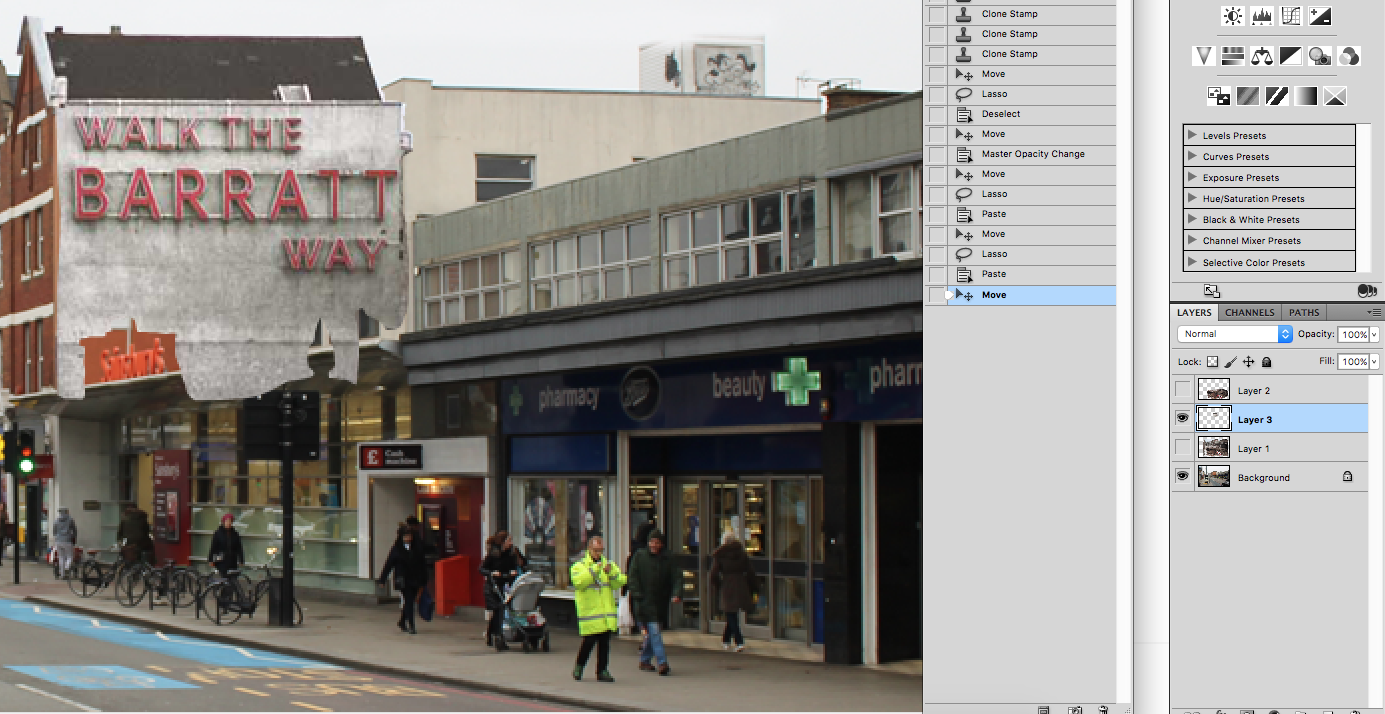
The Bus
After finishing the Barratt building, the most important part of the photo required my attention. I decided the best way to approach superimposing the bus and road damage was to use the lasso tool once again. This time I highlighted ever part of the image in which the road is visible. I had to hide the layer that contained the image of the Bus while doing this in order to see and select the road. I had to make sure the bus was aligned in an appropriate way so that the image would look plausible.
|
|
After implementing the Bus falling into the ground properly (shown below), I noticed a few issues with the image that needed addressing. The main ones being that the pavement on the right was at a different level as it went. The other being the sign that went underneath the superimposed image of the bus and damage around it. To fix these issues, I first erased the bus damage area around where there was too much of it. I then used the 'clone stamp' tool to duplicate the tiles and get rid of the lower part of the signs pole. This took some time as I had to switch from the background layer to Layer 5 then again to select a different target area for the clone stamp tool.

|
|
I then noticed that the 3 men who stood atop the rubble on the road, heads had been cut off. This required immediate action. I used the lasso tool once again to highlight the men in the original image from the war. I copied and pasted them onto a new layer 'Layer 6'. However after pasting them on, it was clear that there was too many extra pixels from the original image and it made the men appear out of place. I set my eraser tool down to 1 and 2 pixels (depending on what i was doing and when) and got to work erasing as many pixels as i could to ensure maximum realism when looking upon the image. The result may have been small compared to image as a whole, but i certainly think it reinforces the image and how it is viewed.
Final touches
|
At this stage i thought the image done. As always I noticed one more small thing: the child at the bottom left. Unlike the previous issues, this was small and quick to fix and i did so through the use of the great 'crop' tool. Again after this i found at the bottom of the image, the old image was overlapping the car too much. I again fixed this by erasing some of the old image with a fine eraser. As well as the car, i noticed that my clone stamping out the pole looked slightly off. I started off by copy and pasting a tile from further down in order to rectify this. This kind of manoeuvre usually and will end up with me making the problem worse and worse so i decided to leave it as it is and it is not the subject of the photo and only if the photo is intensely scrutinised would be noticed
|
|
Below, sits my final image showing off the disaster at Balham station. It is, without doubt, the most ambitious and successful piece of photography work I have produced.